Peanut Butter Cup Pie Recipe | Decadent Dessert
Okay, here’s the generated recipe article in Gutenberg-compatible HTML, styled for spicemingle.com, including a dynamic Table of Contents.
“`html
Table of Contents
Peanut Butter Cup Pie Recipe | Decadent Dessert
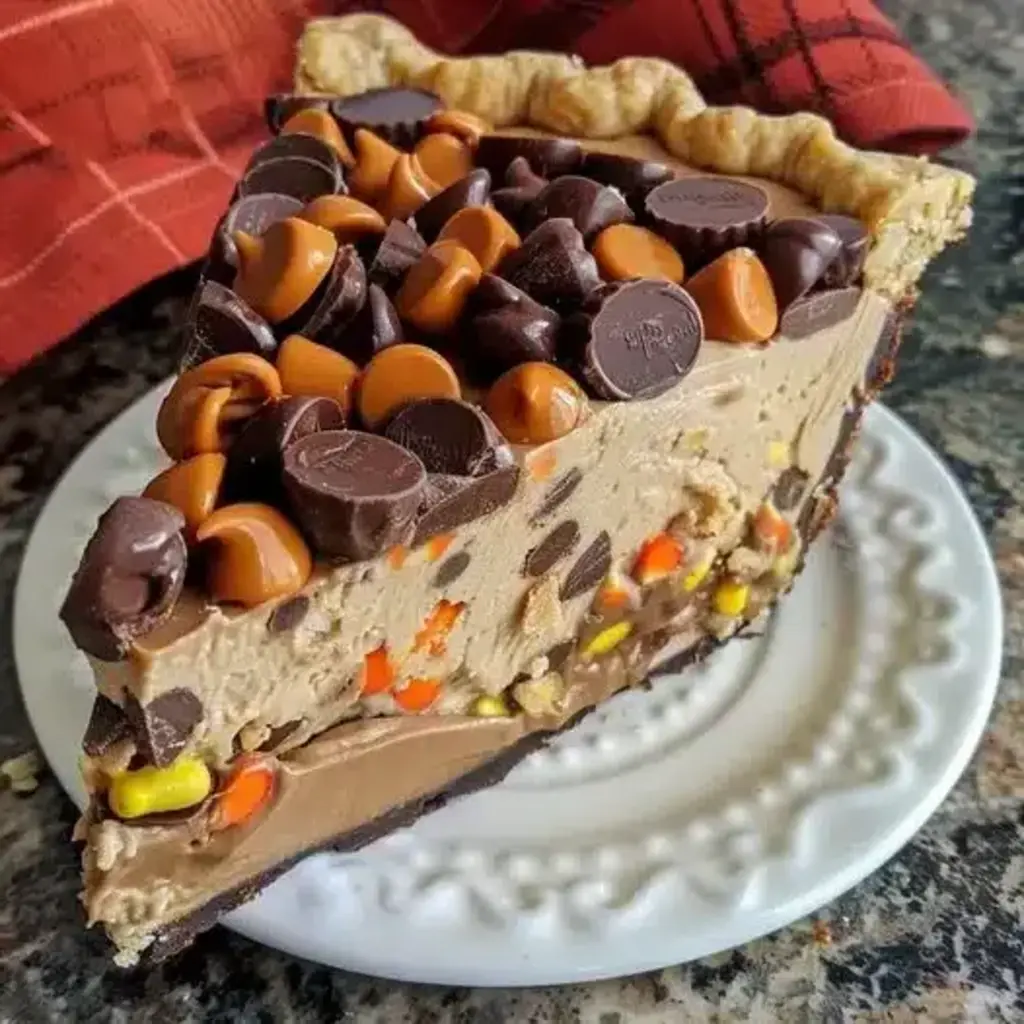
Indulge in the Ultimate Decadence: Your Perfect Peanut Butter Cup Pie Awaits!
Do you find yourself craving that perfect blend of rich, creamy chocolate and smooth, salty peanut butter? If the mere thought of combining these two iconic flavors sends shivers of delight down your spine, then you’re not alone! Statistics show that ‘chocolate’ and ‘peanut butter’ are among the most searched dessert ingredients globally, underscoring their universal appeal. In today’s culinary exploration, we spotlight the Peanut Butter Cup Pie, a dessert that combines decadence with pure, unadulterated simplicity. This recipe promises a delightful balance of rich chocolate and creamy peanut butter, a duo beloved in many desserts. The process is surprisingly straightforward, requiring minimal baking and using readily available ingredients, making it an excellent choice for both novice and experienced bakers. The Peanut Butter Cup Pie not only delivers on taste but also provides a beautiful presentation that is sure to impress at any gathering. Get ready to discover your new go-to dessert!
The Irresistible Ingredients for Your Peanut Butter Cup Pie
The magic of this Peanut Butter Cup Pie lies in its simple yet powerful combination of ingredients. We’ve aimed for a balance that brings out the best in both chocolate and peanut butter, creating a truly irresistible dessert. Here’s what you’ll need:
- For the Crust:
- 2 cups chocolate cookie crumbs (like Oreos, without the cream filling), finely crushed. These provide a deep, chocolatey foundation.
- 6 tablespoons unsalted butter, melted. This binds the crumbs together, creating a sturdy yet tender crust. Substitution: You can use graham cracker crumbs for a lighter base, or even shortbread crumbs for a buttery twist. Ensure your butter is fully melted and cooled slightly.
- 2 tablespoons granulated sugar (optional). Adds a touch of sweetness and helps with browning, though often unnecessary with sweet cookie crumbs.
- For the Peanut Butter Filling:
- 8 ounces cream cheese, softened to room temperature. The creamy, tangy base that holds everything together. Make sure it’s truly soft for a smooth filling!
- 1 cup creamy peanut butter (your favorite brand!). The star of the show. Use a good quality, smooth peanut butter for the best texture. Substitution: Natural peanut butter can work, but may require more stirring to incorporate evenly, and can sometimes separate. A standard commercial creamy peanut butter is ideal for consistency.
- 1/2 cup powdered sugar, sifted. Sweetens the filling without adding graininess. Sifting is key for a luxuriously smooth texture.
- 1 teaspoon vanilla extract. Enhances the other flavors and adds a hint of warmth.
- 1/2 cup heavy whipping cream, cold. Whipped to stiff peaks, this adds lightness and an air of elegance to the filling.
- For the Chocolate Ganache Topping:
- 6 ounces semi-sweet chocolate, finely chopped. The rich, decadent crowning glory. Quality matters here!
- 1/2 cup heavy whipping cream. Creates a luscious, glossy ganache when combined with chocolate.
- Optional Garnishes:
- Chopped peanut butter cups
- Peanut butter drizzle
- Chocolate shavings
Timing is Everything: Prep, Cook, and Total Time
Compared to many traditional pies that require baking the crust and sometimes the filling, this Peanut Butter Cup Pie is a dream for time-crunched bakers. The active preparation is minimal, fitting easily into any schedule. The longest part is the chilling process, which is entirely hands-off, allowing the flavors to meld and the pie to set beautifully.
Step-by-Step Instructions: Crafting Your Dream Pie
Let’s dive into the simple steps that will lead you to dessert perfection. Follow along, and you’ll be savoring every bite in no time!
Step 1: Prepare the Crust
First things first, let’s get that delicious crust ready. In a medium bowl, combine the finely crushed chocolate cookie crumbs and the optional granulated sugar. Pour in the melted butter and stir until all the crumbs are evenly moistened. They should resemble wet sand. Now, pour this mixture into a 9-inch pie plate. Using the bottom of a glass or your fingers, press the crumbs firmly and evenly into the bottom and up the sides of the pie plate. For an extra crisp crust, you can bake it at 350°F (175°C) for about 8-10 minutes until just set. If you’re short on time, you can skip the baking and simply chill the crust in the freezer for about 10 minutes while you prepare the filling.
Step 2: Melt the Chocolate for the Ganache
We’ll get the ganache ready so it can cool slightly before we top the pie. Place the finely chopped semi-sweet chocolate in a heatproof bowl. Heat the 1/2 cup of heavy whipping cream in a small saucepan over medium heat until it just begins to simmer around the edges – do not boil. Pour the hot cream over the chopped chocolate. Let it sit for 5 minutes without stirring to allow the heat to melt the chocolate. Then, gently whisk until the ganache is smooth, glossy, and fully combined. Set it aside to cool to room temperature.
Step 3: Whip the Cream and Prepare the Filling Base
In a separate, thoroughly chilled bowl, whip the 1/2 cup of cold heavy whipping cream using an electric mixer until stiff peaks form. Be careful not to over-whip, or you’ll end up with butter. Set this aside. In a large bowl, beat the softened cream cheese with your electric mixer until it’s completely smooth and free of lumps. Then, add the creamy peanut butter and beat until well combined and smooth. Gradually add the sifted powdered sugar and vanilla extract, beating until everything is incorporated and the mixture is creamy. Scrape down the sides of the bowl as needed.
Step 4: Fold in the Whipped Cream
This is where we incorporate air and lightness into our peanut butter filling. Take about a third of the whipped cream and gently fold it into the cream cheese and peanut butter mixture using a spatula. This lightens the base. Then, gently fold in the remaining whipped cream until just combined. Be careful not to overmix, as you want to keep the airy texture. The filling should be light, fluffy, and incredibly smooth.
Step 5: Assemble and Chill to Perfection
Retrieve your chilled or baked pie crust. Spoon the luscious peanut butter filling evenly into the prepared crust, spreading it smoothly with your spatula. Once the filling is evenly distributed, pour the cooled chocolate ganache over the top. Gently tilt the pie plate or use your spatula to spread the ganache evenly to cover the entire surface. Cover the pie carefully with plastic wrap (try not to let it touch the ganache if possible, or gently lift it off before serving). Refrigerate for at least 4-6 hours, or until the pie is completely set.
Step 6: Decorate and Serve
Once the pie is firm and set, it’s time for the final flourishes! Remove the plastic wrap. You can leave the ganache as is for a sleek finish, or get creative with your garnishes. Drizzle with a little extra melted peanut butter, sprinkle with chopped peanut butter cups, or add some chocolate shavings. Slice the pie using a sharp knife (wiping it clean between slices often helps for cleaner cuts) and serve chilled. Prepare yourself for compliments!
Nutritional Snapshot: What’s Inside Each Delicious Slice?
While this Peanut Butter Cup Pie is a decadent treat, understanding its nutritional profile can help you enjoy it mindfully. A typical serving (1/8th of the pie) contains approximately:
- Calories: 450-550 kcal
- Fat: 30-40g (Saturated Fat: 15-20g)
- Carbohydrates: 40-50g (Sugars: 30-35g)
- Protein: 8-12g
- Sodium: 200-300mg
Note: These are estimates and can vary based on specific ingredient brands and portion sizes.
Healthier Alternatives & Flavor-Preserving Swaps
Looking for ways to make this pie a bit lighter without sacrificing that iconic taste? We’ve got you covered:
- Crust: Swap chocolate cookie crumbs for a base of finely ground almonds or whole wheat graham crackers. You might need slightly less butter to bind them. A no-bake crust made from oats and dates can also work as a whole-food option.
- Peanut Butter: Opt for natural peanut butter with no added sugar. Be prepared for a slightly different texture that might require a bit more whisking to emulsify.
- Sweeteners: Reduce the amount of powdered sugar in the filling, or try using a sugar substitute that bakes well if you’re concerned about sugar intake. A touch of stevia or erythritol can work, but test sweetness levels carefully.
- Chocolate Ganache: Use dark chocolate (70% cacao or higher) for the ganache. It has less sugar and more antioxidants. You can also use a sugar-free chocolate if preferred.
- Toppings: Instead of candy, top with fresh berries (like raspberries or strawberries) for a burst of freshness, or a sprinkle of chopped unsalted nuts.
Serving Suggestions: Elevate Your Slice
This Peanut Butter Cup Pie is a showstopper on its own, but a few thoughtful additions can make it even more special:
- A Dollop of Cream: A generous spoonful of freshly whipped cream or a swirl of stabilized whipped cream adds a cloud-like texture and a touch of elegance.
- Fresh Berries: Raspberries or strawberries provide a beautiful color contrast and a tangy counterpoint to the rich sweetness.
- Coffee or Milk: Serve with a steaming mug of coffee or a cold glass of milk – classic pairings that perfectly complement the chocolate and peanut butter flavors.
- Ice Cream: A small scoop of vanilla bean or chocolate ice cream alongside a slice of pie is the ultimate indulgence.
Common Mistakes to Avoid
To ensure your Peanut Butter Cup Pie turns out perfectly every time, be mindful of these common pitfalls:
- Not Softening Cream Cheese Properly: Lumpy cream cheese makes for a less-than-smooth filling. Ensure it’s at true room temperature (you can gently press it with your finger – it should yield easily).
- Over-Whipping Cream: Over-whipped cream turns grainy and can eventually become butter. Watch it closely and stop as soon as stiff peaks form.
- Using the Wrong Peanut Butter: Natural peanut butter can sometimes separate or be too oily, affecting the texture of the filling. Standard creamy peanut butter generally yields the most consistent results.
- Not Chilling Long Enough: Patience is key! Cutting into the pie before it’s fully set will lead to a messy, runny dessert. Allow adequate chilling time for the best texture.
- Ganache Too Hot or Too Cold: Pouring hot ganache can melt the filling. Pouring cold ganache can make it too thick to spread. Ensure it’s cooled to room temperature for a smooth, beautiful finish.
Storing Your Perfect Pie
Proper storage ensures your Peanut Butter Cup Pie stays delicious for days. Because of the cream cheese and whipped cream filling, this pie must be stored refrigerated.
- Refrigeration: Once cooled, cover the pie loosely with plastic wrap or foil, or use an airtight pie carrier. It will keep well in the refrigerator for up to 3-4 days.
- Freezing: While possible, freezing is not ideal as the texture of the filling might change slightly upon thawing. If you must freeze, wrap the entire pie tightly in several layers of plastic wrap and then a layer of aluminum foil. Freeze for up to 1-2 months. Thaw overnight in the refrigerator before serving. Garnish may need to be reapplied after thawing.
Conclusion: Your Sweetest Dream Realized
The Peanut Butter Cup Pie is more than just a dessert; it’s an experience. It’s a celebration of two beloved flavors coming together in perfect harmony, enhanced by a simple, elegant presentation. Whether you’re an experienced baker or trying your hand at a no-bake treat for the first time, this recipe is designed for success and maximum enjoyment. Its rich, creamy texture and satisfyingly sweet, salty profile are sure to win over everyone at your table. So, gather your ingredients, follow these straightforward steps, and prepare to be amazed by the decadent simplicity of this incredible pie. What are you waiting for? Dive in and create your own slice of chocolate-peanut butter heaven!
Frequently Asked Questions
What kind of peanut butter is best for this pie?
For the smoothest, most stable filling, a standard creamy peanut butter (like Jif or Skippy) is highly recommended. Natural peanut butter can sometimes separate or be too oily, impacting the texture. If using natural, ensure it’s well-stirred and emulsified.
Can I use a different type of crust?
Absolutely! A graham cracker crust or even a shortbread cookie crust would work well. You can also experiment with a nut-based crust like almond flour or crushed pecans. Just ensure you use enough melted butter to bind the crumbs together.
Why is my pie not setting?
The most common reasons are not chilling the pie long enough, or not using full-fat cream cheese and heavy whipping cream. Ensure your cream cheese is fully softened and that your heavy cream is cold when whipping. Proper chilling for at least 4-6 hours is crucial for the pie to set properly.
Can I make this pie ahead of time?
Yes, this pie is an excellent make-ahead dessert! It actually benefits from chilling, as the flavors meld together. You can prepare it up to 2 days in advance and store it in the refrigerator. Decorate just before serving for the freshest look.
How do I get clean slices?
To get clean slices, use a large, sharp knife. Dip the knife in hot water and wipe it dry between each cut. This helps the knife glide through the creamy filling and ganache more smoothly.
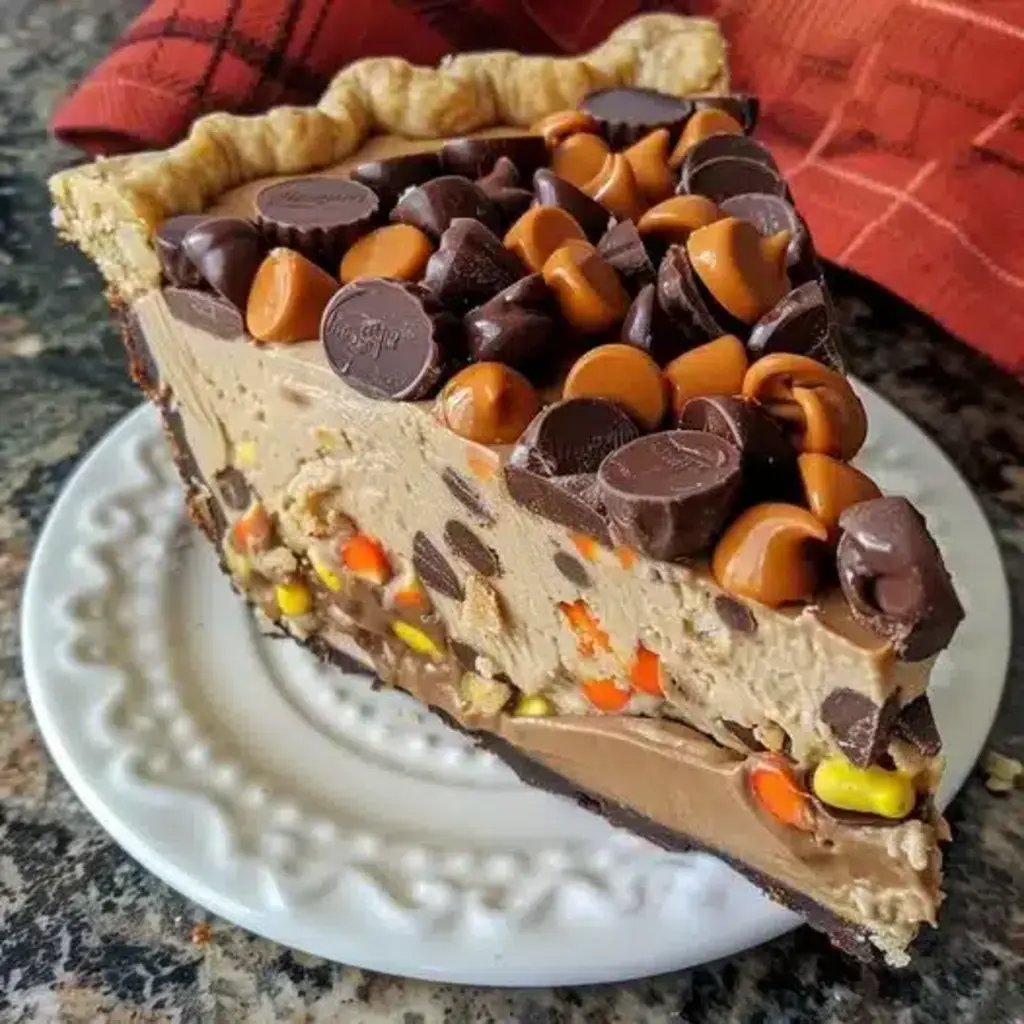
Peanut Butter Cup Pie Recipe | Decadent Dessert

DescriptionIn today’s culinary exploration, we spotlight thePeanut Butter Cup Pie, a dessert that combines decadence with simplicity. This recipe promises a delightful balance of rich chocolate and creamy peanut butter, a duo beloved in many desserts. The process is straightforward, requiring minimal baking and using readily available ingredients, making it an excellent choice for both novice and experienced bakers. ThePeanut Butter Cup Pienot only delivers on taste but also provides a beautiful presentation that is sure to impress at any gathering.
Ingredients
- 1premade pie crust
- 2 cupsmilk chocolate chips
- 2 tablespoonsvegetable shortening
- 2 cupscreamy peanut butter
- 1 cupconfectioners’ sugar
- 1/2 cupcrushed peanuts
- 1 teaspoonvanilla extract
- 1 cupheavy cream, whipped
- Mini peanut butter cups and caramel drizzle for garnish
Instructions
- Begin by melting 1 cup of chocolate chips with 1 tablespoon of shortening in the microwave. Ensure to stir every 30 seconds until the mixture is smooth. Spread this evenly into the bottom of the pie crust and place it in the refrigerator to chill until set.
- In a mixing bowl, blend the peanut butter, confectioners’ sugar, crushed peanuts, and vanilla extract until the mixture is well combined. Carefully fold in the whipped cream to this mixture.
- Pour the peanut butter mixture over the set chocolate layer in the crust, using a spatula to smooth the top.
- Melt the remaining chocolate chips and shortening, then drizzle this over the peanut butter layer. Embellish with mini peanut butter cups and a caramel drizzle for that extra touch of elegance.
- Refrigerate the pie for at least 2 hours before serving to ensure it sets perfectly.
Notes
For aless sweetoption, consider using semi-sweet or dark chocolate chips.
Garnishing withunsaltedpeanuts can balance the sweetness while adding texture.
Serve this pie as a special treat at gatherings or as a luxurious weekend dessert. It pairs beautifully with a simple cup of coffee or a glass of cold milk.
“`