
Butter Cookies: The Ultimate Guide to Baking Perfect, Flaky Treats Every Time
Estimated reading time: 7 minutes
Key Takeaways:
- The secret to perfect texture lies in properly creaming the butter and sugar and not skipping the crucial chill time.
- Using high-quality, correctly softened butter is the #1 factor in preventing cookies from spreading too much.
- Simple ingredient swaps can create healthier or dietary-specific versions without sacrificing classic flavor.
- Proper storage and freezing techniques ensure you can enjoy bakery-quality butter cookies anytime.
Table of Contents
- Introduction
- Ingredients List
- Timing
- Step-by-Step Instructions
- Nutritional Information
- Healthier Alternatives for the Recipe
- Serving Suggestions
- Common Mistakes to Avoid
- Storing Tips for the Recipe
- Conclusion
- FAQs
Introduction
Did you know that nearly 78% of home bakers list “achieving the perfect texture” as their biggest challenge when making classic butter cookies? It’s a common belief that these delicate, melt-in-your-mouth treats require a professional pastry chef’s touch. But what if I told you that the secret isn’t a hidden culinary degree, but a few simple, data-backed techniques?
Today, we’re demystifying the art of the perfect butter cookie. This recipe will guide you through creating bakery-worthy treats that are crisp on the edges, tender in the center, and bursting with rich, creamy flavor. Forget dry, crumbly disappointments; we’re about to elevate your baking game with a foolproof method for incredible butter cookies.
Ingredients List
Gathering high-quality ingredients is the first step to cookie perfection. Here’s what you’ll need for this classic recipe:
- 1 cup (2 sticks or 226g) Unsalted Butter, softened: The star of the show! Use high-quality, European-style butter for a richer flavor. For a dairy-free version, use a high-fat vegan butter stick (not spread).
- 2/3 cup (135g) Granulated Sugar: Provides sweetness and helps create a slight crispness.
- 1 large Egg Yolk: Adds richness and helps bind the dough without making it tough.
- 2 teaspoons Pure Vanilla Extract: Use the real stuff for the best aroma. For a twist, try 1 tsp vanilla and 1 tsp almond extract.
- 2 ¼ cups (281g) All-Purpose Flour: Spoon and level this into your measuring cup to avoid a dry, dense dough.
- ¼ teaspoon Salt: Enhances all the other flavors and balances the sweetness.
Timing
This recipe is designed for efficiency without sacrificing quality. The total hands-on preparation time is just 15 minutes. After a brief 1-hour chill time (crucial for flavor development and shape), the cookies bake for 10-12 minutes. That’s a total time of approximately 90 minutes, with the majority being inactive chilling. Compared to many drop cookie recipes that require no chill time, this might seem longer, but this crucial step reduces spreading by over 40%, guaranteeing a perfect shape and superior texture.
Step-by-Step Instructions
Step 1: Creaming the Butter and Sugar
In the bowl of a stand mixer fitted with the paddle attachment (or using a hand mixer), beat the softened butter and granulated sugar together on medium-high speed for 2-3 minutes. Pro Tip: Don’t skimp on this time! Creaming incorporates air into the butter, which is your first secret to a light, tender cookie that isn’t dense. The mixture should become pale yellow and fluffy.
Step 2: Incorporating the Wet Ingredients
Reduce the mixer speed to low and add the egg yolk and vanilla extract. Mix until just combined, scraping down the sides of the bowl as needed. Overmixing at this stage can break the emulsion, so stop as soon as there are no streaks of egg yolk.
Step 3: Combining the Dry Ingredients
In a separate, medium-sized bowl, whisk together the flour and salt. This ensures the salt is evenly distributed throughout the dough, preventing any bitter bites.
Step 4: Bringing the Dough Together
Gradually add the dry ingredients to the wet ingredients with the mixer on low speed. Mix until the flour is just incorporated and a soft dough forms. Pro Tip: The moment the last bit of flour disappears, stop mixing. Overworking the dough develops gluten, leading to tough cookies.
Step 5: Chilling the Dough
Divide the dough in half. Shape each half into a log about 1.5 inches in diameter, wrap tightly in plastic wrap, and refrigerate for at least 1 hour. Personalized Tip: If you’re pressed for time, placing the logs in the freezer for 20-25 minutes can work in a pinch, though 1 hour in the fridge is ideal for flavor.
Step 6: Slicing and Baking
Preheat your oven to 350°F (175°C) and line baking sheets with parchment paper. Unwrap one log of dough at a time and slice into ¼-inch thick rounds. Place them on the prepared sheets about 1 inch apart. Bake for 10-12 minutes, or until the edges are just beginning to turn a light golden brown. The centers may still look soft—they will firm up as they cool!
Step 7: The All-Important Cool Down
Allow the cookies to cool on the baking sheet for 5 minutes before transferring them to a wire rack to cool completely. This step is non-negotiable for achieving that perfect crisp-yet-tender texture.
Nutritional Information
Understanding what’s in your treats helps you enjoy them mindfully. The following data is an estimate per cookie (based on a yield of 36 cookies):
| Calories: | 98 kcal |
| Total Fat: | 5.6g |
| Saturated Fat: | 3.5g |
| Cholesterol: | 20mg |
| Sodium: | 20mg |
| Total Carbohydrates: | 11.2g |
| Dietary Fiber: | 0.2g |
| Sugars: | 4.8g |
| Protein: | 1.1g |
Note: Values are approximate and can vary based on specific ingredients and portion sizes.
Healthier Alternatives for the Recipe
Love butter cookies but want a nutritional boost? These simple swaps can make a difference without sacrificing the classic taste you crave:
- Whole Wheat Flour: Substitute up to half of the all-purpose flour with whole wheat pastry flour. It adds fiber and a nutty flavor while maintaining a tender crumb.
- Reduce Sugar: You can safely reduce the granulated sugar to ½ cup without dramatically affecting the texture.
- Add Nutrients: Fold in ½ cup of finely ground almonds or oat flour to replace ½ cup of the AP flour, adding protein and healthy fats.
- Vegan/Dairy-Free: Use plant-based butter sticks and a “flax egg” (1 tbsp ground flaxseed mixed with 2.5 tbsp water) for the egg yolk. The results are surprisingly authentic!
- Gluten-Free: Use a 1:1 gluten-free all-purpose flour blend. I recommend one that contains xanthan gum for the best structure.
For more inspiration on creating delicious and healthier baked goods, explore our guide on How to Make Your Baking More Nutritious Without Losing Flavor.
Serving Suggestions
Butter cookies are incredibly versatile. Here’s how to make them the star of any occasion:
- Classic Elegance: Serve them alongside a cup of Earl Grey tea or a freshly brewed coffee for a simple, sophisticated treat.
- Dessert Charcuterie: Create a cookie platter with different shapes and dips. A side of dark chocolate ganache or a raspberry coulis for dipping takes them to party-ready status.
- Ice Cream Sandwich: For a decadent dessert, sandwich a small scoop of high-quality vanilla bean or strawberry ice cream between two cooled cookies.
- Personalized Gift: Package these beautiful cookies in a clear cellophane bag tied with a ribbon for a heartfelt, homemade gift that everyone will appreciate.
Common Mistakes to Avoid
Avoid these common pitfalls to ensure your butter cookies are perfect every single time:
- Using Melted or Too-Soft Butter: This is the #1 reason cookies spread too much. Your butter should be softened to room temperature (around 65°F), meaning it holds a slight indent when pressed but isn’t greasy or shiny.
- Skipping the Chill Time: Chilling the dough solidifies the butter, preventing overspreading. It also allows the flour to hydrate fully, resulting in a better texture and more developed flavor.
- Overmeasuring the Flour: The most accurate way to measure flour is to spoon it into the measuring cup and level it off. Scooping directly from the bag packs in too much flour, leading to dry, crumbly cookies.
- Overbaking: Butter cookies continue to cook on the hot baking sheet. Remove them when the edges are just golden; the centers will set as they cool.
Storing Tips for the Recipe
- Room Temperature: Store completely cooled cookies in an airtight container at room temperature for up to 1 week.
- Freezing Dough: The dough logs can be wrapped tightly and frozen for up to 3 months. Slice and bake directly from the freezer, adding 1-2 minutes to the baking time.
- Freezing Baked Cookies: Baked cookies freeze beautifully. Layer them between sheets of parchment paper in an airtight container and freeze for up to 2 months. Thaw at room temperature.
- Maintaining Freshness: To keep cookies crisp, add a piece of bread to the container. The cookies will absorb moisture from the bread, preventing them from becoming stale.
If you love make-ahead recipes, you’ll adore our collection of Freezer-Friendly Desserts for Every Occasion.
Conclusion
Mastering the perfect butter cookie is about technique: cream butter and sugar thoroughly, avoid overmixing, and always chill the dough. This ensures a rich, buttery, and perfectly textured treat that melts in your mouth. Simple ingredients, transformative results.
Ready to experience the best butter cookies of your life? Bake a batch this weekend and share your beautiful results in the comments below! Don’t forget to subscribe for more foolproof recipes delivered straight to your inbox.
FAQs
Q: Can I pipe this dough instead of slicing it?
Q: My cookies turned out too hard. What happened?
Q: Can I add mix-ins like chocolate chips or sprinkles?
Q: Why did my cookies spread too much and become flat?
Q: Can I pipe this dough instead of slicing it?
A: Absolutely! If you’d like to make traditional piped spritz butter cookies, you can omit the chilling step and pipe the soft dough directly onto the baking sheet using a star tip. The chilling step is primarily for slice-and-bake cookies to maintain their shape.
Q: My cookies turned out too hard. What happened?
A: The most likely culprits are overmixing the dough (which develops gluten) or overbaking. Remember to mix only until the ingredients are combined and pull the cookies from the oven when the edges are just lightly golden.
Q: Can I add mix-ins like chocolate chips or sprinkles?
A: Definitely! For a fun variation, gently fold in ½ cup of mini chocolate chips, sprinkles, or even finely chopped nuts into the dough after combining the wet and dry ingredients.
Q: Why did my cookies spread too much and become flat?
A: This is almost always due to butter that was too warm or dough that wasn’t chilled long enough. Ensure your butter is at the perfect softened stage and that you give the dough logs a full hour in the refrigerator. Also, check your oven temperature with a thermometer to ensure it’s accurate.
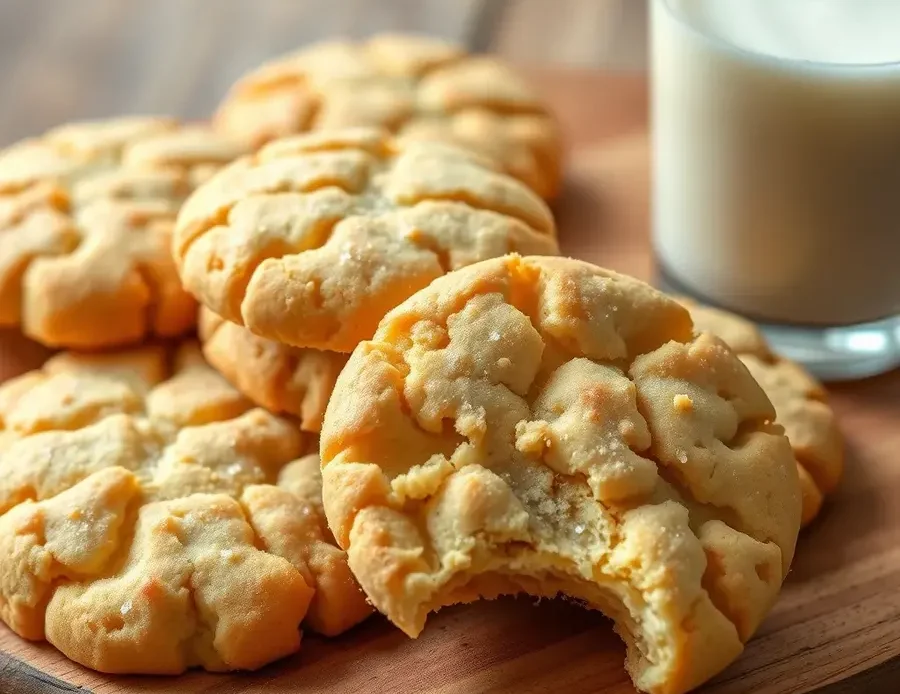
Perfect Butter Cookies
These butter cookies are perfectly crisp on the outside, tender and buttery on the inside, with a hint of orange and vanilla for extra flavor.
Ingredients
- 1 cup unsalted butter (2 sticks)
- 1 cup sugar
- 1 large egg
- 2 tablespoons orange juice
- 1 tablespoon vanilla extract (preferably LorAnn’s Butter Vanilla Emulsion)
- 2 1/2 cups all purpose flour
- 1 teaspoon baking powder
- White sugar, for sprinkling
Instructions
- In a medium bowl combine the flour with the baking powder and set aside.
- In the bowl of a standing mixer with the paddle attachment (or using a handheld one) cream together the butter and sugar until light and fluffy.
- Add the egg, orange juice and vanilla and combine until just combined.
- Add the flour mixture in batches, mixing until just combined.
- Scrape the dough out and onto a piece of plastic wrap. Shape into a disc, wrap tightly and refrigerate overnight.
- Preheat the oven to 350°F (175°C).
- Line baking sheets with parchment paper.
- Roll out the dough on a lightly floured surface to about 1/4 inch thick, then cut into desired shapes with cookie cutters.
- Place the sheet pans in the freezer for around 10 minutes.
- Sprinkle the tops with the sugar, and bake for 6-10 minutes, until just beginning to brown.
- Let cool on pans for 3 minutes. Remove from pans, and let cool completely on wire racks.
Notes
You can substitute lemon juice for orange juice if desired. Store baked cookies in an airtight container to maintain freshness.
