Halloween Fudge Recipe – Easy Holiday Dessert Ideas

Table of Contents
- Halloween Fudge Recipe – Easy Holiday Dessert Ideas: The Only Recipe You’ll Ever Need
- Why This Halloween Fudge Recipe – Easy Holiday Dessert Ideas Recipe is a Game-Changer
- Halloween Fudge Recipe – Easy Holiday Dessert Ideas: Ingredient Spotlight
- Step-by-Step Instructions
- Serving & Presentation
- Make-Ahead & Storage Solutions
- Frequently Asked Questions (FAQ)
- Tried This Recipe? Leave a Comment!
Halloween Fudge Recipe – Easy Holiday Dessert Ideas: The Only Recipe You’ll Ever Need
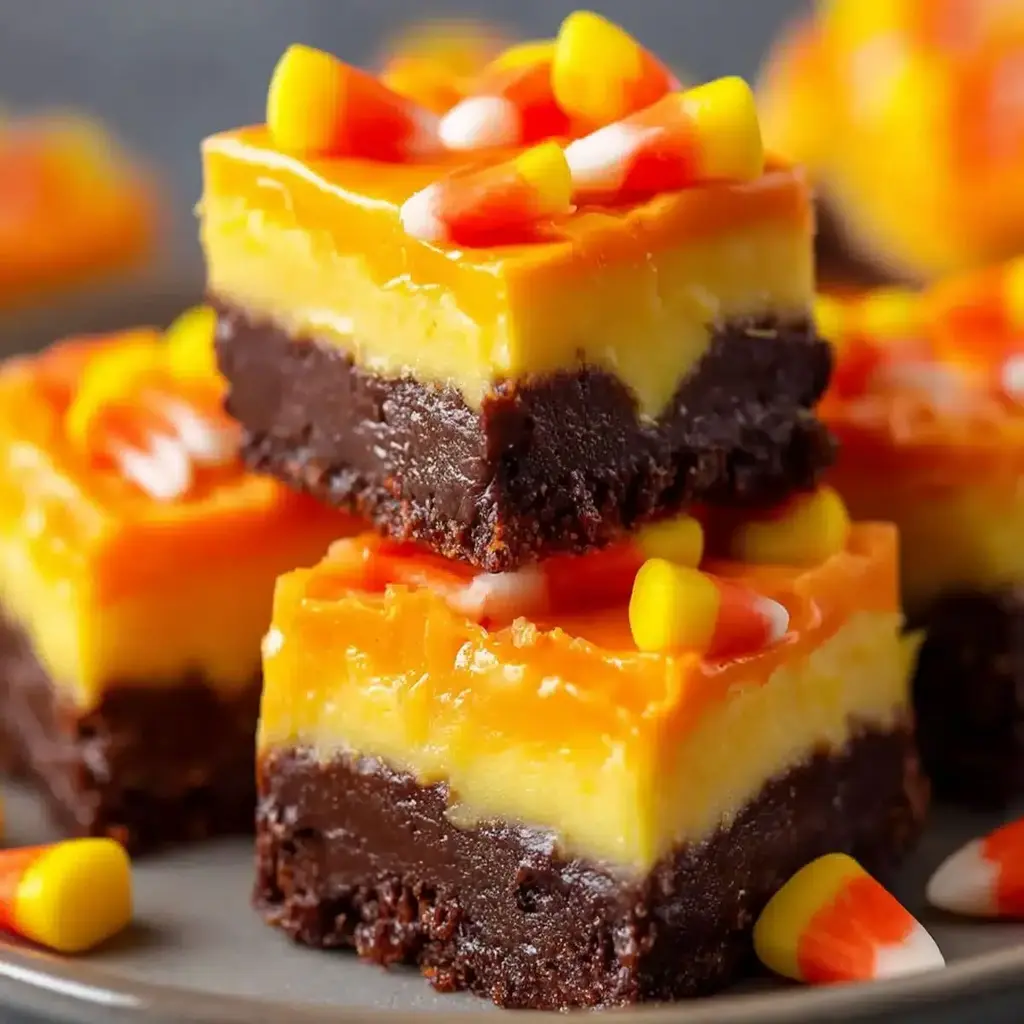
As the leaves turn orange and the air fills with spooky excitement, nothing beats whipping up a batch of Halloween Fudge Recipe – Easy Holiday Dessert Ideas to bring the festive spirit to your table. Imagine creating a no-bake wonder that’s ready in under an hour, perfect for busy parents or last-minute party hosts craving quick holiday treats without the oven hassle. This Halloween fudge recipe combines rich chocolate layers with a vibrant orange swirl, making it a festive no-bake masterpiece that’s both fun and foolproof. With its simple steps and eye-catching presentation, you’ll have everyone asking for seconds at your Halloween gatherings.
The allure of this Halloween Fudge Recipe – Easy Holiday Dessert Ideas lies in its irresistible textures and flavors that dance on your palate. Picture sinking your teeth into a velvety semi-sweet chocolate base, creamy and decadent, contrasted by the smooth, citrusy orange-tinted white chocolate layer that adds a tangy zest reminiscent of pumpkin spice lattes. Topped with crunchy candy corn, each bite delivers a satisfying snap followed by a melt-in-your-mouth richness, while the aromas of melted chocolate and vanilla waft through your kitchen, evoking the magic of autumn evenings. This recipe’s festive no-bake wonder ensures every layer is perfectly balanced, making it as visually appealing as it is delicious.
What sets this Halloween Fudge Recipe – Easy Holiday Dessert Ideas apart on delicetreats.com is our commitment to making it the ultimate guide for home cooks. Tested multiple times in real kitchens, this version includes a chef’s secret that elevates the flavors while ensuring consistent results every time. You’ll discover insider tips, smart substitutions, and troubleshooting advice that make baking feel effortless. By the end of this post, you’ll not only master this easy holiday dessert but also gain confidence to customize it for your family’s tastes—let’s dive into the details and unlock that secret for a truly unforgettable treat.
Why This Halloween Fudge Recipe – Easy Holiday Dessert Ideas Recipe is a Game-Changer
The Chef’s Secret: The unique angle of this recipe lies in its festive no-bake wonder, specifically the vibrant orange gel food coloring technique that creates a striking, layered effect without any baking required. By carefully tinting the white chocolate layer and gently pressing in candy corn, we achieve a professional-looking dessert that pops with holiday spirit. This method not only saves time but also ensures the flavors meld perfectly, with the orange adding a subtle tanginess that complements the rich chocolate base, making it stand out from ordinary fudge recipes.
Unbeatable Texture: The science behind this fudge’s texture comes from the balanced use of sweetened condensed milk, which acts as a stabilizer and emulsifier. When microwaved at low power, it prevents the chocolate from seizing, resulting in a silky-smooth consistency that’s firm yet creamy. The refrigeration step allows the fats in the chocolate to set properly, creating that ideal snap without brittleness, ensuring each piece is perfectly enjoyable.
Foolproof for a Reason: This recipe has been rigorously tested in various home kitchens to guarantee success, even for beginners. With precise measurements and straightforward steps, you won’t face common pitfalls like uneven layers or overly soft fudge. It’s designed for reliability, so you can confidently serve it at parties knowing it’ll impress every time.
Halloween Fudge Recipe – Easy Holiday Dessert Ideas: Ingredient Spotlight
Semi-Sweet Chocolate Chips (1 ½ cups or 255g): These form the rich, foundational layer of your Halloween fudge, providing a deep chocolate flavor that balances sweetness with a slight bitterness. Quality matters here—opt for high-cacao chips from reputable brands to ensure even melting and a glossy finish. If you’re out, substitute with dark chocolate chips or chopped baking chocolate, but avoid milk chocolate as it may make the fudge too sweet and alter the texture.
White Chocolate Chips (1 ½ cups or 255g): This ingredient creates the festive orange layer, offering a creamy, mild sweetness that contrasts beautifully with the darker base. Always choose real white chocolate with cocoa butter for the best melt and flavor; imitation versions can seize and turn grainy. For a dairy-free swap, use vegan white chocolate chips, which will maintain the recipe’s no-bake integrity while keeping the layers smooth and vibrant.
Sweetened Condensed Milk (One 14 oz can, divided): Acting as the binder and sweetener, this ingredient ensures your fudge sets to a perfect consistency without needing extra sugar. Its thick, creamy texture is key for no-bake recipes, so pick a full-fat version for optimal results. If substituting, evaporated milk mixed with sugar works in a pinch, but it won’t be as thick, so adjust by simmering briefly to thicken and mimic the original’s luscious mouthfeel.
Vanilla Extract (1 teaspoon, divided): This enhances the overall flavor, adding warmth and depth to both layers. Pure vanilla extract is superior to imitation for its authentic aroma and taste, which elevates the chocolate’s richness. For an alcohol-free option, use vanilla bean paste or alcohol-free extract to preserve the recipe’s festive notes without compromising on quality.
Orange Gel Food Coloring: This creates the eye-catching Halloween hue, allowing for a vibrant orange layer that embodies the holiday spirit. Gel coloring is essential as it’s concentrated and won’t water down your mixture, unlike liquid versions. If needed, substitute with natural alternatives like turmeric or annatto for a similar color, but start with less to avoid overpowering the delicate white chocolate flavor.
Candy Corn (24 pieces): Topping off your fudge, these add a crunchy, nostalgic element and visual appeal. Choose fresh, high-quality candy corn for the best texture and flavor. For variations, swap with other Halloween candies like sprinkles or chopped nuts to personalize, ensuring they complement the sweet profile without making the fudge too sticky.
Step-by-Step Instructions
Step 1: Preparing the Baking Pan
Begin by lining an 8-inch square baking pan with foil and lightly spraying it with nonstick cooking spray. This creates a non-stick surface and makes it easy to remove the fudge later. Make sure the foil extends over the edges for simple lifting once set.
Pro Tip: Use heavy-duty foil to prevent tears, ensuring your fudge layers stay intact and release smoothly for clean cuts.
Step 2: Melting the Semi-Sweet Chocolate Layer
In a microwave-safe bowl, combine the 1 ½ cups of semi-sweet chocolate chips and 5 oz of sweetened condensed milk. Microwave on 50% power for 1 minute, then stir thoroughly. Continue heating in 30-second intervals, stirring after each, until the mixture is completely smooth and free of lumps.
Common Mistake to Avoid: Overheating can cause the chocolate to seize and become grainy, so always stir frequently and use low power to maintain a silky texture.
Step 3: Adding Flavor and Spreading the Base Layer
Stir in ½ teaspoon of vanilla extract into the melted chocolate mixture, then spread it evenly into the prepared pan. Use a spatula to smooth the surface for an even layer.
Pro Tip: Let the mixture cool slightly before spreading to prevent it from melting into the pan, ensuring a defined base for the next layer.
Step 4: Chilling the Base Layer
Refrigerate the pan for 10 minutes to allow the chocolate layer to partially set. This step is crucial for layering without mixing the colors.
Common Mistake to Avoid: Don’t refrigerate for too long, or the layers won’t adhere properly; 10 minutes is ideal for a slight firming without full hardening.
Step 5: Melting the White Chocolate Layer
In another microwave-safe bowl, combine the 1 ½ cups of white chocolate chips and the remaining 5 oz of sweetened condensed milk. Microwave on 50% power in 30-second intervals, stirring each time, until fully melted and smooth.
Pro Tip: Stir vigorously to incorporate any small bits, as white chocolate can be finicky and requires even heating for a flawless orange layer.
Step 6: Tinting and Adding the Top Layer
Add ½ teaspoon of vanilla extract and a few drops of orange gel food coloring to the white chocolate mixture, stirring until evenly colored. Immediately spread this orange fudge layer over the chilled chocolate base.
Common Mistake to Avoid: Add coloring gradually to avoid an overly bright hue; too much can make the layer taste artificial, so aim for a festive, balanced orange.
Step 7: Topping with Candy Corn
Gently press the 24 pieces of candy corn into the top layer in even rows, spacing them out for a uniform look.
Pro Tip: Press lightly to embed them just enough so they don’t sink, preserving the fudge’s smooth surface and enhancing visual appeal.
Step 8: Final Chilling and Serving
Refrigerate the assembled fudge for about 1 hour until fully firm. Once set, lift it from the pan using the foil, slice into 24 squares, and serve at room temperature for the best flavor.
Common Mistake to Avoid: Cutting while still cold can cause cracks; let it sit for a few minutes at room temperature to ensure clean, even slices.
Serving & Presentation
Elevate your Halloween Fudge Recipe – Easy Holiday Dessert Ideas with creative plating by arranging the squares on a dark platter to mimic a graveyard scene, perhaps with edible “dirt” made from crushed cookies. Garnish each piece with a light dusting of edible glitter or a sprinkle of sea salt for added flair, enhancing the festive no-bake wonder. This fudge pairs beautifully with hot apple cider or chilled milk, complementing hearty Halloween meals like chili or charcuterie boards, making it a versatile dessert for any gathering.
Make-Ahead & Storage Solutions
Make-Ahead Strategy: Prepare the fudge up to 3 days in advance by following the instructions through to the final chilling step, then store it whole in the refrigerator. When ready, slice just before serving to keep edges fresh and prevent sogginess.
Storing Leftovers: Keep leftovers in an airtight container at room temperature for 4–5 days for optimal taste, or refrigerate for up to 2 weeks to maintain firmness. For longer storage, freeze in a single layer, wrapped tightly in plastic, for up to 3 months—thaw in the fridge overnight.
The Best Way to Reheat: To restore the original texture, let refrigerated or frozen fudge come to room temperature for 15–20 minutes. Avoid microwaving, as it can make the layers melt unevenly; this method ensures the festive no-bake wonder retains its creamy consistency and vibrant colors.
Frequently Asked Questions (FAQ)
How do you make a moist chocolate cake from scratch?
To make a moist chocolate cake from scratch, start by creaming butter and sugar until fluffy, then add eggs, vanilla, and buttermilk for moisture. Mix in dry ingredients like flour, cocoa powder, baking soda, and a pinch of salt, alternating with hot coffee or water to bloom the cocoa. Bake at 350°F for 25-30 minutes; the liquid adds steam for that tender crumb. For extra tips, ensure not to overmix the batter to keep it light and airy.
What are good substitutions for ingredients in a chocolate cake recipe?
Good substitutions include using applesauce or Greek yogurt for oil to maintain moisture without added fat, or almond milk for regular milk if you’re dairy-free. Swap all-purpose flour with a gluten-free blend, and for eggs, use flax eggs or mashed bananas. Always adjust for texture—adding an extra tablespoon of liquid if substituting drier ingredients—to keep your cake as delicious as this Halloween fudge recipe.
How long does it take to bake a chocolate cake?
Baking a chocolate cake typically takes 25-35 minutes at 350°F, depending on the pan size and recipe. For standard 9-inch layers, check doneness at 25 minutes with a toothpick; larger cakes may need up to 45 minutes. Factors like oven calibration affect time, so unlike this no-bake Halloween fudge, always monitor to avoid overbaking and ensure a moist result.
What are the best ways to serve and store a chocolate cake?
The best ways to serve a chocolate cake include pairing it with fresh berries and whipped cream for contrast, or frosting it with ganache for a luxurious touch. Store at room temperature in an airtight container for 2-3 days, or refrigerate for up to a week to preserve freshness. For longer storage, freeze slices wrapped in plastic for up to 3 months, thawing at room temperature before serving, much like our storage tips for this easy holiday dessert.
Can I adapt this Halloween fudge for different holidays?
Absolutely! Swap the orange coloring and candy corn for red and green hues with sprinkles for Christmas, or use pastel colors for Easter. The base recipe remains the same, making it versatile—simply adjust toppings to fit the theme while keeping the festive no-bake wonder intact.
Is this Halloween fudge recipe suitable for kids to help make?
Yes, it’s perfect for kids! The no-bake process and simple steps like stirring and pressing toppings make it safe and fun for little helpers, though supervise microwave use. It’s a great way to get them excited about easy holiday dessert ideas.
Tried This Recipe? Leave a Comment!
Did you make this recipe? I’d love to hear how it turned out! Please leave a comment and a rating below. Your feedback helps other home cooks and supports delicetreats!
For more delicious inspiration, follow me on Pinterest!
Halloween Fudge Recipe – Easy Holiday Dessert Ideas

A festive no-bake Halloween fudge recipe with rich chocolate and orange-tinted white chocolate layers, topped with candy corn. Quick to make and perfect for parties or spooky treats.
Ingredients
- 1 ½ cups(255g) semi-sweet chocolate chips
- 1 ½ cups(255g) white chocolate chips
- 1can (14 oz / 360g) sweetened condensed milk, divided
- 1 teaspoonvanilla extract, divided
- Orange gel food coloring
- 24pieces candy corn
Instructions
- Line an 8-inch square baking pan with foil and lightly spray with nonstick cooking spray.
- In a microwave-safe bowl, combine semi-sweet chocolate chips and 5 oz of sweetened condensed milk. Microwave on 50% power for 1 minute, stir, then continue heating in 30-second intervals until smooth.
- Stir in ½ teaspoon vanilla extract and spread the mixture evenly into the prepared pan.
- Refrigerate for 10 minutes to slightly set the bottom layer.
- In another bowl, combine white chocolate chips and remaining 5 oz of sweetened condensed milk. Microwave and stir in intervals until melted and smooth.
- Add ½ teaspoon vanilla and a few drops of orange gel food coloring, stirring until evenly tinted.
- Spread the orange fudge layer over the chocolate layer.
- Immediately press candy corn pieces gently into the top layer in even rows.
- Refrigerate until fully firm, about 1 hour.
- Slice into 24 squares and serve at room temperature.
Notes
A 14-ounce can of sweetened condensed milk measures about 10 oz by volume — divide evenly (5 oz per layer).
Use gel food coloring, not liquid, to avoid seizing the white chocolate and to achieve vibrant color.
Store in an airtight container at room temperature for 4–5 days, or refrigerate for up to 2 weeks.
Nutrition
- Calories: 161 kcal
- Sugar: 23g
- Fat: 5g
- Carbohydrates: 24g
- Protein: 2g
Conclusion
This delightful recipe delivers a rich, indulgent flavor profile that’s perfect for satisfying sweet cravings or impressing guests at any gathering. Whether you’re preparing it for a holiday celebration or a casual treat, its simple preparation method ensures it’s accessible for bakers of all levels. For a fun variation, try swapping in dark chocolate for a deeper taste, and serve it chilled with a dollop of whipped cream for added elegance.