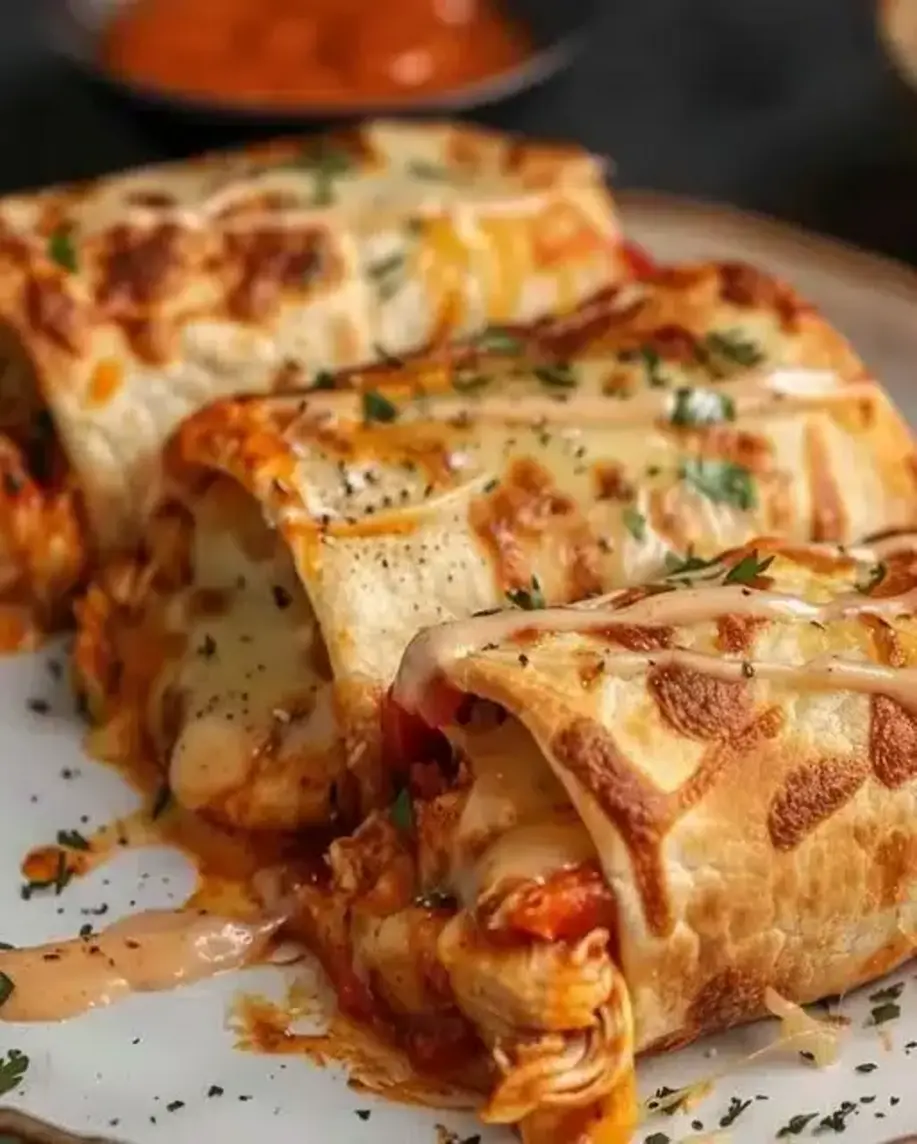
Baked Chicken Chimichangas: Easy and Delicious Recipe
“`html
Table of Contents
Baked Chicken Chimichangas: Easy and Delicious Recipe
Hello, dear readers! If you’re looking for a delicious and easy-to-make meal that is sure to please everyone at your table, you’ve come to the right place. Today, we’re diving into the world of Tex-Mex cuisine with a fantastic Baked Chicken Chimichangas recipe. But have you ever wondered how to achieve that perfect crispy exterior without deep frying, or how to infuse maximum flavor into your chicken filling? You’re not alone! Many home cooks struggle to replicate restaurant-style chimichangas at home. That’s why this baked version is a game-changer, offering all the craveable taste and texture with a much healthier approach.
Ingredients List
Gathering your ingredients is the first step to chimichanga bliss. This recipe focuses on fresh flavors and simple preparations, ensuring a delightful meal. Feel free to adjust seasonings to your personal taste – that’s the beauty of home cooking!
Chicken Base
- 2 cups cooked, shredded chicken: This can be rotisserie chicken for ultimate ease, or chicken breast poached and then shredded. Ensure it’s moist and not dry.
- 1 tbsp olive oil: For sautéing aromatics and adding richness.
- 1/2 cup finely chopped yellow onion: Provides a sweet and pungent base.
- 2 cloves garlic, minced: The essential aromatic for savory dishes.
- 1/2 tsp cumin powder: Earthy and warm, a Tex-Mex staple.
- 1/2 tsp chili powder: Adds a mild heat and characteristic Mexican flavor.
- 1/4 tsp smoked paprika: For a subtle smoky depth.
- Salt and freshly ground black pepper to taste: Essential for bringing out all the flavors.
- 1/4 cup chicken broth or water: To keep the filling moist and bind it together.
Filling Flavors (Optional Enhancements)
- 1/4 cup black beans, rinsed and drained: Adds texture and protein.
- 1/4 cup corn kernels (fresh, frozen, or canned): For a touch of sweetness and pop.
- 2oz cream cheese, softened (optional): For a creamy, richer filling.
- 1/4 cup shredded Monterey Jack or Cheddar cheese (optional): Melts beautifully and adds gooeyness.
Chimichanga Assembly
- 8 medium (8-inch) flour tortillas: These should be pliable. Use warm water or a damp towel to soften them if needed.
- 2 tbsp olive oil or melted butter (for brushing): This creates the golden, crispy exterior.
Optional Toppings
- Salsa
- Sour cream or Greek yogurt
- Guacamole or sliced avocado
- Shredded lettuce
- Chopped cilantro
- Pickled jalapeños
Timing is Everything
Compared to traditional deep-fried chimichangas which can be more labor-intensive and time-consuming (often involving frying oil setup and cleanup), this baked version offers a significantly quicker path to deliciousness. The average oven-baked recipe preparation time is comparable, but the cooking and cleanup are often more streamlined.
Step-by-Step Instructions
1. Prepare the Chicken Filling
Heat 1 tablespoon of olive oil in a skillet over medium heat. Add the chopped onion and sauté until softened and translucent, about 5-7 minutes. Stir in the minced garlic and cook for another minute until fragrant. Add the shredded chicken, cumin, chili powder, smoked paprika, salt, and pepper. Stir well to coat the chicken with the spices. Pour in the chicken broth or water and let it simmer for a few minutes, allowing the flavors to meld and the liquid to slightly reduce, ensuring the filling isn’t too wet. If using, stir in black beans, corn, softened cream cheese, and shredded cheese until well combined and the cheese is melted.
2. Warm the Tortillas
To make them pliable and prevent tearing, warm the flour tortillas. You can do this by microwaving them for 20-30 seconds wrapped in a damp paper towel, or by quickly heating them one by one in a dry skillet. This step is crucial for easy rolling.
3. Assemble the Chimichangas
Lay a warmed tortilla flat. Spoon about 1/4 to 1/3 cup of the chicken filling onto one half of the tortilla, leaving a little space around the edges. Fold the sides of the tortilla inward, then tightly roll it up from the bottom, like a burrito. Ensure the filling is well-contained.
4. Prepare for Baking
Preheat your oven to 400°F (200°C). Lightly grease a baking sheet or line it with parchment paper. Place the rolled chimichangas seam-side down on the prepared baking sheet. You can arrange them snugly if you want them to hold their shape better, or with a little space if you prefer crispier edges all around.
5. Brush and Bake
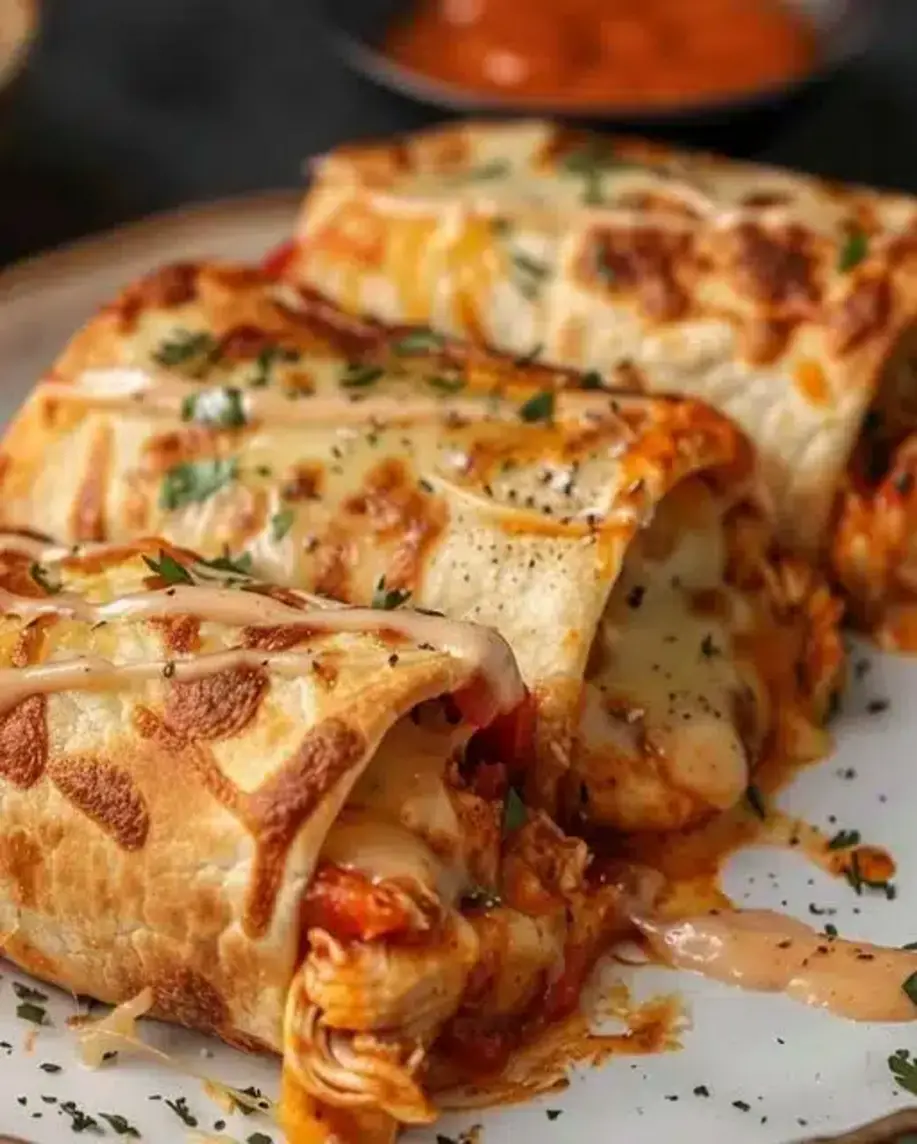
Brush the tops and sides of each chimichanga generously with olive oil or melted butter. This is what will give them that lovely golden-brown, crispy finish. Place the baking sheet in the preheated oven and bake for 20-25 minutes, or until the tortillas are golden brown and crispy. Halfway through baking, you can carefully flip them to ensure even crisping, though it’s not always necessary if you’ve brushed them well.
6. Serve and Enjoy!
Carefully remove the chimichangas from the oven. Let them cool for a minute or two before serving. Serve hot with your favorite toppings!
Nutritional Information
While exact nutritional values can vary based on specific ingredients and portion sizes, a typical Baked Chicken Chimichanga (without excessive toppings) is estimated to provide:
- Calories: Approximately 350-450 kcal
- Protein: 25-35g
- Fat: 15-25g
- Carbohydrates: 25-35g
- Fiber: 3-5g
Note: These are estimates. Using whole wheat tortillas, leaner chicken, and less cheese will alter these numbers significantly.
Healthier Alternatives
Craving that chimichanga goodness without the heavier ingredients? Here are some smart swaps:
- Tortillas: Opt for whole wheat tortillas or even low-carb options. For an even lighter twist, try making “chimichanga bowls” by serving the filling over rice or greens.
- Chicken: Use lean chicken breast, or even plant-based protein like seasoned black beans or lentils for a vegetarian option.
- Cheese: Use reduced-fat cheese sparingly, or omit it entirely. A sprinkle of nutritional yeast can add a cheesy flavor without the dairy.
- Creaminess: Instead of cream cheese, add a tablespoon of plain Greek yogurt to the filling for tanginess and a protein boost.
- Cooking Fat: Use a light brush of olive oil spray instead of brushing with oil or butter.
Serving Suggestions
Chimichangas are versatile! Serve them piping hot, fresh from the oven. A dollop of cool sour cream or Greek yogurt, a spoonful of vibrant salsa, and a side of creamy guacamole are classic pairings. For a fresh crunch, add shredded lettuce and a sprinkle of fresh cilantro. They also pair wonderfully with Mexican rice and refried beans (or a healthier black bean alternative!).
Common Mistakes to Avoid
- Overfilling: Don’t stuff too much filling into the tortillas, or they will be difficult to roll and might burst during baking.
- Dry Filling: Ensure your chicken filling has enough moisture. A little bit of chicken broth or salsa mixed in helps keep it from being dry and crumbly.
- Tearing Tortillas: Forgetting to warm and soften the tortillas is a sure way to end up with ripped wrappers.
- Not Brushing Enough: Insufficient brushing with oil will result in a pale and less crispy exterior. Load up that oil or butter!
Storing Your Chimichangas
Cooked chimichangas are best enjoyed fresh. However, if you have leftovers, let them cool completely. Store them in an airtight container in the refrigerator for up to 2-3 days. To reheat, you can place them back in a preheated oven at 350°F (175°C) for about 10-15 minutes until heated through and slightly re-crisped. Microwaving is an option but will result in a softer, less crispy texture.

Frequently Asked Questions
Can I make the filling ahead of time?
Yes! The chicken filling can be prepared up to 2 days in advance and stored in an airtight container in the refrigerator. Reheat it gently on the stovetop before assembling the chimichangas.
Can I freeze chimichangas?
Yes, you can freeze the assembled, uncooked chimichangas. Wrap them tightly in plastic wrap, then aluminum foil, and freeze for up to 1 month. Thaw them in the refrigerator overnight before baking, or bake directly from frozen (adding extra baking time).
What kind of chicken is best for chimichangas?
Rotisserie chicken is incredibly convenient and flavorful. Alternatively, you can poach or bake chicken breasts or thighs until cooked through, then shred them. Ensure the chicken is moist!
Why are my chimichangas not crispy?
Several factors can contribute: not brushing enough oil/butter, oven not being hot enough, or overfilling with moist ingredients. Ensure a good coating of fat and a properly preheated, hot oven.
Ready to wow your family with a healthy, homemade Tex-Mex favorite? Give these Baked Chicken Chimichangas a try and let us know how they turn out in the comments below! We love hearing from you!
Baked Chicken Chimichangas: Easy and Delicious Recipe

Hello, dear readers! If you’re looking for a delicious and easy-to-make meal that is sure to please everyone at your table, you’ve come to the right place. Today, we’re diving into the world of Tex-Mex cuisine with a fantastic Baked Chicken Chimichangas recipe.
Ingredients
- 8 ozpackage cream cheese
- 8 ozPepperjack cheese, shredded
- 1 1/2 tbsptaco seasoning
- 1lb cooked chicken, shredded
- 8flour tortillas
- Cooking spray
- Shredded cheddar cheese
- Green onions, for garnish
- Sour cream
- Salsa
Instructions
- Mixing the Cheeses and Seasoning: In a bowl, stir together the cream cheese, shredded Pepperjack cheese, and taco seasoning until well combined.
- Add Chicken: Fold in the shredded cooked chicken until evenly mixed with the cheese mixture.
- Fill and Roll: Divide the chicken and cheese mixture among the 8 flour tortillas. Tuck in the sides and roll up each tortilla to enclose the filling.
- Preheat and Arrange: Preheat your oven to 350°F. Spray a 9×13-inch baking dish with cooking spray.
- Baking: Place the rolled chimichangas seam side down in the prepared baking dish. Spray the tops of the tortillas with cooking spray.
- Bake: Bake the chimichangas in the preheated oven for 15 minutes. After 15 minutes, carefully turn the chimichangas over and bake for an additional 15 minutes or until golden and crispy.
- Garnish and Serve: Remove the baked chimichangas from the oven. Serve them hot, garnished with shredded cheddar cheese, sliced green onions, sour cream, and salsa on the side.
Notes
For a spicier kick, add some chopped jalapeños to the filling.
Ensure the tortillas are fresh and pliable to avoid cracking when rolling.
“`