Cheesy Chicken Crescent Roll | Easy Dinner
“`html
Table of Contents
Cheesy Chicken Crescent Roll Sausage | Easy Dinner
Welcome to Flavor Town!
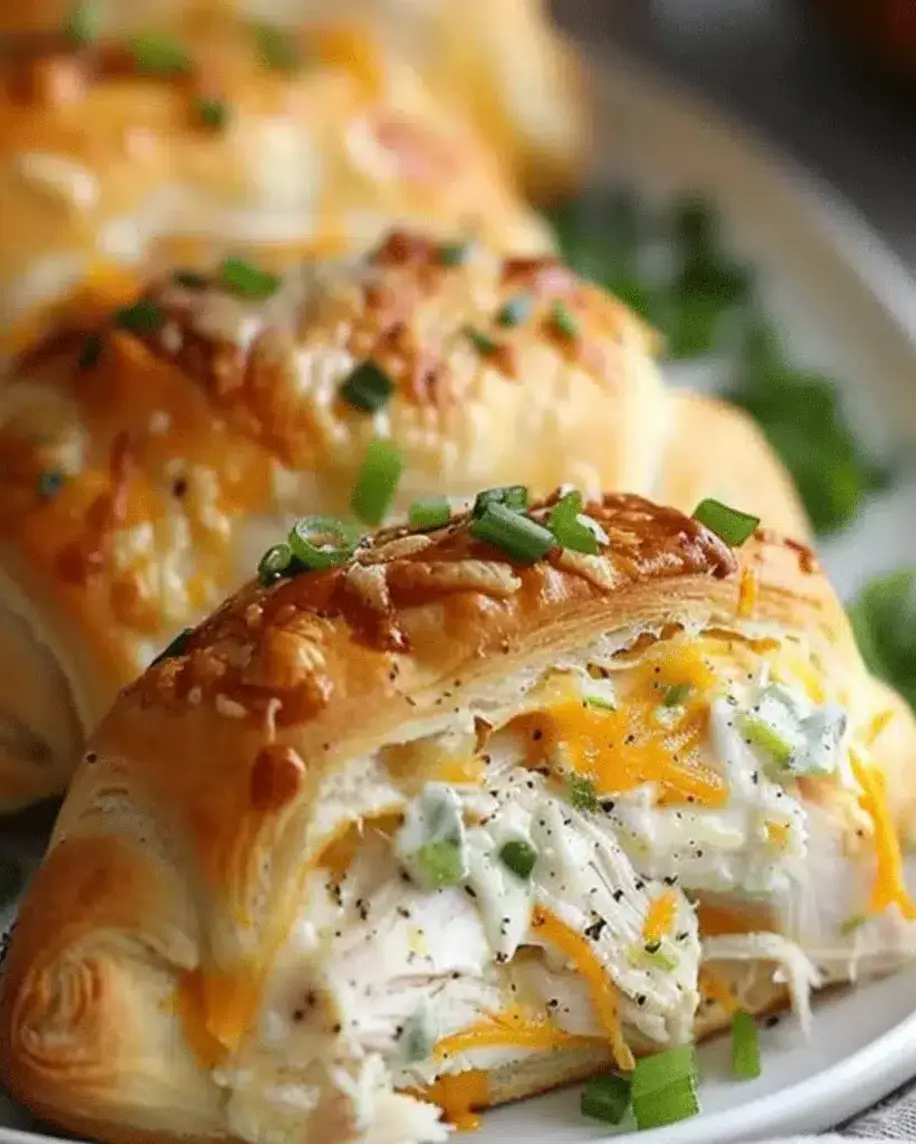
Are you searching for a dinner that’s both incredibly easy and bursting with cheesy, chickeny goodness? In today’s fast-paced world, finding meals that satisfy our cravings without demanding hours in the kitchen can feel like a culinary quest. That’s where our delightful Cheesy Chicken Crescent Roll-Ups 🥐🍗 come in! These aren’t just any stuffed crescent rolls; they’re a shortcut to pure comfort food, perfect for those busy weeknights when hunger strikes but time is short. Imagine flaky, golden crescent dough enveloping a warm, gooey filling of seasoned chicken and melted cheese. Sounds divine, right? If you’re a fan of comforting, cheesy chicken dishes, or simply love the magic of crescent rolls transformed into a satisfying meal, this recipe is poised to become your new go-to. We’ve perfected the art of creating a melt-in-your-mouth experience that will have kids and adults alike clamoring for more. So, let’s dive into the simple, delicious steps to creating this crowd-pleasing dinner!
What You’ll Need
Gathering your ingredients is the first step to unlocking this recipe’s potential. We’ve kept it simple, with most items likely already in your pantry or a quick trip to the grocery store away. Remember, the quality of your ingredients will shine through, so choose fresh and flavorful!
For the Rolls:
- 2 (8-ounce) cans refrigerated crescent dinner rolls: The foundation of our flaky delights. Keep them chilled until ready to use for optimal texture. Buttery varieties work wonderfully here!
- 1 tablespoon butter: For sautéing and adding a touch of richness. Unsalted is preferred so you can control the saltiness.
For the Cheesy Chicken Filling:
- 2 cups shredded cooked chicken: This is your canvas! Rotisserie chicken is a lifesaver for speed, but poached or baked chicken breasts work beautifully too. Aim for tender, moist chicken.
- 8 ounces cream cheese, softened: The creamy binder that makes everything luxurious. Ensure it’s at room temperature for smooth mixing.
- 1/2 cup sour cream or plain Greek yogurt: Adds tang and moisture. Greek yogurt provides a protein boost and a slightly thicker texture.
- 1/2 cup shredded cheddar cheese (or your favorite melting cheese): The star of the cheesy show! Sharp cheddar offers a bolder flavor, while Monterey Jack or a mix is wonderfully melty.
- 1 teaspoon garlic powder: For that essential savory aroma and taste.
- 1/2 teaspoon onion powder: Complements the garlic and adds depth.
- 1/4 teaspoon salt: Adjust to your taste, especially if your chicken is already seasoned.
- 1/4 teaspoon black pepper: Freshly ground pepper offers the best flavor.
Optional Add-ins:
- Chopped fresh chives or parsley: For a pop of color and fresh herby notes.
- Pinch of red pepper flakes: For a subtle kick of heat.
- Finely diced jalapeños (canned or fresh): For those who love a spicier bite.
The Magic Timeline
We know your time is precious! This recipe is designed for efficiency, making it a true weeknight warrior. Typically, recipes of this nature take around 45-60 minutes from start to finish. Our Cheesy Chicken Crescent Roll-Ups are even quicker, thanks to the convenience of refrigerated dough and pre-cooked chicken.
That’s right – a delicious, homemade meal ready in under 40 minutes! Compare that to the average 60+ minutes for many similar baked dishes, and you can see why these are so popular.

Let’s Get Rolling!
Now for the fun part – transforming simple ingredients into something spectacular! Follow these straightforward steps for perfect results every time.
Step 1: Preheat & Prep
First things first, let’s get your oven ready to work its magic. Preheat your oven to 375°F (190°C). While the oven heats up, grab a baking sheet and lightly grease it or line it with parchment paper for easy cleanup. This prevents any potential sticking and ensures your crescent roll-ups bake up beautifully golden. Also, if you’re using leftover cooked chicken that’s not shredded, take a moment to shred or dice it now. Ensure your cream cheese is soft enough to mix easily – if it’s still a bit firm, a few seconds in the microwave can help.
Step 2: Cook the Chicken (if not already cooked)
If you’re starting with raw chicken, this is your cooking phase. You can quickly sauté diced chicken breast in a skillet with a little oil until cooked through, or boil chicken breasts until tender. Once cooked, allow it to cool slightly before shredding or dicing it into bite-sized pieces. If you’re using a rotisserie chicken, you can skip this step and proceed directly to shredding!
Step 3: Craft the Cheesy Filling
In a medium bowl, combine the softened cream cheese, sour cream (or Greek yogurt), shredded cooked chicken, shredded cheddar cheese, garlic powder, onion powder, salt, and black pepper. If you’re feeling adventurous, now is the time to stir in any optional add-ins like chives, parsley, red pepper flakes, or diced jalapeños. Mix everything together thoroughly until it’s well combined and creamy. You want a flavorful, cohesive filling that’s easy to spread.
Step 4: Assemble the Rolls
Unroll the cans of crescent dough onto a clean surface. You’ll notice they are pre-divided into triangles. If you want larger rolls, you can gently press the seams together to form larger rectangles, but for classic crescent roll-ups, keeping them as triangles is perfect. Spoon a generous tablespoon or two (depending on the size of your triangles) of the cheesy chicken mixture onto the wider base of each crescent triangle. Then, gently roll up the dough, starting from the wide base and rolling towards the point. Pinch the edges slightly to seal in that delicious filling – we don’t want any cheesy leaks during baking!
Step 5: Bake to Golden Perfection
Place the assembled crescent roll-ups seam-side down on your prepared baking sheet. Make sure they have a little space between them so they can puff up nicely. Bake in the preheated oven for 20-25 minutes, or until the crescents are puffed, golden brown, and the filling is hot and bubbly. Keep an eye on them towards the end of the baking time, as ovens can vary. You’re looking for that irresistible golden crust!
Step 6: Serve and Savor
Once baked to perfection, carefully remove the baking sheet from the oven. Let the Cheesy Chicken Crescent Roll-Ups cool for just a few minutes – they’ll be hot! Serve them warm, directly from the baking sheet. They are fantastic on their own, but feel free to serve with a side salad or some steamed vegetables for a complete meal. Enjoy the moment!
Nutritional Snapshot
While precise nutritional values can vary based on specific ingredients and portion sizes, here’s a general idea of what you can expect from a serving of these Cheesy Chicken Crescent Roll-Ups:
- Calories: Approximately 300-400 kcal per roll, depending on the size and exact ingredients.
- Protein: Rich in protein from the chicken and dairy.
- Fat: Contains a moderate amount of fat from cheese, cream cheese, and butter.
- Carbohydrates: Primarily from the crescent roll dough.
(Note: This is an estimation. For precise nutritional information, use a recipe calculator with your exact ingredients.)
Making it Lighter
Looking to make these even healthier without sacrificing flavor? Here are a few smart swaps:
- Leaner Protein: Use finely chopped cooked turkey breast or lean chicken breast.
- Greek Yogurt Power: Replace some or all of the sour cream with plain Greek yogurt. It adds protein and a tangy creaminess.
- Reduced-Fat Cheese: Opt for reduced-fat cheddar or Monterey Jack cheese.
- Whole Wheat Dough: If available, consider using whole wheat crescent rolls for added fiber.
- Veggies Galore: Mix in finely chopped steamed broccoli, spinach, or bell peppers into the filling for added nutrients and fiber.
Serving Ideas
These Cheesy Chicken Crescent Roll-Ups are incredibly versatile!
- As a Main Course: Serve with a fresh green salad, steamed broccoli, or roasted asparagus for a balanced meal.
- As an Appetizer: Make smaller versions and serve them at parties or gatherings. They disappear fast!
- With Dipping Sauce: Offer a side of ranch dressing, marinara sauce, or your favorite dipping sauce for an extra layer of flavor.
- Potluck Perfect: They travel well and are always a hit at potlucks and family gatherings.
Common Pitfalls to Avoid
Even with simple recipes, a few common mistakes can happen. Here’s how to avoid them:
- Overfilling the Rolls: Too much filling can cause the dough to burst open during baking. Use a moderate amount.
- Not Sealing Properly: Ensure the seams of the crescent dough are pinched together well to keep the filling contained.
- Using Cold Cream Cheese: Cold cream cheese will result in a lumpy, uneven filling. Always soften it first.
- Under or Overbaking: Ovens vary! Keep an eye on your roll-ups during the last few minutes of baking to achieve that perfect golden-brown color.
Storing Your Masterpieces
Leftovers are rare, but if you find yourself with any Cheesy Chicken Crescent Roll-Ups, here’s how to store them:
- Refrigeration: Once cooled, store completely cooled roll-ups in an airtight container in the refrigerator for up to 3-4 days.
- Reheating: To enjoy them again, reheat in a 350°F (175°C) oven for about 10-15 minutes until heated through and slightly crisped. Microwaving can make them a bit soft, but is quicker if crispiness isn’t a priority.

Your New Favorite Weeknight Meal
There you have it – a recipe that delivers maximum flavor with minimum fuss! These Cheesy Chicken Crescent Roll-Ups are a testament to the idea that delicious, comforting meals don’t need to be complicated. They are perfect for satisfying those cheesy chicken cravings, impressing your family with minimal effort, and adding a delightful twist to your dinner rotation. Whether you’re a seasoned home cook or just starting, this recipe is foolproof and incredibly rewarding. So, gather your ingredients, roll up your sleeves, and get ready to create a meal that’s sure to become a beloved favorite. Don’t forget to share your creations and any variations you try in the comments below!
Frequently Asked Questions
Can I make these ahead of time?
You can prepare the filling and assemble the rolls up to a few hours in advance. Store them covered in the refrigerator and bake just before serving. For best results, try to bake them as close to serving time as possible to enjoy the freshest, flakiest texture.
What kind of chicken works best?
Rotisserie chicken is a fantastic shortcut and adds great flavor. However, any cooked chicken breast or thigh meat that is shredded or finely diced will work beautifully. Ensure the chicken is moist and not dry for the best filling texture.
Can I add vegetables to the filling?
Absolutely! Finely chopped and well-drained cooked spinach, broccoli, or sautéed mushrooms are great additions. You could also add finely diced bell peppers or jalapeños for a kick.
My crescent rolls keep opening up. What am I doing wrong?
Make sure you’re pinching the seams firmly and placing the rolls seam-side down on the baking sheet. Don’t overstuff them, and ensure you are using the standard crescent roll triangles as they are designed for rolling.
Can I freeze these?
It’s best to enjoy these fresh. If you want to freeze them, bake them first, let them cool completely, then freeze in an airtight container. Reheat in the oven for best results. Freezing the unbaked rolls can affect the dough’s texture.
Cheesy Chicken Crescent Roll | Easy Dinner

Welcome, food lovers! Today, we’re bringing you a delightfully easy and cheesy dinner recipe—Cheesy Chicken Crescent Roll-Ups 🥐🍗! These rolls are perfect for busy weeknights when you crave something delicious yet quick to make. If you’re a fan of stuffed crescent rolls or cheesy chicken dishes, this is going to be your new go-to recipe. Whether you’re hosting a family dinner or just looking for a comforting meal, these crescent roll-ups will have everyone asking for seconds. Let’s dive into the magic of this melt-in-your-mouth recipe that’s sure to satisfy both kids and adults alike!
Ingredients
- Optional Substitutions:
Instructions
- Preheat your oven to 375°F (190°C) to ensure the rolls bake evenly.
- In a mixing bowl, combine theshredded chicken,softened cream cheese,shredded cheddar cheese,chopped green onions,salt, andpepper. Stir until all ingredients are well incorporated. This cheesy chicken mixture will be the filling for your crescent rolls.
- Pro Tip:If you want an extra burst of flavor, add a pinch of garlic powder or Italian seasoning to the mixture.
- Unroll the crescent roll dough and separate it into8 individual triangles. These triangles will be the base for each roll-up.
- Place a spoonful of the cheesy chicken mixture at the wide end of each crescent dough triangle. Be careful not to overfill, as you’ll need to roll the dough securely to keep the filling inside.
- Starting from the wide end, roll up each crescent roll triangle, enclosing the cheesy chicken filling. Make sure to pinch the sides slightly to seal the filling in as you roll. This ensures none of the delicious filling spills out during baking.
- Place the filled crescent rolls on a greased or parchment-lined baking sheet. Brush the tops of each roll withmelted butterto achieve a crispy, golden-brown finish.
- Bake in your preheated oven for12-15 minutes, or until the crescent rolls are golden brown. Keep an eye on them to ensure they don’t overbake.
- Once the rolls are baked to perfection, remove them from the oven and let them cool for a minute or two. Serve with your favorite dipping sauce, like ranch or marinara, and enjoy the cheesy goodness!
Notes
Use a Baking Sheet Lined with Parchment Paper– This will prevent the rolls from sticking and make cleanup a breeze.
Brush with Melted Butter Before and After Baking– For an even more golden and crispy exterior, you can brush the rolls with melted butter both before they go into the oven and right after they come out.
Keep an Eye on the Oven– Crescent rolls can bake quickly, so check on them after 12 minutes to make sure they don’t overcook.
Use a Pizza Stone for Extra Crispiness– If you want a slightly crispier roll, bake the crescents on a preheated pizza stone.
“`