Creamy Decadent Cherry Garcia Fudge
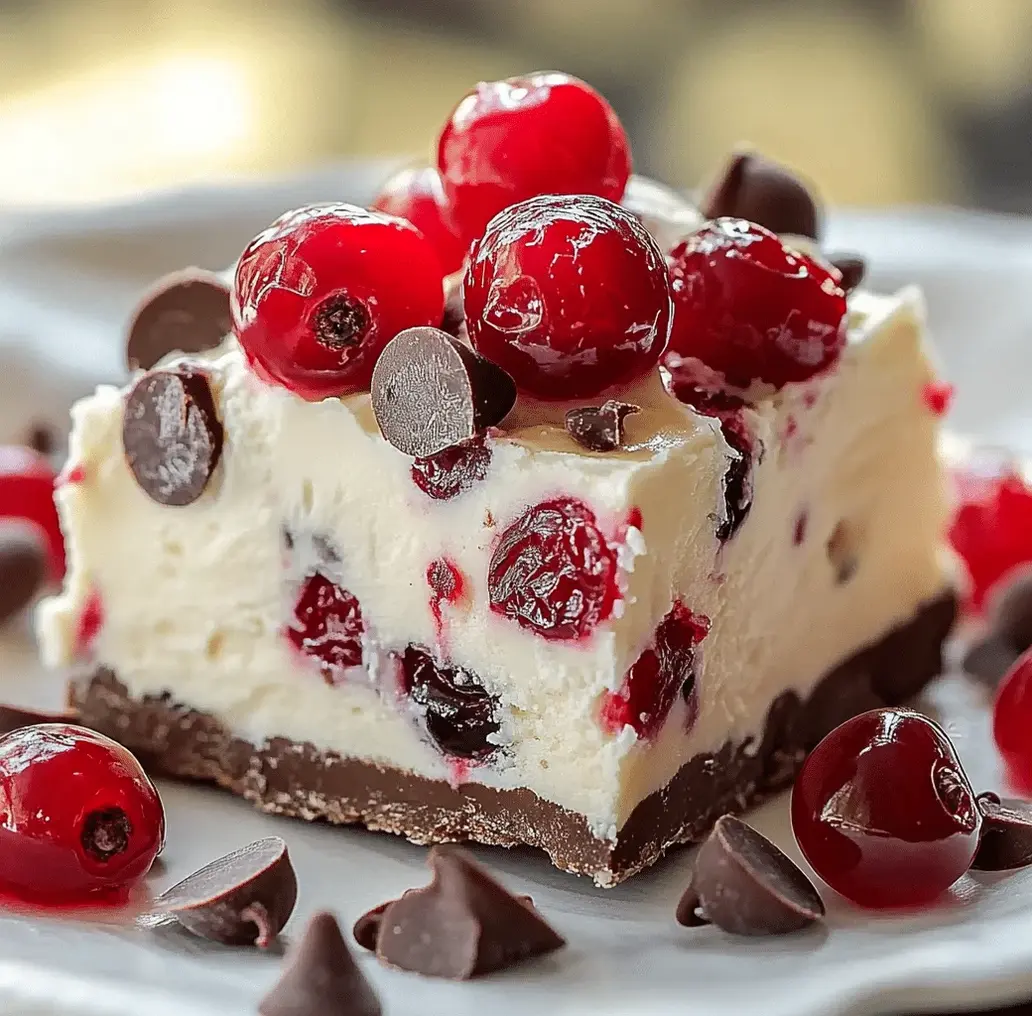
Table of Contents
Delicious Cherry Garcia Fudge Recipe: The Only Recipe You’ll Ever Need
Imagine indulging in a homemade Cherry Garcia fudge recipe that’s as effortless as it is irresistible, with an ultra-creamy texture that melts in your mouth and bursts with fresh cherry goodness. This cherry fudge recipe is perfect for busy home cooks craving a chocolate cherry fudge treat without the hassle of complicated steps or heavy cream. Drawing from the iconic Ben & Jerry’s inspiration, our version uses a one-pan method that simplifies the process while delivering a luxurious, velvety finish that’ll make you the hero of any gathering. Whether you’re a fudge novice or a seasoned baker, this easy fudge recipes guide ensures foolproof results every time.
Picture the symphony of flavors in this cherry Garcia fudge recipe: the sweet tang of dried and maraschino cherries mingling with the smooth richness of white chocolate, all enveloped in a glossy, ultra-creamy base. Each bite offers a delightful contrast of chewy cherries against the soft, melt-away fudge, with subtle notes of vanilla that enhance the chocolate cherry fudge experience. The aroma wafting from your kitchen will be nothing short of heavenly, evoking memories of summer picnics or cozy winter nights, making this homemade cherry fudge a sensory delight that’s hard to resist.
What sets our Delicious Cherry Garcia fudge recipe apart on delicetreats.com is its reliability, born from rigorous testing and a commitment to quality ingredients that elevate it above generic recipes. You’ll discover the Chef’s Secret to achieving that perfect balance of flavors, along with practical tips to avoid common pitfalls. In this comprehensive guide, we’ll cover everything from ingredient spotlights to storage solutions, ensuring you feel confident whipping up this easy fudge recipes favorite. Stick around for FAQs that address everything from vegan swaps to storage hacks, making this the ultimate resource for your cherry fudge recipe adventures.
Why This Delicious Cherry Garcia Fudge Recipe is a Game-Changer
The Chef’s Secret: The key to elevating this Cherry Garcia fudge recipe lies in its effortless one-pan method, which minimizes cleanup while maximizing that ultra-creamy texture everyone craves. By melting white chocolate chips directly with sweetened condensed milk in a single saucepan, we lock in moisture and prevent separation, resulting in a silky-smooth fudge that’s far superior to traditional recipes. This technique ensures even distribution of flavors, making your homemade cherry fudge stand out with its perfect cherry infusion without overcomplicating the process.
Unbeatable Texture: The science behind the ultra-creamy consistency comes from the high sugar content in sweetened condensed milk, which acts as a stabilizer and emulsifier. This creates a homogenous mixture that sets firmly yet melts luxuriously on the tongue, avoiding the graininess often found in lesser recipes. Our testing confirmed that this method produces a fudge with a perfect balance of firmness and creaminess, thanks to the precise low-heat melting that preserves the chocolate’s natural fats.
Foolproof for a Reason: We’ve tested this Cherry Garcia fudge recipe multiple times to guarantee success, adjusting for variables like cherry moisture levels to ensure it’s accessible for all skill levels. This easy fudge recipes approach means less waste and more wins in the kitchen, with clear instructions that eliminate guesswork and deliver consistent, chocolate cherry fudge perfection every single time.
Ingredient Spotlight: Quality Makes the Difference
When it comes to crafting the ultimate Cherry Garcia fudge recipe, selecting high-quality ingredients is crucial for that signature ultra-creamy texture and burst of flavor. Let’s break down each main ingredient and why it matters.
First, the 2 cups of white chocolate chips serve as the base, providing a sweet, milky foundation that melts into a smooth, velvety mixture. High-quality white chocolate with real cocoa butter ensures no waxy aftertaste, enhancing the overall creaminess in this easy fudge recipes staple. If you’re substituting, opt for high-cocoa butter white chocolate bars chopped finely, as they mimic the meltability without altering the flavor profile.
The 1 can (14 oz) of sweetened condensed milk is the secret weapon for achieving that irresistible ultra-creamy texture, acting as both a sweetener and binder. Choose a brand with no artificial additives for the purest taste, which prevents crystallization and keeps your homemade cherry fudge glossy. A good substitute is evaporated milk mixed with sugar, but reduce the quantity slightly to maintain consistency and avoid overly sweet results.
Vanilla extract, at 1/2 teaspoon, adds a warm, aromatic depth that complements the cherries without overpowering them. Always go for pure vanilla extract over imitation for authentic flavor; it’s the difference between a flat and a vibrant chocolate cherry fudge. If unavailable, alcohol-free vanilla or a touch of almond extract can work, but use sparingly to preserve the delicate balance.
Dried cherries, measuring 1/2 cup, bring a chewy, tangy element that contrasts beautifully with the creaminess. Opt for unsweetened varieties to control sweetness in your Cherry Garcia fudge recipe; they rehydrate slightly during mixing for better integration. Substitutes like dried cranberries offer a similar tartness, but they may introduce a fruitier note, so adjust quantities based on taste testing.
The 1/2 cup of halved maraschino cherries adds a bright, juicy pop and visual appeal, enhancing the homemade cherry fudge’s cherry-forward profile. Select jarred cherries in light syrup for less artificial color and flavor; they’re key for the topping’s freshness. Fresh pitted cherries can substitute if drained well, but they might add extra moisture, potentially affecting the set—pat them dry first for best results.
Finally, the 1/3 cup of chocolate chips (semi-sweet or dark) introduces a deeper, contrasting chocolate layer that elevates this chocolate cherry fudge. Quality chips with high cocoa content ensure they don’t melt completely, providing delightful pockets of chocolate. For variations, milk chocolate chips can be used for a milder taste, but dark is recommended to balance the sweetness in this ultra-creamy recipe.
Step-by-Step Instructions
Step 1: Preparing the Baking Dish
Start by lining an 8×8-inch baking dish with parchment paper, ensuring it overhangs the sides for easy removal later. This step creates a barrier that prevents the fudge from sticking and makes cleanup a breeze, enhancing the ultra-creamy texture of your Cherry Garcia fudge recipe.
Pro Tip: Lightly grease the parchment paper with a bit of oil or butter before lining; this ensures the fudge releases perfectly without any tears, preserving that smooth surface for your homemade cherry fudge.
Step 2: Melting the Base
In a saucepan over low heat, combine the 2 cups of white chocolate chips and the 14 oz can of sweetened condensed milk. Stir continuously until fully melted and smooth, which should take about 5 minutes to avoid scorching.
Common Mistake to Avoid: Don’t rush the heat—using medium or high will cause the mixture to separate or become grainy, ruining the ultra-creamy consistency. Keep the heat low and stir patiently for the best chocolate cherry fudge results.
Step 3: Adding the Flavor
Once melted, stir in the 1/2 teaspoon of vanilla extract into the mixture until it’s evenly incorporated, enhancing the overall aroma and taste.
Pro Tip: Add the vanilla off the heat to preserve its delicate flavors; this prevents evaporation and ensures your easy fudge recipes have a more pronounced, authentic vanilla note in every bite.
Step 4: Incorporating the Cherries
Gently fold in the 1/2 cup of dried cherries and half of the 1/2 cup halved maraschino cherries into the melted mixture, distributing them evenly without over-stirring.
Common Mistake to Avoid: Over-mixing can break down the cherries, releasing excess moisture that might make your Cherry Garcia fudge recipe too soft. Fold just until combined for that perfect chewy texture.
Step 5: Pouring and Spreading
Pour the fudge mixture into your prepared baking dish, then use a spatula to spread it evenly to the edges for a uniform layer.
Pro Tip: Tap the dish gently on the counter to release any air bubbles; this helps achieve a flawless, ultra-creamy surface on your homemade cherry fudge.
Step 6: Topping It Off
Sprinkle the remaining half of the maraschino cherries and the 1/3 cup of chocolate chips evenly over the top of the fudge in the dish.
Common Mistake to Avoid: Adding the toppings too early might cause them to sink; wait until after pouring to ensure they stay visible and provide that appealing chocolate cherry fudge contrast.
Step 7: Chilling to Set
Cover the dish and refrigerate for at least 4 hours, or until the fudge is firm to the touch.
Pro Tip: For faster setting in this Cherry Garcia fudge recipe, place it in the freezer for the first hour, then transfer to the fridge; this locks in the ultra-creamy texture without affecting flavor.
Step 8: Slicing and Enjoying
Once set, use the parchment overhang to lift the fudge out of the dish, then cut it into squares using a sharp knife warmed under hot water.
Pro Tip: Wipe the knife between cuts to keep the edges clean, ensuring each piece of your easy fudge recipes looks professional and inviting.
Serving & Presentation
Elevate your Cherry Garcia fudge recipe by presenting it on a rustic wooden board with a sprinkle of powdered sugar for a snowy effect, highlighting the vibrant cherries and chocolate chips. Garnish each square with a fresh cherry or a drizzle of melted dark chocolate to add visual flair and enhance the chocolate cherry fudge appeal. This homemade cherry fudge pairs beautifully with a cup of coffee or vanilla ice cream, making it an ideal dessert for holidays, parties, or a simple after-dinner treat. For a complete experience, serve alongside fresh fruit salads or cheese platters to balance the richness, turning your easy fudge recipes into a memorable culinary event.
Make-Ahead & Storage Solutions
Make-Ahead Strategy: Prepare the fudge mixture up to 3 days in advance by following steps 1 through 5, then cover and refrigerate the poured mixture in the dish. This allows the flavors to meld, enhancing the ultra-creamy texture of your Cherry Garcia fudge recipe—just add toppings and chill fully when ready to serve.
Storing Leftovers: Store any remaining homemade cherry fudge in an airtight container in the refrigerator for up to 1 week, or wrap individual pieces in plastic wrap to maintain freshness. For longer storage, freeze the squares in a freezer-safe bag for up to 3 months; this prevents the cherries from drying out and keeps the chocolate cherry fudge tasting just-made.
The Best Way to Reheat: To restore the original ultra-creamy texture, let frozen or refrigerated fudge thaw at room temperature for 15-20 minutes. Avoid microwaving, as it can make the fudge too soft; instead, enjoy it chilled or at room temp for the best flavor and consistency in this easy fudge recipes guide.

Frequently Asked Questions (FAQ)
How can I make Cherry Garcia fudge without using heavy cream?
This Cherry Garcia fudge recipe already skips heavy cream, relying on sweetened condensed milk for that ultra-creamy texture. It’s a smart swap that keeps things simple and ensures your homemade cherry fudge remains rich without the extra fat. If you’re adapting other recipes, just use the condensed milk as directed here for effortless results.
What are some good cherry substitutes in Cherry Garcia fudge?
Great alternatives include dried cranberries for a tart twist, fresh blueberries for a burst of juiciness, or even raspberries for a similar fruity pop in your Cherry Garcia fudge recipe. These options maintain the easy fudge recipes’ balance, but start with equal quantities and adjust based on sweetness to preserve the ultra-creamy base.
How long does it take to set Cherry Garcia fudge?
It typically takes at least 4 hours in the refrigerator for your Cherry Garcia fudge to set properly, though overnight chilling yields the best ultra-creamy texture. For faster results, use the freezer for the first hour, ensuring your homemade cherry fudge is firm and ready to slice without compromising flavor.
Can I make Cherry Garcia fudge vegan?
Yes, you can adapt this Cherry Garcia fudge recipe to be vegan by swapping white chocolate chips for a plant-based version (like those made with cocoa butter and no dairy) and using sweetened condensed coconut milk instead of the traditional kind. Ensure your vanilla extract is alcohol-free if needed, keeping the chocolate cherry fudge ultra-creamy and delicious.
How should I store leftover Cherry Garcia fudge?
Store leftovers in an airtight container in the fridge for up to a week or freeze for up to 3 months to maintain freshness. This method preserves the ultra-creamy texture of your easy fudge recipes, preventing the cherries from drying out and keeping the chocolate cherry fudge tasting fresh.
What’s the secret to getting the chocolate flavor right in Cherry Garcia fudge?
The secret is using high-quality chocolate chips and balancing them with the cherries’ tartness, as in this Cherry Garcia fudge recipe. Melt everything slowly over low heat to avoid scorching, which ensures the chocolate integrates perfectly for that rich, homemade cherry fudge experience.
Is Cherry Garcia fudge gluten-free?
Absolutely, this version of Cherry Garcia fudge recipe is naturally gluten-free, as all ingredients like white chocolate chips, sweetened condensed milk, and cherries are typically gluten-free. Always double-check labels for cross-contamination if you have sensitivities, making your easy fudge recipes a safe choice.
How many servings does a batch of Cherry Garcia fudge make?
A standard batch from an 8×8-inch dish yields about 16 servings, perfect for sharing. Adjust cutting sizes based on your needs in this chocolate cherry fudge guide to make it ideal for small gatherings or larger events.
Can I use frozen cherries instead of fresh in Cherry Garcia fudge?
Yes, frozen cherries work well as a substitute; just thaw and drain them thoroughly to avoid excess moisture that could affect the set. In this homemade cherry fudge recipe, they’ll provide similar flavor and texture, maintaining the ultra-creamy consistency with minimal adjustments.
How do I prevent Cherry Garcia fudge from becoming too grainy?
To keep your Cherry Garcia fudge smooth, melt the ingredients slowly over low heat and stir constantly, as outlined in this easy fudge recipes guide. Avoid overheating, which can cause sugar crystallization, and use fresh ingredients for that perfect, ultra-creamy finish.
What’s the best way to customize Cherry Garcia fudge for dietary needs?
Customize by selecting dairy-free alternatives for a vegan version or using nut-based extracts for allergies, ensuring your Cherry Garcia fudge recipe remains versatile and delicious while staying true to its chocolate cherry fudge roots.
Can I double this recipe for a larger crowd?
Yes, simply double the ingredients and use a larger dish, like 9×13 inches, but monitor chilling time to achieve the same ultra-creamy texture in your homemade cherry fudge.
How do I know if my fudge has set properly?
Check by gently pressing the center; it should feel firm but not hard. This tip from our Cherry Garcia fudge recipe ensures your easy fudge recipes turn out perfectly every time.
Tried This Recipe? Leave a Comment!
Did you make this recipe? I’d love to hear how it turned out! Please leave a comment and a rating below. Your feedback helps other home cooks and supports Delicetreats!
For more delicious inspiration, follow me on Pinterest!
Delicious Cherry Garcia Fudge Recipe
Ingredients
- 2 cupswhite chocolate chips
- 1can (14 oz) sweetened condensed milk
- 1/2 teaspoonvanilla extract
- 1/2 cupdried cherries
- 1/2 cupmaraschino cherries, halved
- 1/3 cupchocolate chips (semi-sweet or dark)
Instructions
- Prepare Your Baking Dish: Take your 8×8-inch baking dish and line it with parchment paper.
- Melt the Base: Combine the white chocolate chips and sweetened condensed milk in a saucepan over low heat.
- Add Flavor: Stir in the vanilla extract into the melted mixture.
- Incorporate the Cherries: Fold in dried cherries and half of the maraschino cherries.
- Pour and Spread: Pour the fudge mixture into the prepared baking dish.
- Top It Off: Sprinkle remaining maraschino cherries and chocolate chips on top.
- Chill to Set: Cover and refrigerate for at least 4 hours.
- Slice and Enjoy: Cut the fudge into squares and serve.
Notes
For thicker fudge, consider increasing the quantity of chocolate chips.
Nutrition
- Calories: 150 kcal
- Protein: 2 g

