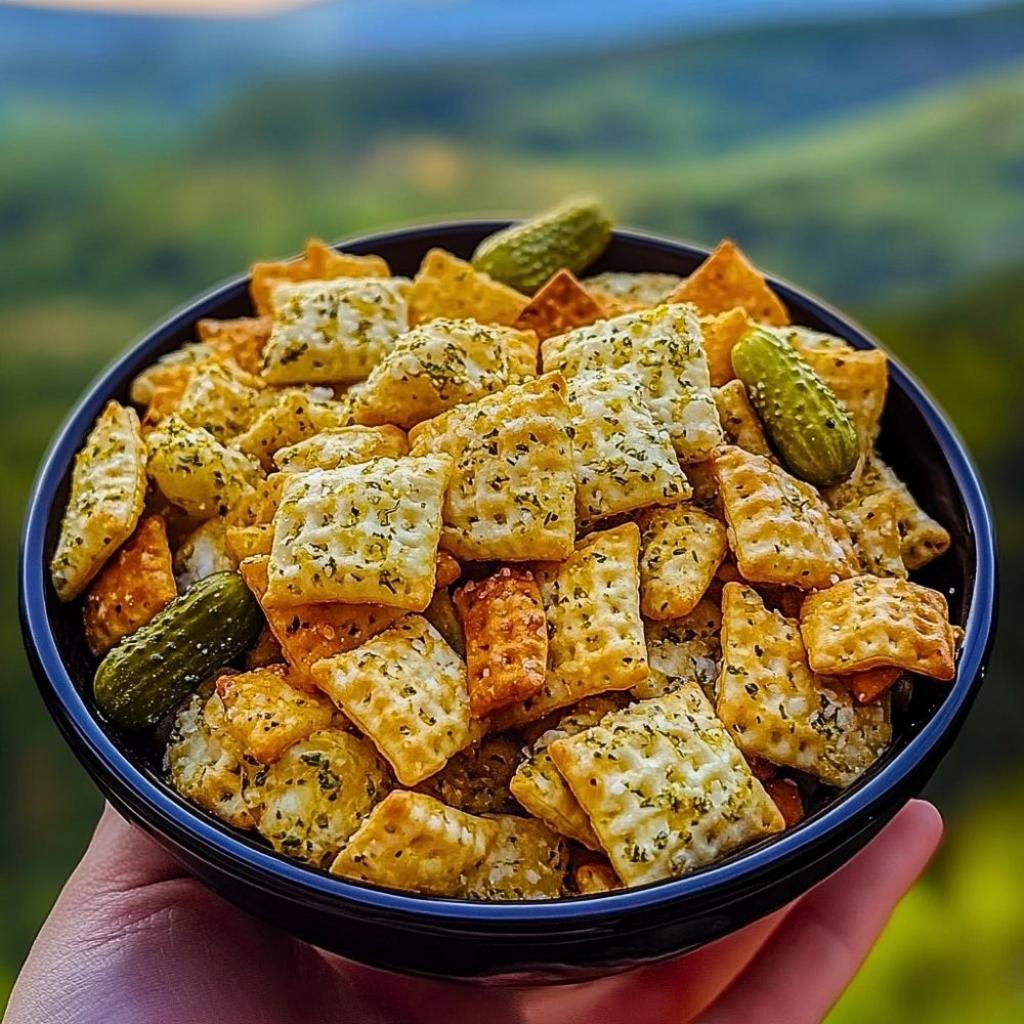
Dill Pickle Chex Mix

“`html
Table of Contents
Dill Pickle Chex Mix
Introduction: What is Dill Pickle Chex Mix?
Are you craving a snack that’s a symphony of savory, tangy, and crunchy flavors? Did you know that a significant percentage of snack enthusiasts actively seek out unique flavor profiles that go beyond the ordinary? If you find yourself reaching for something extraordinary, then Dill Pickle Chex Mix is about to become your new obsession! This isn’t just any snack mix; it’s an explosion of taste that dances on your palate, transforming simple cereal and pretzels into a gourmet treat. Imagine the familiar crunch of Chex, the salty bite of pretzels, and the zesty, herbaceous kick of dill pickle flavor – all baked into a cohesive, addictive snack. It’s the perfect appetizer for game nights, a delightful addition to potlucks, or even just a personal indulgence for when that craving hits. Forget boring chips; this dill pickle Chex mix is here to redefine your snacking experience.
Ingredients for This Tangy Treat
The magic of Dill Pickle Chex Mix lies in its ability to transform humble pantry staples into something truly special. The key is the flavorful coating that infuses every crunchy piece with that irresistible dill pickle essence.
Substitutions and Sensory Notes
- Cereals: You’ll need a base of crunchy cereals. Rice Chex, Corn Chex, and Wheat Chex are classics, offering a satisfying, airy crunch. You can also experiment with Cheerios or even some pretzels for varied textures. The textural contrast is key to a delightful mouthfeel.
- Pretzels: Small pretzel twists or sticks add a salty, malty dimension. Their robust structure holds up well to the coating.
- Peanuts: Roasted and salted peanuts (or any nuts you prefer, like cashews or almonds) provide a rich, buttery flavor and a firmer crunch, balancing the lightness of the cereals.
- Butter: Melted butter is the binder for our flavor concoction. It coats everything beautifully, ensuring the seasonings adhere. (Dairy-free butter or coconut oil can be substituted.)
- Dill Weed: Dried dill weed is essential for that signature herbaceous, slightly anise-like aroma and taste. Don’t skimp on this!
- Garlic Powder: Adds a savory depth that complements the dill and pickle notes.
- Onion Powder: Provides a milder, sweeter allium flavor than fresh onion.
- Dill Pickle Seasoning: This is the secret weapon! Look for a good quality dill pickle-flavored seasoning blend. These often contain salt, dill, vinegar powder, and other spices to mimic that tangy pickle punch. If you can’t find a blend, consider a combination of salt, a touch of citric acid (for tang), and extra dill.
- Salt: Adjust to taste, especially if your seasoning blend is already salty.
Timing is Everything
This Dill Pickle Chex Mix is surprisingly quick to prepare, with most of the time dedicated to hands-off baking. The prep is minimal – just mixing and coating. Compared to many homemade snack mixes that require multiple baking stages or complex processes, this recipe is a breeze. Most average snack mixes might take anywhere from 45 minutes to over an hour in total, considering prep and bake time, and this Dill Pickle Chex Mix fits perfectly within that expectation, offering a delicious payoff for your time investment.
Step-by-Step Instructions
Let’s get this tangy, crunchy goodness into your life! Follow these simple steps for Dill Pickle Chex Mix perfection.
Step 1: Preheat and Prep
First things first, let’s get your oven ready. Preheat it to 250°F (120°C). This low and slow baking method is crucial for drying out the mix without burning it, ensuring maximum crispiness. Now, grab a very large mixing bowl (think serving-bowl size, or even bigger if you have one). This is where the party will happen! Pour your chosen cereals (Chex, Cheerios, etc.), pretzels, and peanuts into this bowl. Give them a gentle toss to combine them loosely.
Step 2: The Pickle Magic
In a separate, smaller bowl or a liquid measuring cup, melt your butter (or chosen fat). Once melted, whisk in the dill weed, garlic powder, onion powder, dill pickle seasoning, and any additional salt you plan to use. Whisk it all together until it forms a beautifully aromatic, seasoned liquid. This is the flavor base that will transform your snack mix!
Step 3: Coating Time
Now for the fun part: coating! Slowly and evenly pour the melted butter mixture over the cereal, pretzels, and nuts in the large bowl. Using a large spoon or spatula, gently and persistently toss everything together. You want to ensure that every single piece gets coated in that delicious, tangy dill pickle mixture. Don’t be afraid to get in there and mix thoroughly – every morsel deserves that flavor!
Step 4: Bake to Perfection
Once everything is coated, carefully spread the mixture out in a single layer onto one or two large, rimmed baking sheets. Using two sheets helps with even baking and prevents overcrowding. Place the baking sheets in your preheated oven. Now, the waiting game begins: bake for 1 hour, stirring the mixture every 15 minutes. This stirring is vital! It ensures even toasting and prevents any one side from getting too brown or soggy. You’re looking for a dry, crisp texture.
Step 5: Cool and Enjoy
After one hour, remove the baking sheets from the oven. The Chex mix will feel slightly soft but will crisp up significantly as it cools. Let it cool completely on the baking sheets. Rushing this step means a less crispy final product. Once it’s reached room temperature, it’s ready to be devoured! It will be wonderfully crunchy, incredibly flavorful, and utterly addictive.
Nutritional Information
While specific values can vary based on exact ingredients and portion sizes, a typical serving of Dill Pickle Chex Mix is generally considered a source of carbohydrates and fats. It’s a treat, meant to be enjoyed in moderation.
- Calories: Approximately 150-200 per 1/4 cup serving.
- Fat: Primarily from butter and nuts.
- Carbohydrates: From the cereals and pretzels.
- Sodium: Can be significant due to pretzels, nuts, and seasoning. Adjustments can be made by using low-sodium ingredients.
This is an approximate guide; actual nutritional content will vary.
Healthier Alternatives for a Lighter Snack
You can lighten up this Dill Pickle Chex Mix without sacrificing too much flavor. Here are some swaps:
- Fat Source: Reduce the butter by half and use a heart-healthy oil like olive oil or avocado oil for the coating. You can also lightly spray the mix with cooking spray after tossing with a smaller amount of seasoned melted butter to get that coating effect with less fat.
- Cereals: Opt for whole-grain cereals like whole wheat Chex or even whole-grain O’s.
- Nuts: Use unsalted nuts or even seeds like sunflower or pumpkin seeds, which pack healthy fats and minerals.
- Sodium Control: Use unsalted cereals and pretzels, and carefully control the salt added in the seasoning blend.
Serving Suggestions
Dill Pickle Chex Mix is incredibly versatile! Serve it:
- As a crowd-pleasing appetizer at parties, game days, or holiday gatherings.
- In snack bags for road trips or packing lunches.
- Alongside sandwiches or salads for an extra crunch.
- As a savory addition to a charcuterie or grazing board.
Common Mistakes to Avoid
- Oven Temperature Too High: Baking at too high a temperature will burn the smaller pieces before the larger ones are toasted, leading to uneven crunch and burnt flavors.
- Not Stirring Enough: Skipping the regular stirring during baking is a recipe for unevenly toasted, potentially soggy spots.
- Over-seasoning: Taste your seasoning blend first. Some are very salty or potent, and you might need to adjust the added salt accordingly.
- Not Cooling Completely: This mix needs to cool entirely to achieve its signature crispiness. It will lose its crunch if stored or eaten too soon.
Storing Tips for Maximum Freshness
To keep your Dill Pickle Chex Mix perfectly crunchy:
- Allow the mix to cool COMPLETELY before storing. This is non-negotiable for crispiness.
- Store in an airtight container at room temperature.
- Avoid refrigerating, as this can lead to sogginess.
- Properly stored, it should stay fresh and crunchy for 1-2 weeks.
Frequently Asked Questions
Got questions about this tangy snack? Here are some answers!
***Can I make this mix without pretzels or nuts?***
Absolutely! If you have allergies or simply don’t prefer pretzels or nuts, feel free to omit them. You might need to slightly adjust the amount of cereal to maintain a similar volume, and ensure you still have enough components to absorb the coating.
***How do I make it ‘more dill pickle’ flavored?***
If you want an even stronger dill pickle kick, increase the amount of dill pickle seasoning and dried dill weed. You could also mix a tablespoon or two of pickle juice (well-drained) into the melted butter before adding the dry seasonings, though this might affect the baking time and crispiness slightly. Be mindful of adding too much moisture.
***What kind of dill pickle seasoning is best?***
Look for a seasoning blend specifically labeled “dill pickle” or “pickle ranch.” Many brands offer these in the spice aisle or online. If you can’t find one, you can create a similar flavor profile by combining salt, garlic powder, onion powder, a good amount of dried dill, and a pinch of citric acid for tanginess. Experiment to find your perfect balance!
***Can I add other ingredients?***
Go ahead and get creative! Some popular additions include other types of crackers (like Cheez-Its or Goldfish), various nuts (pecans, walnuts), and even small crunchy corn snacks. Just ensure they can withstand the low-heat baking process and you might need to adjust your stirring schedule slightly if you add ingredients with very different densities.
Conclusion
Dill Pickle Chex Mix is more than just a snack; it’s a flavor adventure! With its irresistible tangy, savory, and crunchy profile, it’s guaranteed to become a go-to for gatherings or quiet nights in. The simplicity of its preparation belies the depth of flavor it offers, making it a perfect recipe for beginners and experienced cooks alike. Ready to impress your taste buds and your guests? Give this Dill Pickle Chex Mix recipe a try—you won’t regret it!
PrintDill Pickle Chex Mix
ThisDill Pickle Chex Mixis a tangy, crunchy snack bursting with bold dill pickle flavor! With a mix of Chex cereal, pretzels, cheese crackers, and a zesty seasoning blend, it’s the perfect treat for game nights, parties, or anytime snacking. Simple to make and completely addictive, this recipe will be a hit with pickle lovers!
Ingredients
- 3 cupsRice Chex cereal
- 3 cupsCorn Chex cereal
- 2 cupsmini pretzels
- 2 cupscheese crackers (like Cheez-Its)
- 1/4 cupunsalted butter, melted
- 1/4 cupdill pickle juice
- 1packet (1 oz) ranch seasoning mix
- 1 tablespoondried dill weed
- 1 teaspoongarlic powder
- Optional: Small dill pickle chips or spears for garnish
Instructions
- Preheat the oven to250°F (120°C)and line a large baking sheet with parchment paper.
- In a large mixing bowl, combineRice Chex,Corn Chex,mini pretzels, andcheese crackers. Stir to mix.
- In a separate bowl, whisk togethermelted butter,dill pickle juice,ranch seasoning mix,dried dill weed, andgarlic powder.
- Pour the butter mixture over the Chex mix, stirring gently to coat everything evenly.
- Spread the mix evenly onto the prepared baking sheet in a single layer.
- Bake for45-50 minutes, stirring every 15 minutes, until the mix is golden and crispy.
- Remove from the oven and let cool completely. If desired, toss in small dill pickle chips or spears for extra flavor.
- Serve immediately or store in an airtight container for up to 1 week.
Notes
For an extra punch of dill flavor, add 1 teaspoon more of dried dill weed.
To add a little heat, sprinkle in 1/4 teaspoon cayenne pepper before baking.
This snack mix can be stored at room temperature for up to 1 week or frozen for up to 1 month.
“`