Chocolate Pie Crust Recipe: Easy and Delicious Guide
“`html
Table of Contents
- Hello and Welcome!
- The Foundation: Delicious Pie Crust Ingredients
- Timing is Everything: Pie Crust Prep and Bake
- Crafting the Perfect Chocolate Pie Crust: Step-by-Step
- Nutritional Snapshot
- Healthier Twists for Your Crust
- Serving Suggestions: A Perfect Pairing
- Common Pitfalls and How to Avoid Them
- Storing Your Delicious Crust
- Frequently Asked Questions
Chocolate Pie Crust Recipe: Easy and Delicious Guide
Hello and Welcome!
Hello and welcome! Today, we’re diving into the delightful world of baking with a special recipe that’s sure to become a staple in your dessert repertoire. Whether you’re a seasoned baker or a beginner looking for a new challenge, this Chocolate Pie Crust Recipe is perfect for you. Let’s get started! Did you know that a homemade pie crust can elevate your dessert from ordinary to extraordinary, with studies showing a significant preference for homemade pastry in taste tests? This chocolate version, in particular, adds a rich, decadent layer that complements a wide array of fillings. We’ll guide you through each step to ensure a flaky, tender, and utterly delicious crust every time. So, grab your apron and let’s get ready to create a masterpiece!
The Foundation: Delicious Pie Crust Ingredients
The secret to an exceptional pie crust lies in its simplicity and the quality of its ingredients. A good chocolate pie crust should be tender, flaky, and rich with a subtle chocolate flavor that doesn’t overpower your filling. Here’s what you’ll need:
All-Purpose Flour
Amount: 1 ½ cups
Sensory Description: Finely milled, soft, and pale. It’s the structure of our crust, providing a delicate framework.
Substitution: For a more rustic flavor, you can substitute up to half of the all-purpose flour with whole wheat flour. For gluten-free bakers, a good quality gluten-free all-purpose flour blend (with xanthan gum) works well.
Cold Butter (or Shortening)
Amount: ½ cup (1 stick)
Sensory Description: Cold, firm, and slightly waxy. Butter provides richness and a delightful crispness, while shortening contributes to flakiness and a tender crumb.
Substitution: You can use all butter for superior flavor, or a mix of butter and vegetable shortening (50/50) for extra flakiness. For a dairy-free option, use chilled coconut oil (solid state) or a vegan butter substitute.
Ice Water
Amount: 4-8 tablespoons
Sensory Description: Clear, refreshing, and noticeably cold. The ice water is crucial for creating steam pockets during baking, resulting in flakiness.
Substitution: If you’re out of ice water, regular cold water will work in a pinch, but make sure it’s as cold as possible. You can even add a few ice cubes to a small bowl of water and use that liquid.
Salt
Amount: ½ teaspoon
Sensory Description: Crystalline granules that spark flavor. Salt balances the sweetness and enhances the overall taste profile.
Substitution: Fine sea salt or kosher salt can be used. If using unsalted butter, you might want to increase the salt slightly.
Sugar (Optional)
Amount: 1 tablespoon
Sensory Description: Fine, sweet crystals that subtly enhance browning and add a hint of sweetness.
Substitution: Omit entirely if you prefer a less sweet crust, or if your filling is very sweet. A touch of honey or maple syrup can also be used for a different flavor profile, but it can affect the texture.
Cocoa Powder
Amount: 2 tablespoons unsweetened cocoa powder
Sensory Description: Deep brown, fine powder with a rich, earthy aroma. This is what gives our crust its chocolatey goodness.
Substitution: Use Dutch-processed cocoa for a darker color and smoother flavor. Natural unsweetened cocoa powder will also work.
Timing is Everything: Pie Crust Prep and Bake
This recipe is designed for efficiency and delicious results. Here’s a breakdown:
Compared to average pie crust recipes, this one is quite standard in its prep and chill times. The longer chill time is essential for a well-formed crust that doesn’t shrink during baking. Blind baking, if required, adds about 15-20 minutes to the active time.
Crafting the Perfect Chocolate Pie Crust: Step-by-Step
Step 1: Combine Dry Ingredients
In a large mixing bowl, whisk together the flour, cocoa powder, salt, and sugar (if using). Ensure there are no lumps in the cocoa powder for a uniform chocolate distribution. Give it a good mix until everything is evenly incorporated. This is where the subtle chocolate notes begin to develop!
Step 2: Cut in the Fat
Add the cold, cubed butter (or shortening/coconut oil) to the dry ingredients. Using a pastry blender, two knives, or your fingertips, cut the fat into the flour mixture until it resembles coarse meal with some pea-sized pieces of fat remaining. These larger pieces are key to achieving flaky layers. Work quickly to prevent the fat from melting.
Step 3: Add Ice Water
Gradually add the ice water, one tablespoon at a time, mixing gently after each addition until the dough just begins to come together. You might not need all the water, or you might need a touch more. The dough should be moist enough to hold together when squeezed, but not sticky.
Step 4: Form the Dough
Turn the dough out onto a lightly floured surface. Gently gather it into a ball. Do NOT overwork the dough, as this will develop the gluten and result in a tough crust. Just bring it together enough so it’s cohesive.
Step 5: Chill the Dough
Flatten the dough into a disk, wrap it tightly in plastic wrap, and refrigerate for at least 30 minutes (or up to 2 days). This allows the gluten to relax and the fat to firm up, making it easier to roll and preventing shrinkage during baking.
Step 6: Roll Out the Dough
On a lightly floured surface, roll out the chilled dough into a circle about 12 inches in diameter and about ⅛ inch thick. Work from the center outwards, rotating the dough occasionally to prevent sticking. If the dough cracks, simply press it back together. If it becomes too soft, pop it back in the fridge for a few minutes.
Step 7: Transfer to Pie Pan
Carefully transfer the rolled-out dough to your 9-inch pie plate. You can do this by gently folding it in half or quarters and unfolding it in the pan, or by loosely rolling it onto your rolling pin and unrolling it over the pie plate.
Step 8: Crimp the Edges
Trim any excess dough, leaving about a ½-inch overhang. Fold this overhang under and crimp the edges decoratively. You can use your fingers, a fork, or a pastry crimper. A nicely crimped edge not only looks beautiful but also helps seal the crust.
Step 9: Bake Your Crust
For most pies, you’ll want to blind bake your crust. Prick the bottom of the crust all over with a fork. Line the crust with parchment paper and fill it with pie weights, dried beans, or rice. Bake in a preheated oven at 375°F (190°C) for 15 minutes. Remove the parchment and weights, and bake for another 5-10 minutes until the crust is dry and set. If you’re using it for a no-bake pie, you can skip the blind baking and simply press the formed crust into the pan and chill it until firm.
Nutritional Snapshot
This nutritional information is an estimate per serving (assuming 8 servings per pie crust) and can vary based on exact ingredients used.
- Calories: ~150-200 kcal
- Fat: ~8-12g
- Carbohydrates: ~18-22g
- Protein: ~2-3g
- Fiber: ~1-2g
Healthier Twists for Your Crust
You can make this chocolate pie crust a bit healthier without sacrificing too much flavor:
- Whole Wheat Flour: Substitute half the all-purpose flour with whole wheat for added fiber and nutrients.
- Reduced Fat: Use a combination of butter and Greek yogurt or a lighter shortening.
- Natural Sweeteners: If you must add sugar, opt for a tablespoon of maple syrup or a few drops of stevia, though this might affect texture slightly.
- Portion Control: Remember that how you serve it (e.g., smaller slices) is as important as the crust itself!
Serving Suggestions: A Perfect Pairing
This chocolate pie crust is incredibly versatile. It’s phenomenal with:
- Classic chocolate cream pie
- Peanut butter pie
- Cheesecake
- Fruit pies (like cherry or raspberry)
- Mousse-filled pies
For an extra touch, dust the rim with cocoa powder or finely chopped chocolate after filling.
Common Pitfalls and How to Avoid Them
- Tough Crust: Overworking the dough develops gluten. Mix and handle as little as possible.
- Shrinking Crust: Not chilling the dough enough, or not docking (pricking) the bottom before baking. Chill thoroughly and crimp well.
- Soggy Bottom: Not blind baking for a filling that is moist or baked separately. Ensure your crust is fully baked and cooled before adding no-bake fillings.
- Cracking: Dough that is too dry. Add water slowly and ensure it just comes together.
Storing Your Delicious Crust
Unbaked Dough: Wrap tightly in plastic wrap and store in the refrigerator for up to 2 days, or freeze for up to 2 months. Thaw in the refrigerator before using.
Baked Crust: Store cooled, baked pie crust covered at room temperature for up to 2 days. If storing a filled pie, follow the specific pie’s storage instructions as the filling can affect crust longevity.
Frequently Asked Questions
Can I make this chocolate pie crust ahead of time?
Yes! The dough can be made up to 2 days in advance and stored in the refrigerator, or frozen for up to 2 months.
Why is my pie crust tough?
Toughness is usually caused by overworking the dough, which develops gluten. Be gentle and mix only until combined.
What’s the best fat for a flaky crust?
Cold butter is excellent for flavor, while shortening is known for superior flakiness. A 50/50 mix often yields the best of both worlds.
Can I use this crust for a no-bake pie recipe?
Absolutely! For no-bake pies, you can press the dough into the pie plate and chill it until firm, or briefly bake it at 350°F (175°C) for about 10-15 minutes until it’s lightly toasted.
Conclusion
There you have it – a simple yet incredibly satisfying Chocolate Pie Crust Recipe that will elevate any dessert. With its tender texture and rich chocolate undertones, it’s the perfect base for your favorite sweet creations. Don’t be afraid to experiment, and most importantly, have fun in the kitchen!
Ready to bake? Give this recipe a try and let us know how it turned out in the comments below! We’d love to see your creations!
Chocolate Pie Crust Recipe: Easy and Delicious Guide
Hello and welcome! Today, we’re diving into the delightful world of baking with a special recipe that’s sure to become a staple in your dessert repertoire. Whether you’re a seasoned baker or a beginner looking for a new challenge, thisChocolate Pie Crust Recipeis perfect for you. Let’s get started
Ingredients
- Chocolate Crust:1 ½ cupschocolate cookie crumbs¼ cupmelted butter
- 1 ½ cupschocolate cookie crumbs
- ¼ cupmelted butter
- Cherry Whipped Cream:1 cupheavy cream2 tbsppowdered sugar1 cupfinely chopped or pureed cherries
- 1 cupheavy cream
- 2 tbsppowdered sugar
- 1 cupfinely chopped or pureed cherries
- Vanilla Whipped Cream:1 cupheavy cream2 tbsppowdered sugar1 tspvanilla extract
- 1 cupheavy cream
- 2 tbsppowdered sugar
- 1 tspvanilla extract
Instructions
- Prepare the Chocolate Crust:Mix the chocolate cookie crumbs with melted butter until well combined.Press the mixture into the bottom of a pie dish or springform pan.Bake at 350°F (175°C) for 10 minutes. Let it cool completely.
- Mix the chocolate cookie crumbs with melted butter until well combined.
- Press the mixture into the bottom of a pie dish or springform pan.
- Bake at 350°F (175°C) for 10 minutes. Let it cool completely.
- Make the Cherry Whipped Cream:Whip the heavy cream and powdered sugar until soft peaks form.Gently fold in the chopped or pureed cherries.
- Whip the heavy cream and powdered sugar until soft peaks form.
- Gently fold in the chopped or pureed cherries.
- Make the Vanilla Whipped Cream:Whip the heavy cream, powdered sugar, and vanilla extract until soft peaks form.
- Whip the heavy cream, powdered sugar, and vanilla extract until soft peaks form.
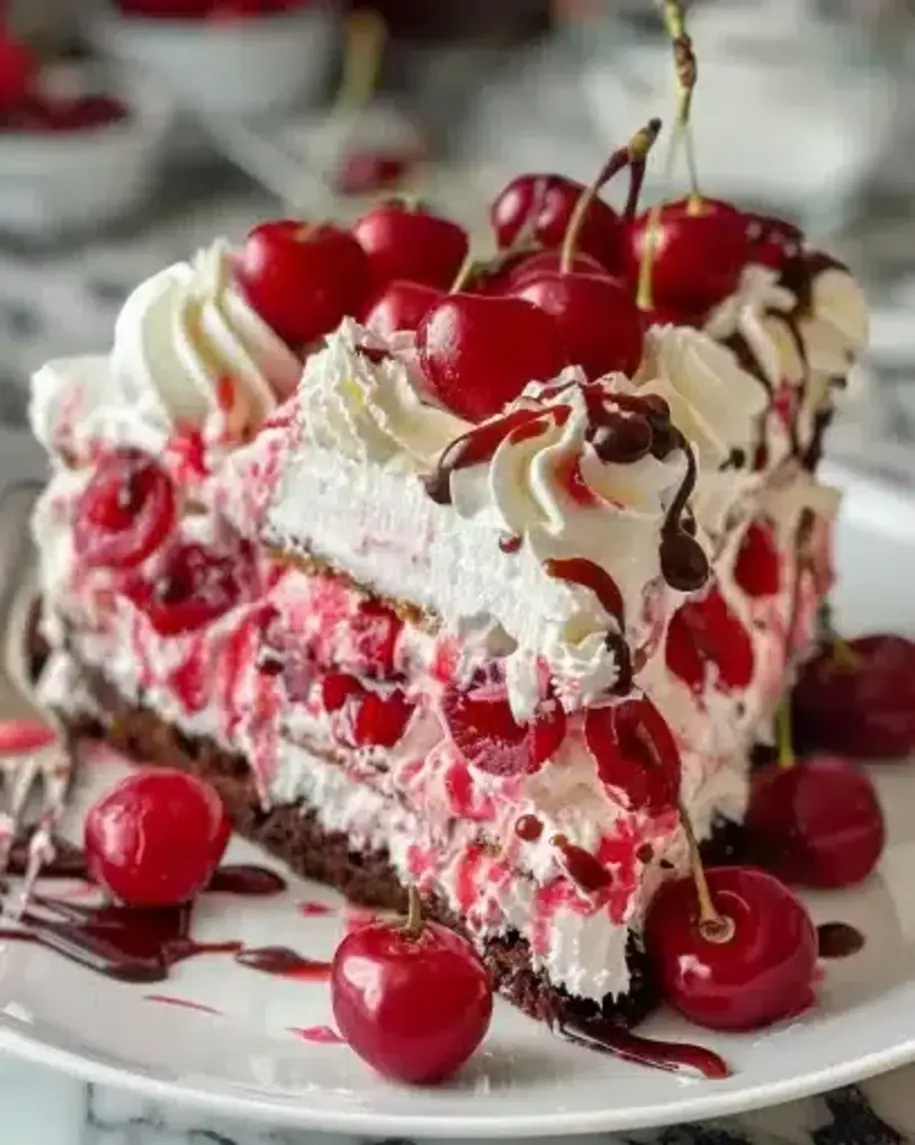
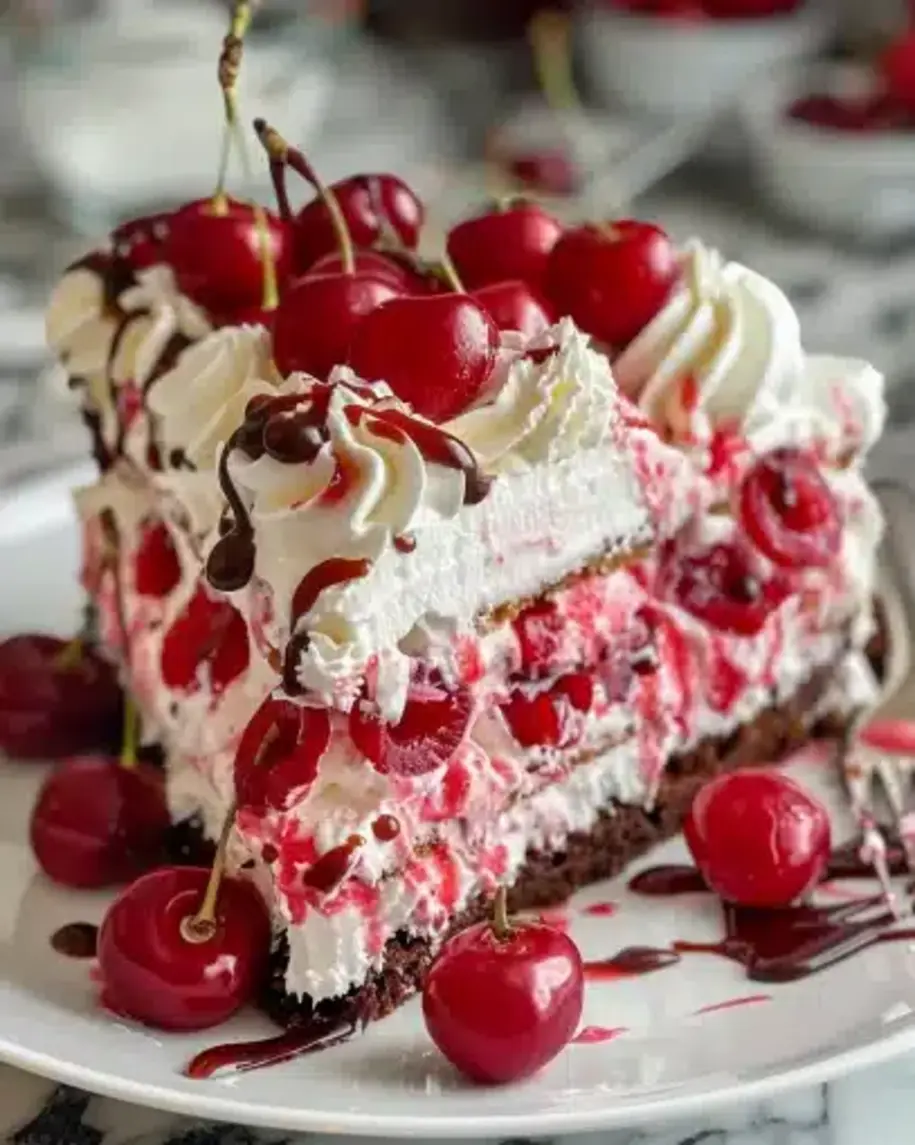
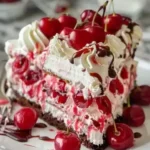
- Assemble the Cake:Spread a layer of cherry whipped cream over the cooled chocolate crust.Gently spread a layer of vanilla whipped cream over the cherry layer.Repeat the layers if desired, ending with a final layer of vanilla whipped cream on top.Garnish with chocolate shavings, fresh cherries, or a drizzle of chocolate sauce.
- Spread a layer of cherry whipped cream over the cooled chocolate crust.
- Gently spread a layer of vanilla whipped cream over the cherry layer.
- Repeat the layers if desired, ending with a final layer of vanilla whipped cream on top.
- Garnish with chocolate shavings, fresh cherries, or a drizzle of chocolate sauce.
- Chill and Serve:Chill the cake in the refrigerator for at least a few hours to allow the flavors to meld together.Slice and serve cold.
- Chill the cake in the refrigerator for at least a few hours to allow the flavors to meld together.
- Slice and serve cold.
Notes
Ensure the whipped creams are well-chilled before assembly for better texture.
Use fresh, ripe cherries for the best flavor.
“`