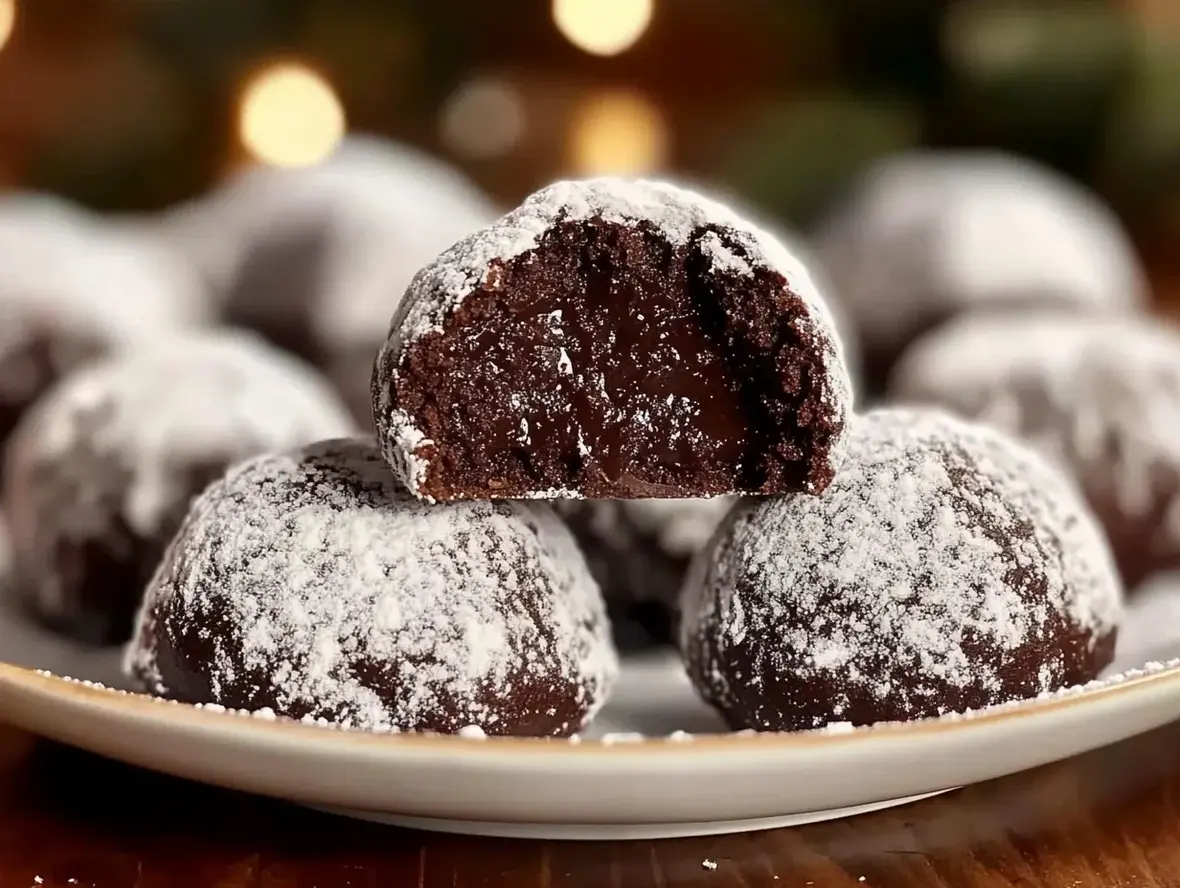
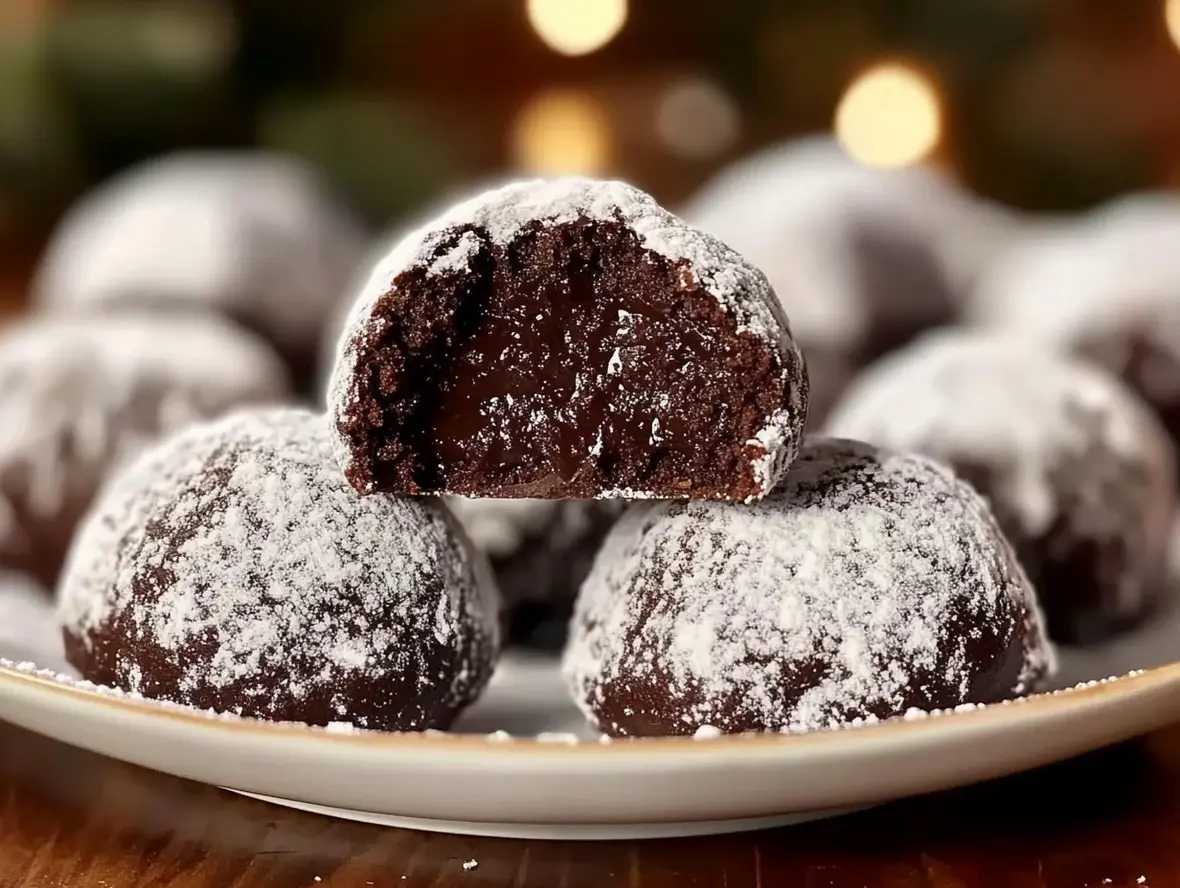
Chocolate Snowball Cookies: Your Go-To Holiday Treat!
“`html
Table of Contents
Chocolate Snowball Cookies: Your Go-To Holiday Treat!
Ingredients
Crafting the perfect Chocolate Snowball Cookie is all about balancing rich flavors and a delicate texture. Here’s what you’ll need to create these delightful morsels. We’ve organized them by what they contribute to the magic!
Dry Ingredients
- 2 ¼ cups all-purpose flour: Provides the structure. Sifted flour ensures a lighter cookie.
- ⅔ cup unsweetened cocoa powder: The heart of our chocolate flavor, choose a good quality one for depth.
- ½ teaspoon baking soda: Helps with leavening and gives a slight lift.
- ¼ teaspoon salt: Enhances all the other flavors, especially the chocolate.
Wet Ingredients
- 1 cup (2 sticks) unsalted butter, softened: The creamy base. Use real butter for the best flavor and texture; it should be soft but not melted.
- ¾ cup granulated sugar: Sweetness and tenderness.
- 1 large egg: Binds everything together and adds richness.
- 1 teaspoon vanilla extract: For that classic comforting aroma and taste.
- ¼ cup milk (whole milk recommended): For moisture and a tender crumb.
Optional Additions
- ½ cup powdered sugar for dusting: Creates the “snowball” effect.
- Optional: ½ cup chocolate chips or mini chocolate chips for extra chocolatey goodness.
- Optional: A pinch of espresso powder dissolved in the milk to intensify the chocolate flavor.
Substitutions: If you’re out of all-purpose flour, a 1:1 gluten-free baking blend can often work, though texture might vary slightly. For the milk, any dairy or non-dairy milk like almond or oat milk will do. Unsalted butter can be substituted with salted, but you’ll want to omit the ¼ tsp salt from the dry ingredients.
Timing
20 minutes
10-12 minutes
30-32 minutes (plus cooling time)
This recipe is wonderfully efficient for holiday baking, coming in at about 30-32 minutes of active time. Compared to many elaborate holiday cookies that can take hours, Chocolate Snowball Cookies are a speedy win, allowing you to create a delightful festive treat without a huge time commitment. The cooling time is also essential for them to hold their shape, so factor that in!
Step-by-Step Instructions
Let’s get baking! Follow these simple steps to create your perfect batch of Chocolate Snowball Cookies.
Step 1: Preheat and Prep
First things first, let’s get our oven ready for action. Preheat your oven to 350°F (175°C). Then, line two baking sheets with parchment paper. This prevents sticking and makes cleanup a breeze. You can also lightly grease them if you don’t have parchment paper.
Step 2: Cream the Butter and Sugar
In a large mixing bowl, or the bowl of your stand mixer fitted with the paddle attachment, cream together the softened butter and granulated sugar. Beat them on medium speed until the mixture is light, fluffy, and pale yellow. This usually takes about 3-4 minutes and is crucial for that tender cookie texture we love!
Step 3: Add Wet Ingredients
Now, it’s time to add the egg and vanilla extract to the creamed butter and sugar mixture. Beat on low speed until just combined, making sure to scrape down the sides of the bowl as needed. In a separate small bowl or measuring cup, whisk together the milk and optional dissolved espresso powder (if using). Ensure the milk is added gradually to avoid curdling.
Step 4: Combine Dry Ingredients to Wet
In a medium bowl, whisk together the sifted flour, unsweetened cocoa powder, baking soda, and salt. Gradually add this dry mixture to the wet ingredients, mixing on low speed until just combined and no dry streaks remain. Be careful not to overmix, as this can lead to tough cookies. If you’re adding chocolate chips, gently fold them in now.
Step 5: Form the Snowballs
Now for the fun part! Roll the cookie dough into small balls, about 1 inch in diameter. You can use a cookie scoop for consistency. Place these dough balls about 2 inches apart on your prepared baking sheets. They don’t spread much, so precise spacing isn’t as critical as with some other cookies.
Step 6: Bake to Perfection
Bake the cookies in the preheated oven for 10-12 minutes. You’re looking for the edges to be set but the centers to still be slightly soft. They will continue to bake a little on the hot baking sheet after you remove them from the oven. Avoid overbaking, or they’ll lose their signature tender texture!
Step 7: Cool and Coat
Let the cookies cool on the baking sheets for about 5 minutes before transferring them to a wire rack to cool completely. Once they are fully cooled (this is important – warm cookies will absorb too much powdered sugar and get sticky!), place the powdered sugar in a shallow bowl and gently roll each cookie in the sugar until well coated, like freshly fallen snow. If you want a thicker coating, you can roll them twice.
Nutritional Information
Please note: Nutritional information is an estimate and can vary based on ingredients and portion sizes.
- Calories: Approximately 150-180 per cookie (without optional additions)
- Fat: 8-10g
- Carbohydrates: 18-22g
- Sugar: 10-14g
- Protein: 2-3g
Healthier Alternatives
Want to enjoy these delightful treats with a lighter touch? Here are a few swaps that still deliver on flavor:
- Reduced Fat Butter: While butter is key for texture, using a reduced-fat butter or a blend can sometimes work, though it may alter the chewiness slightly.
- Whole Wheat or Almond Flour: Substituting a portion of the all-purpose flour with whole wheat flour or almond flour can add fiber and nutrients. Start by replacing 1/4 to 1/3 of the flour.
- Natural Sweetener: Consider using maple syrup or coconut sugar as a partial substitute for granulated sugar, keeping in mind this may affect texture and color. A good starting point is to replace about half of the granulated sugar.
- Darker Cocoa Powder: Use a Dutch-processed cocoa powder for a richer, less bitter chocolate flavor, which might allow you to enjoy them more with less added sweetness.
Serving Suggestions
These Chocolate Snowball Cookies are incredibly versatile! They are:
- Perfect for Holiday Cookie Platters: Their classic snowy look makes them a festive addition.
- Wonderful with Hot Beverages: Pair them with hot chocolate, coffee, or tea for a cozy treat.
- Great for Gifting: Package them in cute tins or cellophane bags tied with ribbons for a homemade gift that’s always appreciated.
- A Delightful Afternoon Snack: Enjoy one (or two!) with a glass of cold milk.
Common Mistakes to Avoid
To ensure your Chocolate Snowball Cookies turn out perfectly every time, keep these common pitfalls in mind:
- Overmixing the Dough: This develops the gluten too much, resulting in tough, dense cookies. Mix dry ingredients until just combined.
- Using Cold Butter: Softened butter is essential for achieving that light, creamy texture. Cold butter won’t cream properly.
- Overbaking: Chocolate cookies can be deceiving as they don’t brown like lighter ones. Overbaking them will make them dry and crumbly instead of tender.
- Rolling in Powdered Sugar While Warm: The heat will melt the powdered sugar, creating a sticky mess rather than a delicate coating. Ensure cookies are completely cool.
- Not Sifting Dry Ingredients: Sifting flour and cocoa powder prevents lumps and ensures a smoother, more uniform cookie batter.
Storing Tips
Proper storage is key to keeping your Chocolate Snowball Cookies fresh and delicious:
- Airtight Container: Once completely cooled and dusted with powdered sugar, store them in an airtight container at room temperature. They should last for up to 3-4 days.
- Avoid Moisture: Because they are coated in powdered sugar, avoid storing them with very moist items, as this can melt the sugar coating.
- Freezing: You can freeze the baked and cooled (but undusted) cookies for up to 3 months. Store them in an airtight container or freezer bag. When ready to serve, thaw them completely, then roll in powdered sugar. Alternatively, freeze the dough balls before baking (they may need an extra minute or two in the oven), then bake and coat as usual.

Frequently Asked Questions (FAQs)
What is the best way to get a consistent snowball shape?
Using a small cookie scoop or a tablespoon to measure the dough, then rolling it gently between your palms can help create uniformly sized balls. Aim for about 1 inch in diameter.
Can I make these ahead of time for a party?
Absolutely! You can bake them a day or two in advance and store them in an airtight container. Dust with powdered sugar just before serving for the freshest look. You can also freeze the baked cookies (undusted) for longer storage.
Why are my cookies spreading too much?
This usually happens if your butter is too soft or melted, or if you’ve overmixed the dough after adding the flour. Ensure your butter is softened but not greasy, and mix only until just combined.
Can I skip the powdered sugar coating?
You can! The powdered sugar is what gives them the “snowball” appearance and name. However, if you prefer them without, they are still delicious as is, perhaps with a dusting of cocoa powder or a light drizzle of white chocolate!
Ready to make your holidays even sweeter? Bookmark this page, gather your ingredients, and get ready to create a batch of Chocolate Snowball Cookies that will delight everyone. Don’t forget to share your creations with us on social media using #ChocolateSnowballs!
Chocolate Snowball Cookies
TheseChocolate Snowball Cookiesare buttery, melt-in-your-mouth treats with a rich cocoa flavor and a snowy powdered sugar coating. Perfect for the holidays or any occasion, these cookies are easy to make and customizable for gluten-free or nut-free diets.
Ingredients
- 1 cupunsalted butter, softened½ cuppowdered sugar (plus extra for rolling)1 teaspoonvanilla extract2 cupsall-purpose flour¼ cupcocoa powder½ teaspoonsalt1 cupfinely chopped nuts (optional, such as pecans or walnuts)
- ½ cuppowdered sugar (plus extra for rolling)1 teaspoonvanilla extract2 cupsall-purpose flour¼ cupcocoa powder½ teaspoonsalt1 cupfinely chopped nuts (optional, such as pecans or walnuts)
- 1 teaspoonvanilla extract2 cupsall-purpose flour¼ cupcocoa powder½ teaspoonsalt1 cupfinely chopped nuts (optional, such as pecans or walnuts)
- 2 cupsall-purpose flour¼ cupcocoa powder½ teaspoonsalt1 cupfinely chopped nuts (optional, such as pecans or walnuts)
- ¼ cupcocoa powder½ teaspoonsalt1 cupfinely chopped nuts (optional, such as pecans or walnuts)
- ½ teaspoonsalt1 cupfinely chopped nuts (optional, such as pecans or walnuts)
- 1 cupfinely chopped nuts (optional, such as pecans or walnuts)
Instructions
- 1️⃣Prepare the Oven and Baking Sheet:Preheat your oven to 350°F (175°C). Line a baking sheet with parchment paper.2️⃣Mix the Dough:In a large mixing bowl, cream the softened butter and powdered sugar together until light and fluffy. Mix in the vanilla extract.3️⃣Add Dry Ingredients:Gradually sift in the flour, cocoa powder, and salt. Mix until the dough is smooth and fully combined.4️⃣Fold in Nuts (Optional):If using nuts, gently fold them into the dough until evenly distributed.5️⃣Shape the Cookies:Roll the dough into 1-inch balls and place them on the prepared baking sheet, leaving about 1 inch of space between each cookie.6️⃣Bake the Cookies:Bake in the preheated oven for 12–15 minutes, or until the edges are set. Allow the cookies to cool on the baking sheet for 5 minutes.7️⃣Add the “Snow” Coating:While the cookies are still warm, roll them in powdered sugar for the first snowy coating. Once cooled, roll them again in powdered sugar for a festive, snowball-like finish.
- 2️⃣Mix the Dough:In a large mixing bowl, cream the softened butter and powdered sugar together until light and fluffy. Mix in the vanilla extract.
- 3️⃣Add Dry Ingredients:Gradually sift in the flour, cocoa powder, and salt. Mix until the dough is smooth and fully combined.4️⃣Fold in Nuts (Optional):If using nuts, gently fold them into the dough until evenly distributed.5️⃣Shape the Cookies:Roll the dough into 1-inch balls and place them on the prepared baking sheet, leaving about 1 inch of space between each cookie.6️⃣Bake the Cookies:Bake in the preheated oven for 12–15 minutes, or until the edges are set. Allow the cookies to cool on the baking sheet for 5 minutes.7️⃣Add the “Snow” Coating:While the cookies are still warm, roll them in powdered sugar for the first snowy coating. Once cooled, roll them again in powdered sugar for a festive, snowball-like finish.
- 4️⃣Fold in Nuts (Optional):If using nuts, gently fold them into the dough until evenly distributed.5️⃣Shape the Cookies:Roll the dough into 1-inch balls and place them on the prepared baking sheet, leaving about 1 inch of space between each cookie.6️⃣Bake the Cookies:Bake in the preheated oven for 12–15 minutes, or until the edges are set. Allow the cookies to cool on the baking sheet for 5 minutes.7️⃣Add the “Snow” Coating:While the cookies are still warm, roll them in powdered sugar for the first snowy coating. Once cooled, roll them again in powdered sugar for a festive, snowball-like finish.
- 5️⃣Shape the Cookies:Roll the dough into 1-inch balls and place them on the prepared baking sheet, leaving about 1 inch of space between each cookie.
- 6️⃣Bake the Cookies:Bake in the preheated oven for 12–15 minutes, or until the edges are set. Allow the cookies to cool on the baking sheet for 5 minutes.7️⃣Add the “Snow” Coating:While the cookies are still warm, roll them in powdered sugar for the first snowy coating. Once cooled, roll them again in powdered sugar for a festive, snowball-like finish.
- 7️⃣Add the “Snow” Coating:While the cookies are still warm, roll them in powdered sugar for the first snowy coating. Once cooled, roll them again in powdered sugar for a festive, snowball-like finish.
Notes
For a festive twist, add a pinch of cinnamon or peppermint extract to the dough.Store the cookies in an airtight container for up to a week or freeze for longer storage.
Store the cookies in an airtight container for up to a week or freeze for longer storage.
“`