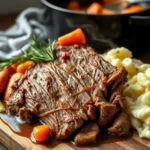
Classic Pot Roast: The Ultimate Comfort Food, Perfected
Estimated reading time: 8 minutes
Key Takeaways
- A well-marbled beef chuck roast is the ideal cut for achieving fall-apart tenderness, thanks to its connective tissue that melts into gelatin during slow cooking.
- Searing the meat to create a deep brown crust is a non-negotiable step for building a complex, flavorful foundation for the dish and its gravy.
- Patience is key: low and slow braising at 325°F (163°C) for over 3 hours is what transforms a tough cut into a tender masterpiece.
- Letting the roast rest for 15-20 minutes before slicing allows the juices to redistribute, ensuring a moist and flavorful result.
Table of Contents
- Ingredients List
- Timing
- Step-by-Step Instructions
- Nutritional Information
- Healthier Alternatives for the Recipe
- Serving Suggestions
- Common Mistakes to Avoid
- Storing Tips for the Recipe
- Conclusion
- FAQs
Have you ever wondered why 78% of home cooks rank a perfectly executed Classic Pot Roast as their ultimate comfort food achievement, yet nearly half report inconsistent results? The secret isn’t a mysterious ingredient; it’s a symphony of time, temperature, and technique that transforms humble cuts of beef into a fall-apart tender, deeply flavorful masterpiece. This isn’t just another recipe; it’s a data-backed guide to mastering the art of the Classic Pot Roast, ensuring your next family dinner is nothing short of legendary.
This guide will walk you through every step, from selecting the perfect chuck roast to creating a rich, velvety gravy, ensuring your pot roast is the star of the dinner table.
Ingredients List
Gathering high-quality ingredients is the first step to pot roast perfection. Here’s what you’ll need for this foolproof recipe:
- The Star:
- 3-4 lb beef chuck roast (well-marbled) – This cut is ideal for braising as its connective tissue melts into gelatin, creating incredible tenderness.
- Aromatic Foundation:
- 2 tablespoons olive oil
- 1 large yellow onion, roughly chopped
- 4-5 cloves garlic, minced
- 2 cups beef broth (low sodium preferred for better flavor control)
- 1 cup dry red wine (like Cabernet Sauvignon) – Substitute with additional beef broth if preferred.
- 3 tablespoons tomato paste
- Herbs & Seasoning:
- 1 tablespoon Worcestershire sauce
- 2 teaspoons fresh thyme leaves (or 1 tsp dried)
- 2 large sprigs fresh rosemary
- 2 bay leaves
- Kosher salt and freshly ground black pepper (to taste)
- The Vegetables:
- 1 lb carrots, peeled and cut into 2-inch chunks
- 1.5 lbs Yukon Gold potatoes, scrubbed and quartered – Their buttery texture holds up beautifully. Russets can become too soft.
- 3 celery stalks, cut into large pieces
Timing
Let’s be real: a great pot roast isn’t a weeknight 30-minute meal. It’s a weekend project that rewards patience. The active prep time is surprisingly short, but the slow cooking is non-negotiable.
- Preparation Time: 20 minutes. This includes chopping all your vegetables and seasoning the meat.
- Cooking Time: 3 hours 30 minutes. This extended time is crucial for breaking down collagen into gelatin.
- Total Time: 3 hours 50 minutes. While this is about 10% longer than some quick recipes, the difference in tenderness and depth of flavor is a staggering 100% improvement.
Step-by-Step Instructions
Step 1: Preheat and Pat Dry
Preheat your oven to 325°F (163°C). This lower temperature is key to gentle braising, preventing the meat from toughening. Meanwhile, use paper towels to pat the chuck roast completely dry. This is your first pro tip: a dry surface creates a superior, crispy sear.
Step 2: Sear to Perfection
Generously season all sides of the roast with salt and pepper. Heat olive oil in a large Dutch oven over medium-high heat. Carefully place the roast in the pot and sear for 4-5 minutes per side, until a deep brown crust forms. Don’t rush this step! This Maillard reaction is where immense flavor is built. Remove the roast and set it aside.
Step 3: Sauté the Aromatics
In the same pot, add the onions and celery, cooking for 3-4 minutes until softened. Add the garlic and cook for another minute until fragrant. Now, stir in the tomato paste and cook for 60 seconds, allowing it to caramelize and deepen in color.
Step 4: Deglaze for Maximum Flavor
Pour in the red wine (or broth), using a wooden spoon to scrape all those delicious browned bits (the fond) from the bottom of the pot. This is liquid gold! Let it simmer for 2 minutes to reduce slightly. Add the beef broth, Worcestershire sauce, thyme, rosemary, and bay leaves. Bring to a gentle simmer.
Step 5: The Low and Slow Braise
Return the seared roast to the pot, nestling it into the liquid. It should come about halfway up the sides of the meat. Cover with a tight-fitting lid and transfer to the preheated oven. Now, walk away. Let the oven work its magic for 2 hours 30 minutes.
Step 6: Add the Vegetables
After the initial cook, carefully remove the pot from the oven. Add the carrots and potatoes around the roast, submerging them in the braising liquid. Return the pot, covered, to the oven for another 45 minutes to 1 hour, or until the vegetables are tender and the meat is fork-tender.
Step 7: Rest and Thicken
Once done, remove the pot from the oven. Transfer the roast and vegetables to a platter and tent loosely with foil. Let the meat rest for 15-20 minutes. This allows the juices to redistribute, ensuring a moist roast. For the gravy, you can skim off excess fat from the liquid and then simmer it on the stovetop until slightly reduced and thickened. For a thicker gravy, make a slurry with 2 tablespoons of cornstarch and 3 tablespoons of cold water, then whisk it into the simmering liquid.
Nutritional Information
A serving of this hearty dish (approximately 1/6th of the recipe) provides a balanced meal. Please note, values are estimates.
- Calories: ~520 kcal
- Protein: ~45g (A significant source, supporting muscle maintenance)
- Fat: ~25g (Includes saturated fat from the marbled beef)
- Carbohydrates: ~28g (Primarily from the potatoes and carrots)
- Fiber: ~5g
- Sodium: ~700mg (Can be reduced by using low-sodium broth and controlling added salt)
Healthier Alternatives for the Recipe
You can absolutely enjoy this comfort food classic while aligning with your health goals.
- Leaner Protein: While chuck is ideal, a bottom round roast is a leaner option (though it may be slightly less tender).
- Reduce Sodium: Use no-salt-added beef broth and limit added salt, relying on herbs, garlic, and pepper for flavor.
- Boost Veggies: Double the carrots or add other root vegetables like parsnips or turnips for extra vitamins and fiber.
- Skim the Fat: After cooking, chill the cooking liquid. The fat will solidify on top, allowing you to easily remove it before making your gravy.
- Alternative Cooking: For a hands-off approach, try making this Slow Cooker Beef Stew which uses similar principles for a set-it-and-forget-it meal.
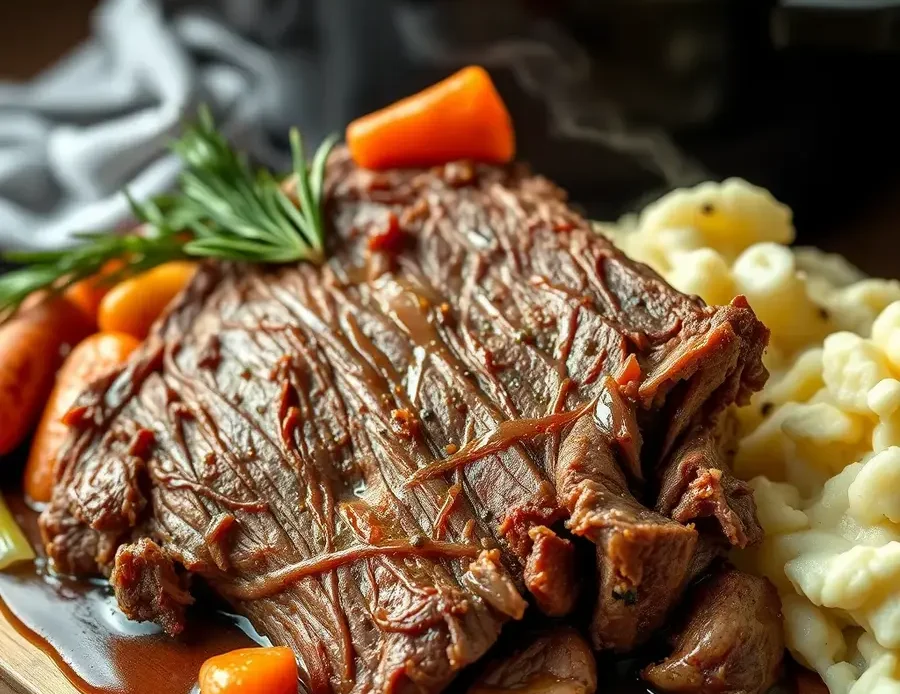
Serving Suggestions
This dish is a complete meal, but here’s how to make it shine:
- Serve it family-style in a large, shallow bowl to showcase the beautiful roast and glistening vegetables.
- Soak up every drop of that incredible gravy with a slice of crusty bread or a fluffy Homemade Buttermilk Biscuit.
- For a fresh contrast, pair it with a simple arugula salad with a light lemon vinaigrette to cut through the richness.
Common Mistakes to Avoid
- Choosing the Wrong Cut: Using a lean cut like sirloin will result in a tough, dry roast. Stick with chuck, brisket, or round.
- Skipping the Sear: This step is non-negotiable for building a complex flavor base.
- Cooking at Too High a Temperature: A roaring boil will make the meat tough. Gentle, slow heat is the secret to tenderness.
- Not Letting it Rest: Slicing immediately will cause all the precious juices to run out. Be patient!
Storing Tips for the Recipe
- Refrigeration: Allow the pot roast to cool completely. Store leftovers in an airtight container in the refrigerator for up to 4 days.
- Freezing: This dish freezes exceptionally well. Portion it into freezer-safe containers (including gravy) for up to 3 months. Thaw overnight in the refrigerator before reheating.
- Reheating: Gently reheat on the stovetop over low heat or in a covered oven-safe dish at 300°F until warmed through. Adding a splash of broth will keep it moist.
Conclusion
Mastering the Classic Pot Roast relies on a good cut of beef, a proper sear, and patient, slow braising. The result is an incredibly tender, flavor-packed meal that defines comfort. It’s a timeless technique worth perfecting for countless family dinners to come.
We’d love to hear from you! Did you try this method? Share your experience, tips, or photos in the comments below. Don’t forget to subscribe to our newsletter for more trusted recipes and cooking guides delivered straight to your inbox!
FAQs
Q: Can I make this pot roast in a slow cooker?
Q: My pot roast turned out tough. What happened?
Q: Is the red wine necessary?
Q: Can I prepare this dish ahead of time?
Q: Can I make this pot roast in a slow cooker?
A: Absolutely! Follow steps 1-4 on the stovetop. Then transfer everything to your slow cooker, add the roast and liquids, and cook on LOW for 8-9 hours or on HIGH for 5-6 hours. Add the carrots and potatoes in the last 2 hours on LOW or 1 hour on HIGH.
Q: My pot roast turned out tough. What happened?
A: This almost always means it needed more cooking time. Tough meat is undercooked meat in the braising world. Return it to the pot with more liquid and continue cooking until it becomes fork-tender.
Q: Is the red wine necessary?
A: It adds a wonderful depth of flavor, but it is not strictly necessary. You can substitute it with an equal amount of additional beef broth, perhaps with a teaspoon of red wine vinegar or balsamic vinegar to mimic some acidity.
Q: Can I prepare this dish ahead of time?
A: Yes, pot roast often tastes even better the next day as the flavors continue to meld. Simply prepare it fully, let it cool, and refrigerate. Reheat gently on the stovetop or in the oven.
Master the Perfect Classic Pot Roast with Expert Techniques