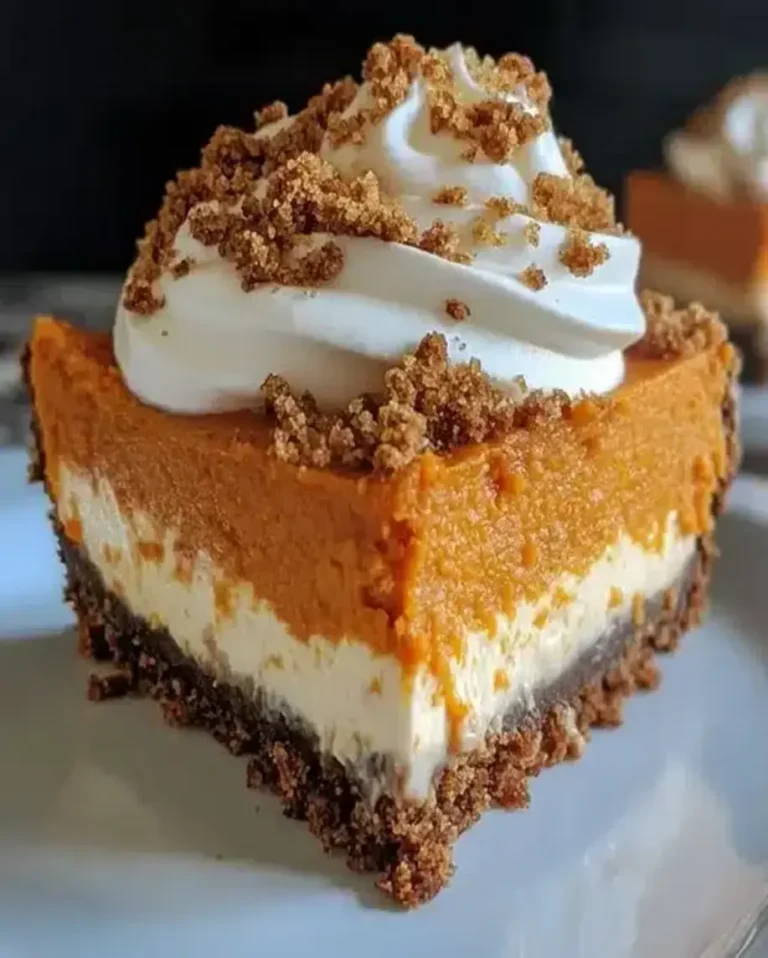
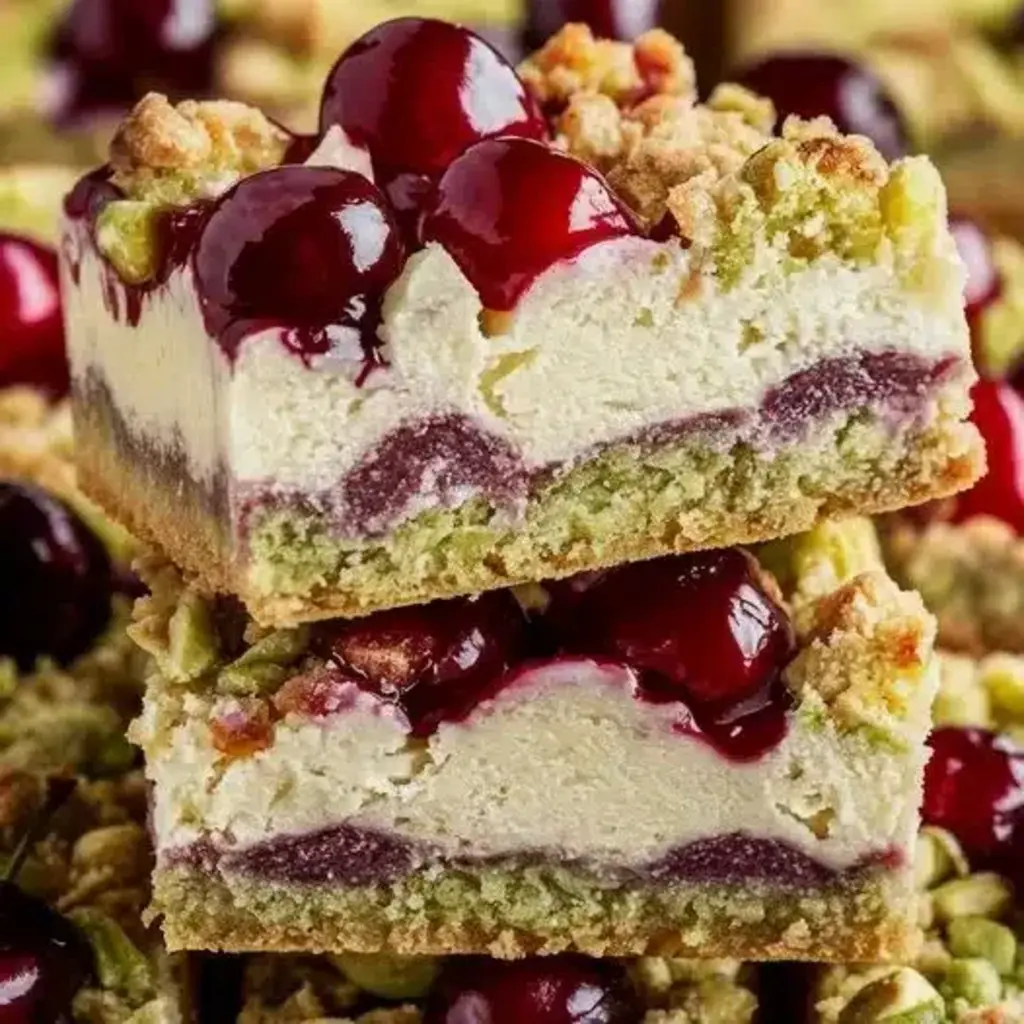
Crunchy Pistachio Cheesecake Bars: A Sweet Delight
“`html
Table of Contents
Crunchy Pistachio Cheesecake Bars: A Sweet Delight
Craving a dessert that balances creamy indulgence with a satisfying crunch?
If you’re nodding along, then you’re in for a treat! Crunchy Pistachio Cheesecake Bars are the perfect answer. For many, the perfect dessert offers a delightful interplay of textures and flavors, and these bars deliver just that. Imagine the velvety richness of a classic cheesecake, elevated by the unique, aromatic nuttiness of pistachios, all crowned with a vibrant cherry topping. This recipe guide aims to make this luxurious dessert accessible, breaking down each step with clarity. We’re confident that by the end of this guide, you’ll be inspired to preheat your oven and create these irresistible bars. They’re not just a dessert; they’re an experience, promising to impress at any occasion, from casual get-togethers to more formal celebrations. Get ready to discover why these pistachio cheesecake bars are destined to become a new favorite.
Ingredients for Crunchy Pistachio Cheesecake Bars
Gathering the right ingredients is the first step to baking perfection. We’ve broken down what you’ll need for each component of these delightful bars, with a few notes on substitutions to ensure you can make them no matter what you have on hand.
For the Crust:
- 1.5 cups graham cracker crumbs: These form the sweet, sturdy base. (Substitution: Digestive biscuits or shortbread cookies can be used for a similar crumbly texture and sweetness.)
- 1/4 cup finely chopped pistachios: Adds a subtle, nutty flavor and texture to the crust. Ensure they are unsalted for better control over the sweetness.
- 1/4 cup granulated sugar: Balances out the tartness of the graham crackers and enhances the overall sweetness.
- 6 tablespoons unsalted butter, melted: Binds the crumbs together, creating a firm crust that holds its shape.
For the Pistachio Cheesecake Filling:
- 16 oz cream cheese, softened: The heart of any cheesecake, it provides that signature creamy, tangy flavor and smooth texture. Ensure it’s at room temperature for a lump-free filling.
- 3/4 cup granulated sugar: Sweetens the filling and balances the tang of the cream cheese.
- 2 large eggs, at room temperature: Act as binders, giving the cheesecake structure and richness. Room temperature eggs incorporate more easily into the batter.
- 1 teaspoon vanilla extract: Enhances the overall flavor profile and adds a warm, sweet aroma.
- 1/2 cup finely ground pistachios: This is where the star flavor comes in! Using ground pistachios ensures a uniform pistachio essence throughout the cheesecake.
- 1/4 cup heavy cream: Adds extra richness and helps achieve a silkier texture in the filling.
- Optional: a drop of green food coloring: For a more vibrant, appealing pistachio color. Use sparingly for a natural look.
For the Cherry Topping:
- 1 cup cherry preserves or cherry pie filling: Provides a burst of sweet and tart fruit flavor that complements the creamy cheesecake beautifully. (Substitution: Fresh or frozen cherries, simmered with a little sugar and cornstarch, can be used.)
- 2 tablespoons chopped pistachios: For garnish, adding a final touch of crunch and visual appeal.
Timing Your Cheesecake Bar Creation
A bit of planning goes a long way to ensure a stress-free baking experience.
Compared to many traditional cheesecakes that require water baths and longer baking times, these bars are relatively quick to prepare. The chilling time is crucial for setting the bars, so plan accordingly.

Step-by-Step Instructions
Let’s get baking! Follow these simple steps to create your delicious Crunchy Pistachio Cheesecake Bars.
1. Prepare the Crust
First things first, preheat your oven to 350°F (175°C). Line an 8×8 inch baking pan with parchment paper, leaving some overhang on the sides. This makes it super easy to lift the bars out later. In a medium bowl, combine the graham cracker crumbs, finely chopped pistachios, granulated sugar, and melted butter. Mix until everything is well combined, resembling wet sand. Press this mixture evenly into the bottom of your prepared baking pan. Use the bottom of a glass or a measuring cup to get a nice, firm layer. Bake the crust for 8-10 minutes, until it’s lightly golden. Let it cool slightly while you prepare the filling.
2. Make the Pistachio Cheesecake Filling
In a large bowl, beat the softened cream cheese with the granulated sugar until it’s smooth and creamy, with no lumps. This is key for a luscious cheesecake texture! Gradually beat in the eggs, one at a time, mixing well after each addition. Don’t overmix, but ensure they are fully incorporated. Stir in the vanilla extract, ground pistachios, and heavy cream. If you desire a more vibrant green hue, add a tiny drop of green food coloring and mix until you achieve your desired shade. Make sure the batter is smooth and homogenous.
3. Assemble and Bake
Pour the pistachio cheesecake filling evenly over the slightly cooled crust. Gently spread it to the edges of the pan. Pop the pan into the preheated oven and bake for 30-35 minutes, or until the edges are set and the center is just slightly jiggly. Overbaking can lead to cracks, so be mindful of this timing. Once done, remove the pan from the oven and let it cool completely on a wire rack. This cooling process is important before adding the topping.
4. Add the Cherry Topping
Once the cheesecake is mostly cooled, carefully spread the cherry preserves or pie filling over the top. Be gentle to avoid disturbing the cheesecake layer too much. Sprinkle the chopped pistachios over the cherry topping for that beautiful contrast and extra crunch.
5. Chill and Serve
This is arguably the hardest part: waiting! Cover the pan loosely with plastic wrap and refrigerate for at least 2 hours, or until the cheesecake is firm. The longer it chills, the better it will set and the flavors will meld. Once chilled, use the parchment paper overhang to lift the entire block out of the pan. Slice into bars using a sharp knife. For clean cuts, wipe the knife clean between each slice.
Nutritional Information
While individual results may vary based on exact ingredients and portion sizes, here’s an approximate nutritional breakdown per bar (assuming 12 bars):
- Calories: ~350-400 kcal
- Protein: ~5-7g
- Fat: ~20-25g
- Carbohydrates: ~35-40g
- Sugar: ~25-30g
Healthier Alternatives
Looking to make these bars a bit lighter without compromising too much on flavor? Here are some swaps:
- Crust: Use whole wheat graham crackers or oat flour for the crumbs. Reduce the sugar slightly or substitute with a natural sweetener like maple syrup for the binder.
- Filling: Use Neufchâtel cheese or a reduced-fat cream cheese. You can also experiment with a sugar substitute like erythritol or stevia, adjusting to taste. Greek yogurt can replace some of the heavy cream for added protein and a lighter texture.
- Topping: Opt for sugar-free cherry preserves or make your own compote using fresh cherries and a touch of natural sweetener.
Serving Suggestions
These bars are delicious on their own, but here are a few ideas to elevate them:
- Serve chilled with a dollop of fresh whipped cream.
- Drizzle with a little extra melted dark chocolate for a decadent finish.
- Pair with a cup of coffee or a light dessert wine.
- Garnish with a few extra whole pistachios or a fresh cherry for visual appeal.
Common Mistakes to Avoid
Even the best bakers can run into issues. Here’s how to avoid them:
- Lumpy Cream Cheese: Always ensure your cream cheese is softened to room temperature. Cold cream cheese is difficult to blend smoothly.
- Overmixing the Filling: Overbeating the batter after adding eggs can incorporate too much air, leading to cracks during baking. Mix just until combined.
- Cutting Too Soon: Patience is key! Letting the bars chill completely is essential for them to set properly, allowing for clean cuts.
- Underbaking: While you don’t want to overbake, ensure the center is just set with a slight wobble. It will continue to firm up as it cools.
Storing Tips
Keep your delicious creations fresh:
- Store leftover bars in an airtight container in the refrigerator for up to 3-4 days.
- For longer storage, you can freeze them. Wrap individual bars tightly in plastic wrap, then in foil, and freeze for up to 1 month. Thaw in the refrigerator overnight before serving.
FAQs
***Can I use pre-shelled, unsalted pistachios?***
Yes, absolutely! Pre-shelled, unsalted pistachios are a convenient option. Just make sure to grind or chop them finely as specified for the crust and filling.
***What if I don’t have graham crackers?***
Digestive biscuits, shortbread cookies, or even vanilla wafers can be used as a substitute for graham crackers. Adjust the sugar in the crust if your cookie substitute is very sweet.
***How do I get clean cuts for my bars?***
Use a long, sharp knife. Dip the knife in hot water and wipe it dry between each cut. This helps the knife glide through the chilled cheesecake smoothly.
***Can I make this recipe dairy-free?***
This would require significant substitutions, such as using dairy-free cream cheese, butter substitutes, and plant-based cream. The texture and taste may vary considerably.
***My cheesecake cracked! What happened?***
Cracks often occur due to overbaking, rapid temperature changes, or overmixing. Ensure you bake until just set, let it cool gradually, and avoid overbeating the filling.
Tried these Crunchy Pistachio Cheesecake Bars? We’d love to hear about your experience! Share your thoughts, tips, or any creative twists you added in the comments below. Your feedback helps us and other bakers!
A Sweet Conclusion
The Crunchy Pistachio Cheesecake Bars are more than just a dessert; they’re a delightful fusion of classic comfort and sophisticated flavor. The creamy, rich cheesecake filling, infused with the unique taste of pistachios, sits atop a buttery graham cracker crust, all finished with a vibrant cherry flourish. They offer a perfect balance of textures and tastes, making them an ideal treat for any occasion. Whether you’re baking for a special event or simply indulging your sweet tooth, these bars are sure to impress. Give them a try and experience this little slice of heaven for yourself!
PrintCrunchy Pistachio Cheesecake Bars: A Sweet Delight

Indulge in the delightful taste ofCrunchy Pistachio Cheesecake Bars, a perfect treat that combines the rich, creamy texture of cheesecake with the nutty crunch of pistachios and the sweet tang of cherry preserves. This recipe guide offers a straightforward approach to creating these irresistible bars, ensuring a dessert that’s as enjoyable to make as it is to savor. Whether you’re a seasoned baker or new to the kitchen, these cheesecake bars promise to be a hit at any gathering.
Ingredients
- 1 1/2 cupsall-purpose flour
- 1/2 cupbutter, chilled and diced
- 1/4 cuppowdered sugar
- 1 cuproasted pistachios, chopped
- 2packages (8 ounces each) cream cheese, softened
- 1/2 cupgranulated sugar
- 2eggs
- 1 teaspoonvanilla extract
- 1/2 cupsour cream
- 1 cupcherry preserves
- Whole cherries and extra pistachios for garnish
Instructions
- Preheat your oven to 350°F (175°C) and line a 9×13 inch baking pan with parchment paper.
- In a bowl, combine flour, powdered sugar, and butter. Mix until crumbly, then press into the bottom of your prepared pan. Sprinkle with chopped pistachios and bake for 15 minutes.
- Drop cherry preserves by spoonfuls over crust layer and gently swirl with a knife.
- In another bowl, beat the cream cheese and granulated sugar until smooth. Add eggs, one at a time, then stir in vanilla and sour cream. Pour over the cherry layer.
- Bake for an additional 25-30 minutes or until the filling is set. Cool completely, then refrigerate for at least 3 hours.
- Cut into bars and garnish each with a cherry and a sprinkle of pistachios before serving.
Notes
Storage:Keep the cheesecake bars in an airtight container in the refrigerator for up to 5 days.
Serving Suggestion:For an extra touch of elegance, serve with a dollop of whipped cream or a drizzle of chocolate sauce.
Variations:Feel free to substitute the cherry preserves with any fruit preserve of your choice for a different flavor profile.
Nut Allergy:For those with nut allergies, omit the pistachios and use a nut-free crust alternative.
“`