Delicious No-Bake Banana Split Cake Recipe
“`html
Table of Contents
Delicious No-Bake Banana Split Cake Recipe
Craving a dessert that screams summer fun but doesn’t require any oven time? If you’re wondering how to get that classic banana split flavor into a crowd-pleasing cake format without breaking a sweat, you’ve landed in the right spot!
Dive into a No-Bake Dream
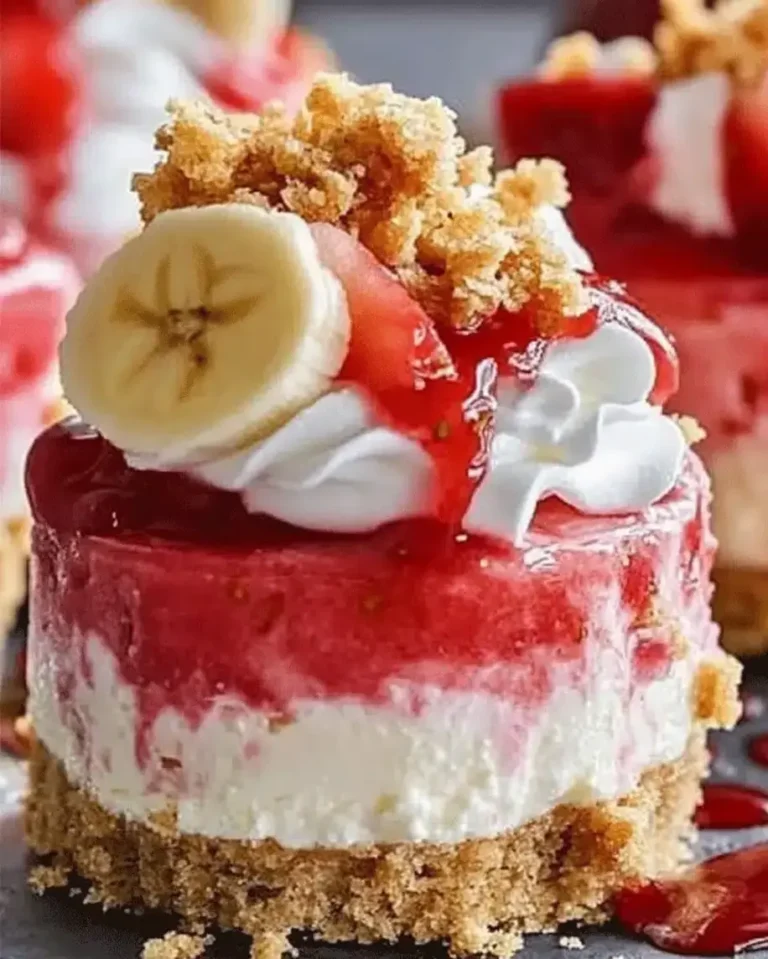
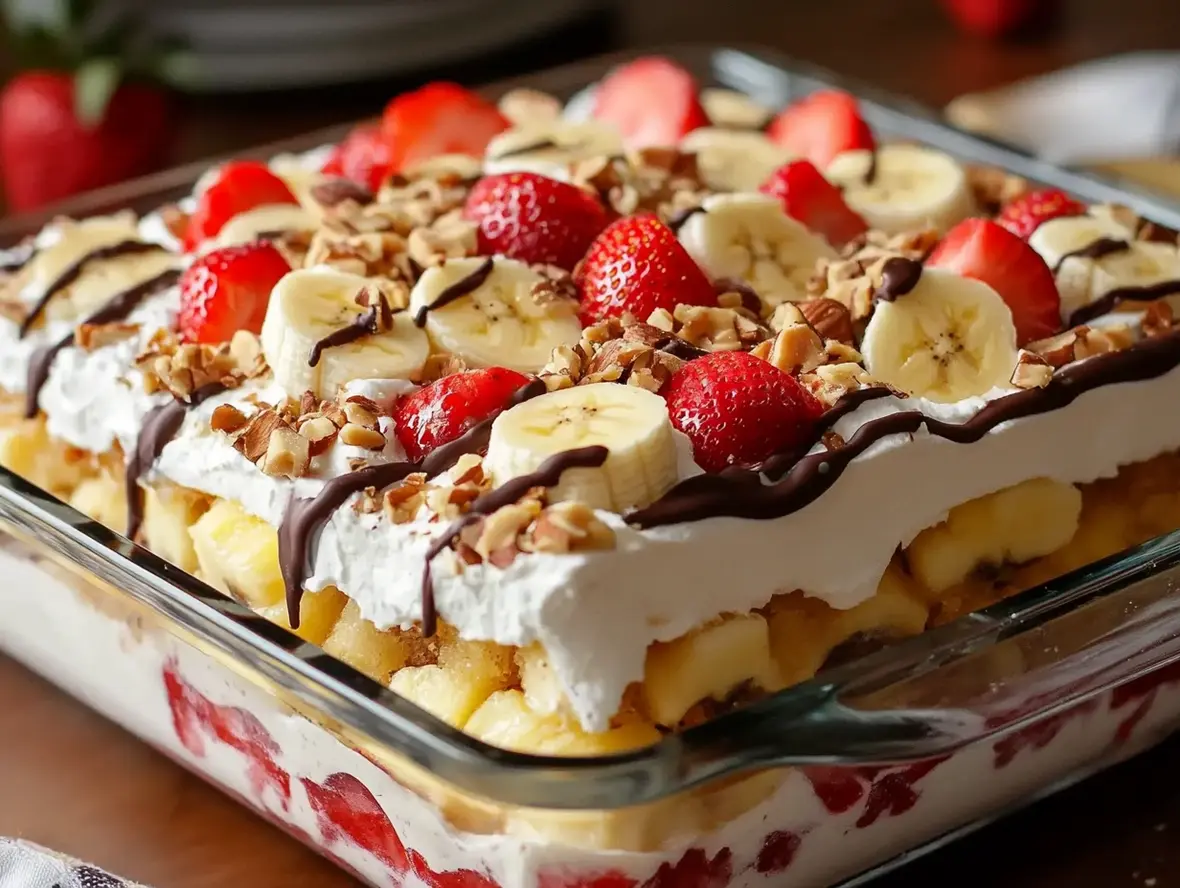
Are you searching for a dessert that’s cool, creamy, and bursting with nostalgic flavor, especially when the temperatures rise? This No-Bake Banana Split Cake recipe is your answer! It masterfully captures the beloved taste of a classic banana split – think sweet bananas, luscious cream, crunchy nuts, and rich chocolate – all layered into a delightful cake that requires zero baking. Perfect for potlucks, family gatherings, or simply treating yourself on a warm afternoon, this dessert is as easy to make as it is to devour. Get ready to wow your taste buds and your guests with this effortless, yet impressive, no-bake wonder!
Ingredients: The Building Blocks of Bliss
Gather these goodies to construct your no-bake masterpiece. Remember, the quality of your ingredients truly shines in simple recipes!
- For the Crust:
- 2 cups graham cracker crumbs (about 14-16 full sheets) – For a buttery, crisp base.
- Substitution: Vanilla wafer crumbs or crushed shortbread cookies work wonderfully for a slightly different sweet profile.
- 1/4 cup granulated sugar – To add a touch of sweetness and help bind.
- 1/2 cup (1 stick) unsalted butter, melted – The essential binder for a firm crust.
- Substitution: Margarine can be used, but unsalted butter offers the best flavor and texture.
- 2 cups graham cracker crumbs (about 14-16 full sheets) – For a buttery, crisp base.
- For the Banana Layer:
- 3 ripe medium bananas, mashed – The riper, the sweeter and more flavorful!
- Substitution: If you can’t find ripe bananas, you can use slightly less ripe ones and perhaps add a touch more sweetener to the filling.
- 1 tablespoon lemon juice – To prevent browning and add a subtle tang.
- 3 ripe medium bananas, mashed – The riper, the sweeter and more flavorful!
- For the Cream Cheese Filling:
- 2 (8-ounce) blocks cream cheese, softened – The creamy, decadent heart of the dessert. Ensure it’s truly soft for a smooth blend.
- 1/2 cup powdered sugar, sifted – For ultimate smoothness and sweetness.
- 1 teaspoon vanilla extract – Enhances all the other flavors.
- 1/2 cup heavy whipping cream, chilled – Adds lightness and airiness to the filling.
- For the Toppings:
- 1/2 cup chopped roasted peanuts or pecans – For that essential crunch.
- Substitution: Walnuts or even almonds can be used for a different nutty note. For a nut-free option, consider toasted coconut flakes or crispy rice cereal.
- Whipped cream, for serving – The fluffy crown of your cake!
- Chocolate syrup, for drizzling – The classic banana split finish.
- Substitution: Hot fudge sauce or a caramel drizzle can also be divine.
- Maraschino cherries, optional – The quintessential cherry on top!
- 1/2 cup chopped roasted peanuts or pecans – For that essential crunch.
Timing Your Sweet Creation
Compared to many baked cakes that can take 1-2 hours just in the oven, plus cooling time, this no-bake recipe drastically cuts down on active time. The majority of the time is hands-off chilling, making it ideal for busy schedules or when you want to prepare a dessert in advance.
Step-by-Step Instructions
Follow these simple steps for a dessert that’s almost as fun to make as it is to eat!
Step 1: Prepare the Banana Layer
In a medium bowl, gently mash the ripe bananas until mostly smooth. Stir in the tablespoon of lemon juice to prevent browning and add a hint of brightness. Set aside.
Step 2: Create the Cheesecake Filling
In a large bowl, use an electric mixer to beat the softened cream cheese until it’s completely smooth and creamy, with no lumps. Gradually beat in the sifted powdered sugar until well combined. Add the vanilla extract and mix. In a separate, chilled bowl, whip the heavy cream until stiff peaks form. Gently fold the whipped cream into the cream cheese mixture until just incorporated. Be careful not to overmix, as this can deflate the whipped cream.
Step 3: Assemble the Cake
For the Crust: In a bowl, combine the graham cracker crumbs and granulated sugar. Pour in the melted butter and mix until all the crumbs are moistened. Press this mixture evenly into the bottom of a 9×13 inch baking dish or a similar-sized trifle bowl. You can use the bottom of a glass to get a firm, even layer.
Layering: Evenly spread the mashed banana mixture over the graham cracker crust. Then, carefully spread the cream cheese filling over the banana layer, creating a smooth, even surface.
Step 4: Chill and Decorate
Cover the dish tightly with plastic wrap and refrigerate for at least 4 hours, or preferably overnight, to allow the cake to set properly. Before serving, sprinkle the chopped nuts evenly over the top of the chilled cake. Garnish generously with swirls of whipped cream, drizzles of chocolate syrup, and a maraschino cherry, if desired, mimicking the classic banana split experience.
Nutritional Tidbits
While this is a decadent treat, understanding its general nutritional profile can be helpful. Exact values will vary based on specific ingredients and portion sizes.
- Calories: Approx. 350-450 per serving (varies greatly with toppings)
- Fat: High, primarily from cream cheese, butter, and heavy cream.
- Carbohydrates: Moderate, from graham crackers, sugar, and bananas.
- Protein: Moderate, mainly from cream cheese and nuts.
- Fiber: Modest, aided by graham crackers and bananas.
This dessert is best enjoyed in moderation as part of a balanced diet.
Healthier Twists
Looking to make this delightful dessert a bit lighter without sacrificing flavor?
- Crust: Use crushed whole wheat graham crackers or even a base made from rolled oats blended with a little date paste and coconut oil.
- Sweetener: Reduce the powdered sugar and rely more on the natural sweetness of the bananas. You could also experiment with a sugar substitute if preferred.
- Filling: Substitute half of the cream cheese with low-fat cream cheese or thick Greek yogurt for a tangier, lighter filling. Use less heavy cream or whip it with a stabilizer like a touch of cream of tartar.
- Toppings: Opt for fresh fruit slices instead of syrup, use a light dusting of cocoa powder, and go easy on the whipped cream. A sprinkle of unsweetened shredded coconut or chia seeds can add texture.
Serving Suggestions
This No-Bake Banana Split Cake is a showstopper on its own! Serve chilled scoops in individual bowls or cut squares directly from the dish. Consider pairing it with a light beverage like iced tea or sparkling water. For an extra indulgence, serve a small slice with a scoop of vanilla bean ice cream.
Common Pitfalls to Avoid
Even no-bake desserts can have a few hiccups:
- Butter Temperature: Ensure butter for the crust is fully melted, not just softened, for proper binding.
- Cream Cheese Lumps: Use truly softened cream cheese and beat it until very smooth before adding other ingredients.
- Overmixing Whipped Cream: Stop whipping heavy cream once stiff peaks form; overwhipping turns it into butter.
- Insufficient Chilling: Don’t rush the chilling process! This is crucial for the cake to firm up and hold its shape.
Storing Your Masterpiece
Keep any leftovers tightly covered with plastic wrap or in an airtight container in the refrigerator. It’s best enjoyed within 3-4 days. The bananas may brown slightly over time, but the flavor will remain delicious.

Frequently Asked Questions
***Can I use frozen bananas?***
It’s best to use fresh, ripe bananas for the best flavor and texture. Frozen bananas, when thawed, can become watery and may alter the consistency of the banana layer.
***How do I get clean slices?***
Ensure the cake is thoroughly chilled. For the cleanest cuts, dip a sharp knife in hot water and wipe it dry between each slice.
***Can I add other fruits?***
While bananas are traditional, you could add a thin layer of crushed strawberries or pineapple (well-drained) beneath the banana layer for extra fruitiness, but be mindful of moisture content.
***What kind of dish is best?***
A 9×13 inch baking dish is standard as it allows for even layers and easy slicing. A trifle bowl works beautifully if you want to showcase the layers.
***Can I make the crust ahead of time?***
Yes, you can prepare the crust mixture a day in advance and store it in an airtight container at room temperature. Press it into the dish just before assembling.
Your No-Bake Banana Split Awaits!
This No-Bake Banana Split Cake is more than just a dessert; it’s a celebration of classic flavors in an incredibly convenient package. With its creamy, fruity, and crunchy layers, it’s guaranteed to be a hit for any occasion, especially when you’re looking for a show-stopping dessert that’s fuss-free. So go ahead, gather your ingredients, and whip up this delightful treat. Your taste buds will thank you!
PrintNo-Bake Banana Split Cake

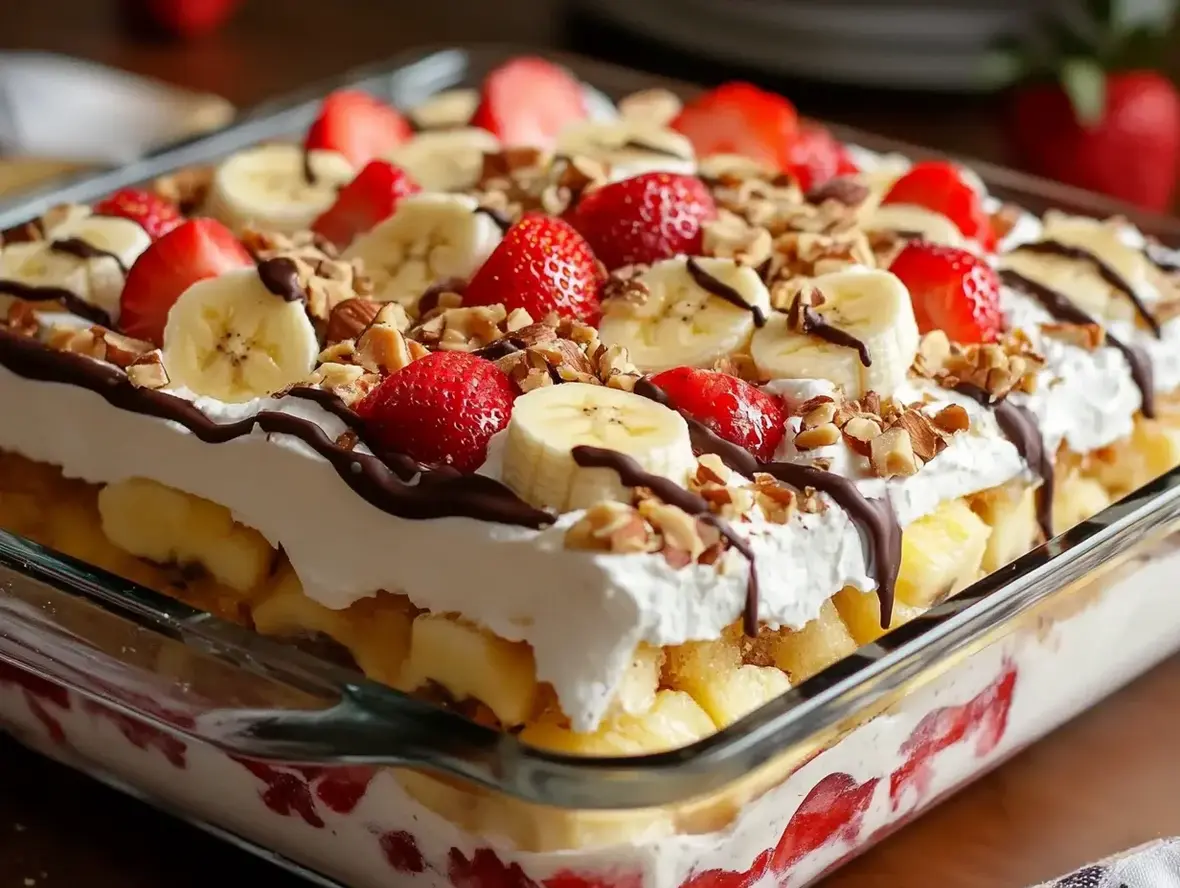
This delightful no-bake dessert combines all the flavors of a classic banana split into a luscious, layered cake. Perfect for warm days when you want a sweet treat without turning on the oven. Creamy, fruity, and nutty with a touch of chocolate—this dessert is sure to impress!
Ingredients
- 2 cupsgraham cracker crumbs1/3 cupunsalted butter, melted1 tspsalt
- 1/3 cupunsalted butter, melted1 tspsalt
- 1 tspsalt
- 16 ozcream cheese, softened1/2 cupgranulated sugar8 ozwhipped topping (e.g., Cool Whip)1 tspvanilla extract
- 1/2 cupgranulated sugar8 ozwhipped topping (e.g., Cool Whip)1 tspvanilla extract
- 8 ozwhipped topping (e.g., Cool Whip)1 tspvanilla extract
- 1 tspvanilla extract
- 3to4bananas, sliced20 ozcan crushed pineapple, well-drained20 ozstrawberries, sliced8 ozwhipped topping (e.g., Cool Whip)1/2 cupchopped hazelnuts (or your favorite nuts)Chocolate sauce (for drizzling)
- 20 ozcan crushed pineapple, well-drained20 ozstrawberries, sliced8 ozwhipped topping (e.g., Cool Whip)1/2 cupchopped hazelnuts (or your favorite nuts)Chocolate sauce (for drizzling)
- 20 ozstrawberries, sliced8 ozwhipped topping (e.g., Cool Whip)1/2 cupchopped hazelnuts (or your favorite nuts)Chocolate sauce (for drizzling)
- 8 ozwhipped topping (e.g., Cool Whip)1/2 cupchopped hazelnuts (or your favorite nuts)Chocolate sauce (for drizzling)
- 1/2 cupchopped hazelnuts (or your favorite nuts)Chocolate sauce (for drizzling)
- Chocolate sauce (for drizzling)
Instructions
- 1️⃣Prepare the Crust:In a medium bowl, combine graham cracker crumbs, melted butter, and salt.Press the mixture firmly into the bottom of a greased 9×13-inch baking dish to create an even crust.Refrigerate the crust while preparing the filling.2️⃣Make the Filling:In a large bowl, beat the softened cream cheese with sugar and vanilla extract until smooth and creamy.Gently fold in the whipped topping until fully combined.Spread the filling evenly over the chilled crust, smoothing the top with a spatula.3️⃣Add the Layers:Arrange banana slices evenly over the filling.Spread the well-drained crushed pineapple over the bananas.Add a layer of sliced strawberries on top of the pineapple.4️⃣Top and Chill:Spread another layer of whipped topping over the strawberries.Drizzle chocolate sauce over the whipped topping and sprinkle with chopped hazelnuts.Cover the dish with plastic wrap and refrigerate for at least 4 hours, or preferably overnight, to set the layers.5️⃣Serve:Slice the cake into squares and serve chilled. Enjoy the sweet and fruity goodness of this no-bake dessert!
- In a medium bowl, combine graham cracker crumbs, melted butter, and salt.
- Press the mixture firmly into the bottom of a greased 9×13-inch baking dish to create an even crust.Refrigerate the crust while preparing the filling.2️⃣Make the Filling:In a large bowl, beat the softened cream cheese with sugar and vanilla extract until smooth and creamy.Gently fold in the whipped topping until fully combined.Spread the filling evenly over the chilled crust, smoothing the top with a spatula.3️⃣Add the Layers:Arrange banana slices evenly over the filling.Spread the well-drained crushed pineapple over the bananas.Add a layer of sliced strawberries on top of the pineapple.4️⃣Top and Chill:Spread another layer of whipped topping over the strawberries.Drizzle chocolate sauce over the whipped topping and sprinkle with chopped hazelnuts.Cover the dish with plastic wrap and refrigerate for at least 4 hours, or preferably overnight, to set the layers.5️⃣Serve:Slice the cake into squares and serve chilled. Enjoy the sweet and fruity goodness of this no-bake dessert!
- Refrigerate the crust while preparing the filling.2️⃣Make the Filling:In a large bowl, beat the softened cream cheese with sugar and vanilla extract until smooth and creamy.Gently fold in the whipped topping until fully combined.Spread the filling evenly over the chilled crust, smoothing the top with a spatula.3️⃣Add the Layers:Arrange banana slices evenly over the filling.Spread the well-drained crushed pineapple over the bananas.Add a layer of sliced strawberries on top of the pineapple.4️⃣Top and Chill:Spread another layer of whipped topping over the strawberries.Drizzle chocolate sauce over the whipped topping and sprinkle with chopped hazelnuts.Cover the dish with plastic wrap and refrigerate for at least 4 hours, or preferably overnight, to set the layers.5️⃣Serve:Slice the cake into squares and serve chilled. Enjoy the sweet and fruity goodness of this no-bake dessert!
- 2️⃣Make the Filling:
- In a large bowl, beat the softened cream cheese with sugar and vanilla extract until smooth and creamy.Gently fold in the whipped topping until fully combined.Spread the filling evenly over the chilled crust, smoothing the top with a spatula.3️⃣Add the Layers:Arrange banana slices evenly over the filling.Spread the well-drained crushed pineapple over the bananas.Add a layer of sliced strawberries on top of the pineapple.4️⃣Top and Chill:Spread another layer of whipped topping over the strawberries.Drizzle chocolate sauce over the whipped topping and sprinkle with chopped hazelnuts.Cover the dish with plastic wrap and refrigerate for at least 4 hours, or preferably overnight, to set the layers.5️⃣Serve:Slice the cake into squares and serve chilled. Enjoy the sweet and fruity goodness of this no-bake dessert!
- Gently fold in the whipped topping until fully combined.Spread the filling evenly over the chilled crust, smoothing the top with a spatula.3️⃣Add the Layers:Arrange banana slices evenly over the filling.Spread the well-drained crushed pineapple over the bananas.Add a layer of sliced strawberries on top of the pineapple.4️⃣Top and Chill:Spread another layer of whipped topping over the strawberries.Drizzle chocolate sauce over the whipped topping and sprinkle with chopped hazelnuts.Cover the dish with plastic wrap and refrigerate for at least 4 hours, or preferably overnight, to set the layers.5️⃣Serve:Slice the cake into squares and serve chilled. Enjoy the sweet and fruity goodness of this no-bake dessert!
- Spread the filling evenly over the chilled crust, smoothing the top with a spatula.
- 3️⃣Add the Layers:Arrange banana slices evenly over the filling.Spread the well-drained crushed pineapple over the bananas.Add a layer of sliced strawberries on top of the pineapple.4️⃣Top and Chill:Spread another layer of whipped topping over the strawberries.Drizzle chocolate sauce over the whipped topping and sprinkle with chopped hazelnuts.Cover the dish with plastic wrap and refrigerate for at least 4 hours, or preferably overnight, to set the layers.5️⃣Serve:Slice the cake into squares and serve chilled. Enjoy the sweet and fruity goodness of this no-bake dessert!
- Arrange banana slices evenly over the filling.Spread the well-drained crushed pineapple over the bananas.Add a layer of sliced strawberries on top of the pineapple.4️⃣Top and Chill:Spread another layer of whipped topping over the strawberries.Drizzle chocolate sauce over the whipped topping and sprinkle with chopped hazelnuts.Cover the dish with plastic wrap and refrigerate for at least 4 hours, or preferably overnight, to set the layers.5️⃣Serve:Slice the cake into squares and serve chilled. Enjoy the sweet and fruity goodness of this no-bake dessert!
- Spread the well-drained crushed pineapple over the bananas.
- Add a layer of sliced strawberries on top of the pineapple.4️⃣Top and Chill:Spread another layer of whipped topping over the strawberries.Drizzle chocolate sauce over the whipped topping and sprinkle with chopped hazelnuts.Cover the dish with plastic wrap and refrigerate for at least 4 hours, or preferably overnight, to set the layers.5️⃣Serve:Slice the cake into squares and serve chilled. Enjoy the sweet and fruity goodness of this no-bake dessert!
- 4️⃣Top and Chill:Spread another layer of whipped topping over the strawberries.Drizzle chocolate sauce over the whipped topping and sprinkle with chopped hazelnuts.Cover the dish with plastic wrap and refrigerate for at least 4 hours, or preferably overnight, to set the layers.5️⃣Serve:Slice the cake into squares and serve chilled. Enjoy the sweet and fruity goodness of this no-bake dessert!
- Spread another layer of whipped topping over the strawberries.
- Drizzle chocolate sauce over the whipped topping and sprinkle with chopped hazelnuts.Cover the dish with plastic wrap and refrigerate for at least 4 hours, or preferably overnight, to set the layers.5️⃣Serve:Slice the cake into squares and serve chilled. Enjoy the sweet and fruity goodness of this no-bake dessert!
- Cover the dish with plastic wrap and refrigerate for at least 4 hours, or preferably overnight, to set the layers.5️⃣Serve:Slice the cake into squares and serve chilled. Enjoy the sweet and fruity goodness of this no-bake dessert!
- 5️⃣Serve:
- Slice the cake into squares and serve chilled. Enjoy the sweet and fruity goodness of this no-bake dessert!
Notes
Customization:Swap hazelnuts for walnuts, almonds, or pecans, depending on your preference.Storage:Store leftovers in the refrigerator, covered, for up to 3 days.Make-Ahead Friendly:This dessert can be made the night before for convenience.
Storage:Store leftovers in the refrigerator, covered, for up to 3 days.Make-Ahead Friendly:This dessert can be made the night before for convenience.
Make-Ahead Friendly:This dessert can be made the night before for convenience.
“`