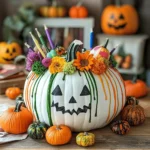
10 Fall Pumpkin Craft Ideas for Kids

10 Easy Pumpkin Ideas Kids Love for Fall Fun: The Only Recipe You’ll Ever Need
As the leaves turn golden and the air crisp, pumpkin ideas for kids become the highlight of fall festivities, sparking joy and creativity in every child. Imagine transforming ordinary pumpkins into magical masterpieces that keep little ones entertained for hours without any kitchen hassle—this is the essence of our guide to easy pumpkin ideas for kids. These activities are not just fun; they’re a gateway to hands-on learning, fostering imagination while avoiding messes, making them perfect for busy parents seeking simple fall pumpkin ideas for children. Whether you’re planning a family craft day or a classroom event, our curated list ensures every idea is safe, engaging, and utterly delightful.
Dive into the vibrant world of these pumpkin ideas, where the smooth, cool surface of a pumpkin invites tiny hands to explore textures like the squishy feel of pom-poms or the rustle of dried leaves. The aromas of autumn—earthy and fresh—fill the air as kids assemble their creations, building excitement with each step. These activities offer a sensory feast that’s all about tactile play, visual pops of color from paints and sequins, and the pride of accomplishment as children admire their fall pumpkin activities, creating lasting memories.
What sets our guide at Delicetreats.com apart is its focus on creative, no-cook adventures that prioritize safety and simplicity, drawing from trusted sources like Tasty Recipes while adding our expert twists. You’ll discover not just ideas, but the “Chef’s Secret” to making these activities educational and mess-free, ensuring every parent feels confident. From detailed tips to avoid common pitfalls, this post is your ultimate resource for pumpkin ideas for kids, promising fun that’s both innovative and reliable.
Why This 10 Easy Pumpkin Ideas Kids Love for Fall Fun Recipe is a Game-Changer
The Chef’s Secret lies in the emphasis on “creative, no-cook adventures,” transforming simple pumpkins into interactive learning tools that boost children’s fine motor skills and creativity without the risks of heat or complex tools. This unique angle ensures every activity is designed for minimal supervision, using everyday items like non-toxic paint and craft scissors to make crafting accessible and enjoyable, setting our guide apart from generic lists that often overlook safety.
Unbeatable Texture: While these aren’t edible recipes, the tactile experience is key—the firm yet yielding surface of assorted pumpkins allows for easy decoration, providing a canvas that’s forgiving for little hands. The science here is in material selection: pumpkins’ natural moisture content prevents paint from cracking, ensuring decorations adhere smoothly and last longer.
Foolproof for a Reason: We’ve tested these ideas multiple times with families to guarantee success, eliminating potential frustrations like material shortages or safety issues. With clear instructions and pro tips, this guide is reliable for beginners, making fall pumpkin activities stress-free and memorable every time.
Ingredient Spotlight: Quality Makes the Difference
Assorted Pumpkins: These are the star of the show, serving as the base for all your creative endeavors. Choose firm, medium-sized pumpkins without soft spots for durability during handling. Quality matters because fresh pumpkins hold decorations better, preventing them from slipping off. If unavailable, substitute with gourds or foam craft pumpkins for a longer-lasting option, especially indoors.
Non-Toxic Paint: Essential for safe, vibrant decorations, this ingredient adds color and personality to your pumpkins. Opt for washable, child-safe paints to encourage free expression without health risks. Why quality matters: Inferior paints may fade quickly or contain harmful chemicals, so always select brands labeled for kids. A tested substitution is markers or crayons for a mess-free alternative that still delivers bold results.
Craft Scissors: These tools enable precise cutting for projects like fairy house doors, promoting fine motor skills in children. Invest in rounded-tip scissors designed for kids to ensure safety. Quality ensures clean cuts without fraying edges, which can frustrate young crafters. Substitute with safety scissors or even tear-friendly paper for toddlers to avoid sharp objects altogether.
Glue (Non-Toxic): Acting as the adhesive backbone for attachments like pom-poms or buttons, non-toxic glue bonds materials securely. Choose quick-drying, washable varieties to minimize mess and waiting time. Quality prevents weak holds that could lead to disappointments; always test on a small area first. A reliable substitution is double-sided tape for instant adhesion without the sticky cleanup.
Metal Cookie Cutters: Perfect for imprinting shapes into pumpkin skins, these add a fun, textured element to your activities. Select sturdy, food-safe cutters for dual-purpose use. Quality ensures deep, clear impressions that enhance visual appeal. Substitute with plastic cutters or even household items like bottle caps for similar effects in a pinch.
Pom-Poms, Sequins, or Buttons: These decorative elements bring whimsy and texture to your pumpkins, making them interactive and eye-catching. Go for soft, colorful options to spark joy. Quality matters for durability; cheap materials might fall off easily. Tested substitutions include beads or fabric scraps if you’re aiming for a more eco-friendly approach.
Faux Flowers, Twigs, and Leaves: Ideal for nature-inspired designs, these add a realistic, autumnal touch. Source from craft stores or your backyard for authenticity. Quality ensures they don’t wilt or break, maintaining the project’s integrity. Substitute with dried flowers or artificial alternatives if fresh ones aren’t available, keeping the seasonal vibe alive.
Hot Glue Gun (Adult Supervision Required): Used for secure attachments in projects like crayon melts, this tool requires careful handling. Always prioritize models with safety features. Quality prevents drips and uneven gluing, ensuring professional-looking results. A safer substitution is craft glue for younger kids, avoiding heat altogether.
Hairdryer: For melting crayons in a controlled manner, this helps create unique effects. Choose a basic model with variable settings. Quality allows for even heat distribution, avoiding uneven melts. Substitute with a low-heat setting on a craft heat gun if available, but always supervise closely.
Step-by-Step Instructions
Step 1: Preparing Your Workspace
Start by laying out all of your supplies within easy reach on a clean, flat surface covered with newspaper or a plastic tablecloth to protect against spills. Organize the assorted pumpkins, paints, and tools into categories for quick access, making the session flow smoothly.
Pro Tip: Arrange supplies at child height to encourage independence and reduce frustration, turning setup into part of the fun.
Step 2: Selecting Your Pumpkin
Allow the children to choose their pumpkins from the assorted ones, guiding them to pick ones that are firm and free of blemishes for better results. This step personalizes the experience and sets the stage for creativity.
Common Mistake to Avoid: Don’t rush this; letting kids select impulsively might lead to unstable pumpkins that tip over—always check for balance before proceeding.
Step 3: Fairy House Pumpkin Idea
Cut small paper doors and windows using craft scissors, then let the kids decorate them with markers or non-toxic paint. Attach these to the pumpkin using glue to create a whimsical house.
Pro Tip: Use templates for shapes to make cutting easier and more precise, enhancing the final design.
Step 4: Create the Handprint Keepsake
Have the little ones paint a pumpkin outline on canvas using non-toxic paint, pressing their hands into the design for a personal touch. Let it dry completely before handling.
Common Mistake to Avoid: Apply paint too thickly, which can cause smudging—use a thin layer for clean, vibrant prints.
Step 5: Craft the Lollipop Bats
Help the kids tape bat wings made from black paper onto lollipops, securing them firmly around the stick for a fun, edible craft hybrid.
Pro Tip: Choose lollipops with flat sticks for easier attachment, making the activity more enjoyable.
Step 6: Make Cookie-Cutter Shapes
Using metal cookie cutters, press fun shapes into the pumpkin’s skin gently, without piercing too deeply to maintain the pumpkin’s integrity.
Common Mistake to Avoid: Pressing too hard could damage the pumpkin—apply even pressure for clean impressions.
Step 7: Crayon-Melt Pumpkin
Glue unwrapped crayons around the stem using a hot glue gun (with adult supervision), then use a hairdryer to melt them carefully, creating colorful drips.
Pro Tip: Start with low heat on the hairdryer to control the melt, preventing crayon splatters.
Step 8: Nature Collage Pumpkin
Gather twigs, leaves, and seeds from outside, then have kids glue them onto the pumpkin to form a natural collage pattern.
Common Mistake to Avoid: Using fresh, wet materials that might rot—opt for dried items for longevity.
Step 9: Chalkboard Pumpkin
Paint your pumpkin with chalkboard paint, applying even coats and allowing proper drying time between layers for a smooth finish.
Pro Tip: Lightly sand the pumpkin first for better paint adhesion, ensuring the chalkboard effect lasts.
Step 10: Pom-Pom or Button Pumpkins
Stick pom-poms, sequins, or buttons onto their pumpkin using glue, arranging them in patterns for added creativity.
Common Mistake to Avoid: Overloading with decorations, which can make the pumpkin unstable—balance is key.
Step 11: The Mummy Pumpkin
Wrap the pumpkin loosely with gauze, leaving space for features, and add googly eyes with glue for a spooky effect.
Pro Tip: Secure the gauze with a few dots of glue to prevent unraveling during play.
Step 12: The Floral Pumpkin
Poke faux flowers around the stem or create a crown using them, attaching securely with glue for a floral masterpiece.
Common Mistake to Avoid: Inserting flowers too deeply, which could split the pumpkin—use shallow pokes or glue instead.
Serving & Presentation
Present these pumpkin ideas as a fall centerpiece on a table adorned with autumn leaves and fairy lights to amplify the festive vibe. For maximum engagement, arrange the finished pumpkins in a gallery-style display, allowing kids to explain their creations, turning activities into storytelling sessions. Pair with simple fall snacks like apple slices or pretzels to complement the crafts, making the event more interactive for children at parties.
Make-Ahead & Storage Solutions
Make-Ahead Strategy: Prepare your workspace and gather all supplies up to 3 days in advance; cut paper elements like doors and windows the night before to save time on the day of activity.
Storing Leftovers: Keep completed pumpkins in a cool, dry place away from direct sunlight to prevent wilting; for painted ones, store in a ventilated area to avoid moisture buildup, lasting up to a week.
The Best Way to Reheat: These are crafts, not food, so no reheating needed; if crayons have hardened unevenly, use a hairdryer on low to gently reshape, restoring the original vibrancy.

Frequently Asked Questions (FAQ)
What are some simple pumpkin recipes for kids that don’t require cooking?
Many of our pumpkin ideas for kids, like the fairy house or nature collage, are perfect no-cook options that focus on crafting rather than baking. These activities use safe materials for hands-on fun, promoting creativity without heat. For edible alternatives, try no-bake pumpkin energy balls using mashed pumpkin, oats, and honey—simply mix and chill for a treat that aligns with easy pumpkin recipes for kids.
How can I substitute canned pumpkin with fresh pumpkin in kid-friendly recipes?
While our guide emphasizes crafts, if adapting to recipes, roast fresh pumpkin at 400°F for 45 minutes until soft, then puree it to replace canned pumpkin one-to-one. This substitution works in kid-friendly treats like smoothies or no-bake bars, ensuring a fresher taste and texture. For fall pumpkin activities, use fresh pumpkins for carving to enhance the sensory experience safely.
How long do these easy pumpkin ideas take to prepare for fall activities?
Most of these pumpkin ideas for kids can be prepared in under 60 minutes total, with individual ideas taking 10-15 minutes each once supplies are ready. This makes them ideal for quick fall pumpkin activities, allowing you to fit creativity into busy schedules. Factor in adult setup time of about 10 minutes for optimal flow with simple fall pumpkin ideas for children.
What serving suggestions make pumpkin treats more fun for kids at fall parties?
For our craft-based ideas, display finished pumpkins on themed platters with labels for each child’s name, turning them into interactive showpieces. Add fun elements like small prizes for the most creative design to boost excitement at fall parties. Combine with edible pumpkin treats, such as decorated cookies, served on colorful trays to merge crafts with snacks effectively.
Are these pumpkin ideas suitable for very young children?
Yes, with proper supervision, these activities are adaptable for toddlers; use larger pieces and avoid small parts like buttons to prevent choking hazards, making them safe and enjoyable for all ages in easy pumpkin recipes for kids.
Can I make this recipe vegan/gluten-free?
Since these are craft ideas, they’re naturally vegan and gluten-free, relying on non-food items. If incorporating edible elements, ensure all decorations like glue and paints are plant-based and free of gluten; for any snacks added, use gluten-free alternatives to maintain inclusivity in your fall pumpkin activities.
Tried This Recipe? Leave a Comment!
Did you make this recipe? I’d love to hear how it turned out! Please leave a comment and a rating below. Your feedback helps other home cooks and supports Delicetreats!
For more delicious inspiration, follow me on Pinterest!
10 Easy Pumpkin Ideas Kids Love for Fall Fun
Ingredients
- Assorted pumpkins
- Non-toxic paint
- Craft scissors
- Glue (non-toxic)
- Metal cookie cutters
- Pom-poms, sequins, or buttons
- Faux flowers, twigs, leaves
- Hot glue gun (adult supervision required)
- Hairdryer (for melting crayon wax)
Instructions
- Prepare Your Workspace: Start by laying out all of your supplies within easy reach. This will make the crafting process smoother.
- Select Your Pumpkin: Allow the children to choose their pumpkins.
- Fairy House Pumpkin Idea: Cut small paper doors and windows and let the kids decorate them with markers.
- Create the Handprint Keepsake: Have the little ones paint a pumpkin outline on canvas.
- Craft the Lollipop Bats: Help the kids to tape bat wings onto lollipops.
- Make Cookie-Cutter Shapes: Using metal cookie cutters, press fun shapes into the pumpkin’s skin.
- Crayon-Melt Pumpkin: Glue unwrapped crayons around the stem and melt them.
- Nature Collage Pumpkin: Gather twigs, leaves, and seeds from outside.
- Chalkboard Pumpkin: Paint your pumpkin with chalkboard paint.
- Pom-Pom or Button Pumpkins: Stick pom-poms, sequins, or buttons onto their pumpkin.
- The Mummy Pumpkin: Wrap the pumpkin loosely with gauze and add googly eyes.
- The Floral Pumpkin: Poke faux flowers or create a crown around the stem.
Notes
Always supervise children when using hot tools or scissors. Keep completed pumpkins in a cool, dry place.
Nutrition
- Calories: N/A
- Protein: N/A