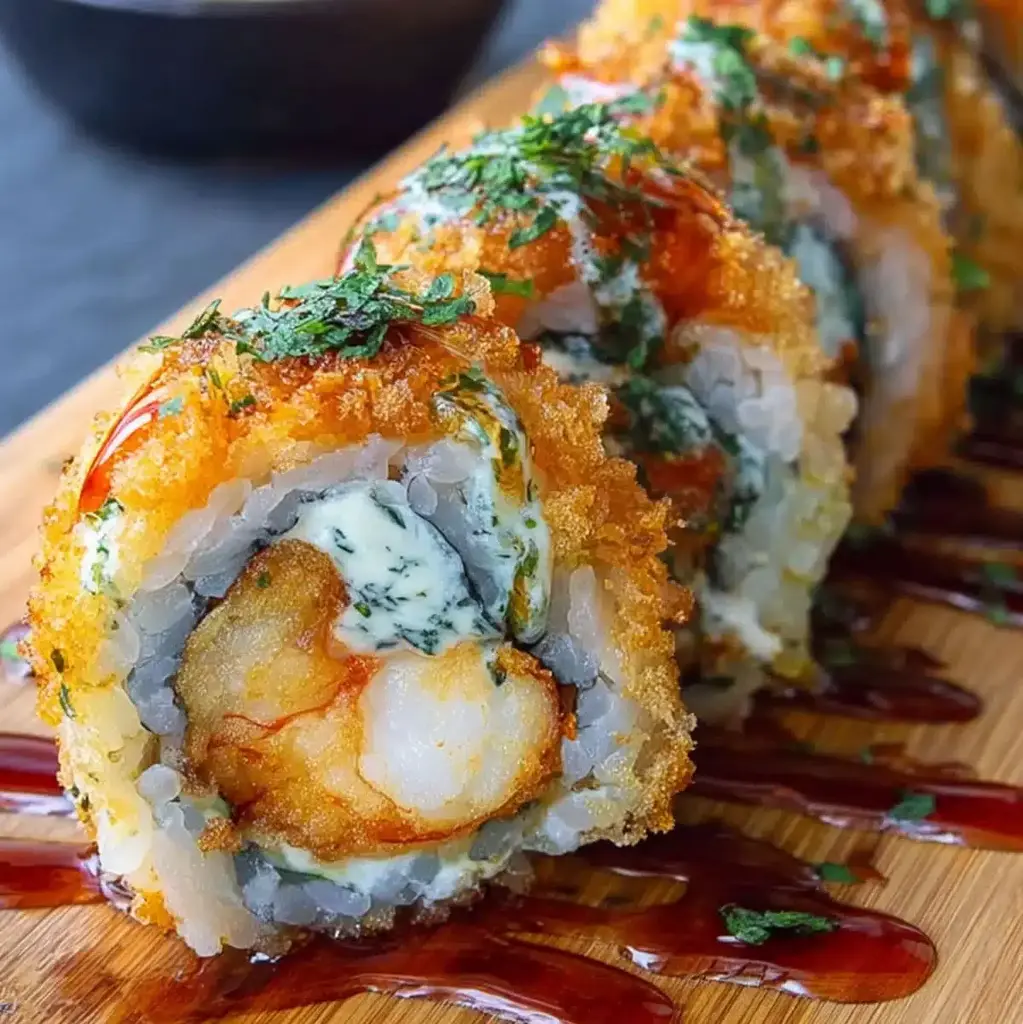
Homemade Shrimp Tempura Roll

“`html
Table of Contents
Homemade Shrimp Tempura Roll
Dreaming of a sushi night that rivals your favorite restaurant but feels cozy and personal? Have you ever wondered what makes those delicate, crispy tempura rolls so utterly irresistible? The secret often lies in the perfect balance of textures and flavors: the crunch of the tempura, the creaminess of the filling, the freshness of the vegetables, and that signature sweet and savory drizzle. Making Homemade Shrimp Tempura Rolls can seem daunting, but with a few insider tips and a bit of practice, you can recreate this culinary delight in your own kitchen. Imagine golden-fried shrimp, enveloped in perfectly cooked sushi rice and nori, bursting with flavor and a delightful crunch. This recipe is your guide to achieving sushi perfection at home, making your next sushi night an undeniable success that everyone will rave about.
Ingredients for Homemade Shrimp Tempura Roll
Crafting the perfect Shrimp Tempura Roll involves a few key components. Here’s what you’ll need, with some notes on making it your own:
For the Tempura Shrimp:
- 12-16 medium shrimp, peeled, deveined, tail on (this makes them easier to roll and looks beautiful!)
- 1 cup all-purpose flour, plus more for dusting
- 1 cup cornstarch (for extra crispiness!)
- 1 cup ice-cold sparkling water (the fizzy bubbles create a lighter batter)
Substitution: Club soda or even very cold plain water - 1 egg, lightly beaten
- Vegetable oil or other high-smoke point oil for frying (about 2-3 inches deep in a pot)
- Salt and freshly ground black pepper to taste
For the Sushi Rice:
- 2 cups sushi rice (short-grain Japanese rice is ideal for its sticky texture)
- 2 cups water
- 1/4 cup rice vinegar
- 2 tablespoons sugar
- 1 teaspoon salt
For the Rolls:
- 4-6 sheets nori (seaweed sheets)
- 1 small bunch fresh dill, finely chopped (for that zesty, herbal note)
Substitution: Parsley or chives for a milder flavor - 4 oz cream cheese, softened (room temperature makes it easier to spread)
- 1/2 ripe avocado, thinly sliced
- Optional: Sriracha or spicy mayo for an extra kick
For the Eel Sauce (or your favorite sushi sauce):
- 1/2 cup soy sauce
- 1/4 cup mirin (Japanese sweet rice wine)
- 2 tablespoons sugar
- Pinch of grated fresh ginger (adds a lovely warmth)
Timing for Homemade Shrimp Tempura Roll
45 minutes
20 minutes
1 hour 5 minutes
This timing is generally comparable to other complex sushi rolls that involve frying and rice preparation, though some recipes might extend prep to include marinating shrimp or making more elaborate sauces. Our goal here is efficiency without sacrificing quality!
Step-by-Step Instructions
Prepare the Shrimp
First things first, let’s get our shrimp ready for their crispy makeover. Pat the peeled and deveined shrimp completely dry with paper towels. This is crucial for the batter to adhere properly and for them to fry up nice and crispy. If you’re leaving the tails on (highly recommended for a beautiful presentation!), make sure they are clean. Lightly season the shrimp with salt and pepper.
Make the Tempura Batter
In a medium bowl, whisk together the all-purpose flour and cornstarch. In a separate small bowl, whisk the lightly beaten egg with the ice-cold sparkling water. Make sure the water is super cold – this is key to a light, crispy tempura! Don’t overmix; a few lumps are perfectly fine and even desirable for tempura batter. Gently pour the wet ingredients into the dry ingredients and stir just until combined. The batter should be quite thin, almost like a pancake batter but a bit runnier.
Fry the Shrimp
Heat your frying oil in a deep pot or Dutch oven to about 350°F (175°C). You can test the oil temperature by dropping a tiny bit of batter in; it should sizzle immediately and float to the top. Dredge each shrimp lightly in plain flour (this helps the batter stick), then dip it into the tempura batter, ensuring it’s fully coated. Carefully place a few shrimp into the hot oil, being careful not to overcrowd the pot. Fry for 2-3 minutes per side, until golden brown and crispy. Use a slotted spoon or spider to remove the fried shrimp and place them on a wire rack set over a baking sheet to drain any excess oil. This keeps them crispy!
Prepare the Sushi Rice
While the shrimp are cooling, let’s make the sushi rice. Rinse the sushi rice under cold water until the water runs clear. Combine the rinsed rice and 2 cups of water in a saucepan. Bring to a boil, then reduce heat to low, cover, and simmer for 15-20 minutes, or until all water is absorbed. Let it steam, covered, for another 10 minutes off the heat. While the rice is steaming, gently warm the rice vinegar, sugar, and salt in a small saucepan until the sugar and salt dissolve. Pour the cooked rice into a large, shallow bowl (a wooden hangiri is traditional, but a glass or ceramic bowl works too). Gradually pour the vinegar mixture over the hot rice, gently folding and fanning the rice with a spatula until it’s well combined and cooled to room temperature. Don’t mash the rice; you want those individual grains intact.
Assemble the Rolls
Now for the fun part! Lay a sheet of nori, shiny side down, on a bamboo sushi mat (or a piece of parchment paper). Wet your hands slightly to prevent the rice from sticking, and spread about 3/4 cup of sushi rice evenly over the nori, leaving a 1-inch border at the top. In a small bowl, mix the softened cream cheese with the finely chopped dill until well combined. Spread a thin layer of this dill cream cheese mixture horizontally across the rice, about one-third of the way up from the bottom. Arrange 2-3 pieces of your crispy tempura shrimp and a few slices of avocado on top of the cream cheese. If you like a kick, you can add a drizzle of sriracha or spicy mayo here.
Slice and Serve
Once your roll is assembled, it’s time to roll it up! Lift the edge of the bamboo mat closest to you, bringing it over the filling to meet the other side of the rice. Gently tuck the edge of the nori in and begin to roll tightly, pressing down with the mat to create a firm, compact log. Continue rolling until you reach the top border of the nori. You can moisten the top border with a little water to help seal the roll. For slicing, use a very sharp knife, wiping it with a damp cloth between each cut to ensure clean slices. Slice the roll into 6-8 pieces. Drizzle generously with sweet eel sauce (or your favorite equally delicious sushi sauce) just before serving. Enjoy the fruits of your labor!
Nutritional Information
(Estimated per roll, without eel sauce – values can vary based on ingredient sizes and brands)
- Calories: 250-300
- Protein: 10-12g
- Carbohydrates: 35-40g
- Fat: 10-15g
- Fiber: 2-3g
Healthier Alternatives
Looking to lighten things up without sacrificing flavor? Try these swaps:
- Air-Fried Shrimp: Instead of deep-frying, lightly coat shrimp with a bit of oil and air fry until crispy. This drastically reduces fat.
- Brown Rice: Use half brown rice and half white sushi rice for added fiber.
- Lighter Cream Cheese: Opt for a reduced-fat cream cheese or a whipped cream cheese for a smoother spread with fewer calories.
- Fresh Veggies: Load up on thin strips of cucumber, carrot, or bell pepper for extra nutrients and a satisfying crunch without the fried element.
Serving Suggestions
Serve your homemade shrimp tempura rolls immediately for the best texture. They pair wonderfully with:
- Pickled ginger and wasabi for that classic sushi experience.
- A side of soy sauce for dipping.
- Edamame or a light miso soup to round out your meal.
- A crisp, refreshing sake or green tea.
Common Mistakes to Avoid
Don’t let these common pitfalls ruin your sushi night!
- Warming the sparkling water: Always use ice-cold water for the crispiest tempura batter.
- Overcrowding the fryer: This lowers the oil temperature, leading to greasy, soggy shrimp. Fry in batches!
- Mashing the sushi rice: Handle the cooked rice gently when seasoning to maintain texture.
- Dull knife for slicing: A sharp, damp knife is essential for clean cuts, preventing the rolls from falling apart.
- Not draining the fried shrimp properly: Use a wire rack to keep them crispy.
Storing Tips
Sushi rolls, especially those with fried components and fresh ingredients like avocado, are best enjoyed immediately after preparation. If you have leftovers, wrap them tightly in plastic wrap and store them in the refrigerator for no more than 12-24 hours. Reheating is not recommended as it will make the tempura soggy and the rice hard. For optimal enjoyment, make only what you plan to eat in one sitting.
Conclusion
You’ve done it! You’ve mastered the art of the Homemade Shrimp Tempura Roll. From the perfectly crisp tempura to the creamy dill-infused filling and fluffy sushi rice, every bite offers a delightful symphony of textures and tastes. This recipe proves that delicious, restaurant-quality sushi is well within your reach. Gather your ingredients, invite some friends, and get ready to impress with your newfound sushi-making skills. Happy rolling, and even happier eating!
FAQs
***Where can I buy good quality sushi rice?***
You can find sushi rice at most major supermarkets in the international aisle, Asian specialty stores, or online retailers. Look for short-grain Japanese rice for the best sticky texture.
***Can I use pre-cooked shrimp for this recipe?***
While you can, the texture and flavor won’t be the same as fresh, raw shrimp that’s coated and fried. If you must, thaw and thoroughly dry pre-cooked shrimp, but expect a softer result.
***What if I don’t have a bamboo sushi mat?***
No worries! You can use parchment paper or even plastic wrap to help you roll the sushi tightly. Just shape them by hand as best as you can.
***How do I make the eel sauce if I don’t have mirin?***
If you can’t find mirin, you can substitute it with dry sherry or even a touch of white wine with a pinch of extra sugar to mimic the sweetness. However, mirin is ideal for authentic flavor.
***Can I make the tempura batter ahead of time?***
It’s best to make tempura batter just before frying. Letting it sit can cause the gluten to develop, making the batter tough instead of light and crispy. Make sure your water is also ice-cold.
Loved this recipe? Share your creations or any questions in the comments below!
Homemade Shrimp Tempura Roll

Crispy homemade Shrimp Tempura Roll filled with golden-fried shrimp, creamy dill-infused cream cheese, and fresh avocado, drizzled with sweet eel sauce for the perfect sushi night treat.
Ingredients
- 2 cupssushi rice, cooked and seasoned with rice vinegar
- 4large shrimp, peeled and deveined
- 1/2 cuptempura batter mix
- 1/2 cuppanko breadcrumbs
- 4sheets nori (seaweed)
- 1/2 cupcream cheese, softened
- 1 teaspoonchopped fresh dill
- 1 tablespoonchopped fresh parsley
- 1/4 cupeel sauce
- 1 tablespoonmayonnaise
- Vegetable oil, for frying
- Optional: sliced avocado, julienned cucumber, spicy mayo drizzle
Instructions
- Rinse sushi rice until the water runs clear. Cook according to package or rice cooker instructions. While warm, season with rice vinegar, sugar, and salt.
- Prepare tempura batter using cold water. Dip shrimp into the batter, coat with panko breadcrumbs.
- Heat vegetable oil to 350°F (175°C) and fry shrimp for 2–3 minutes until golden and crispy. Drain on paper towels.
- Lay a bamboo mat on a clean surface and cover with plastic wrap. Place nori sheet shiny side down.
- Spread sushi rice evenly over the nori, leaving a 1-inch strip uncovered at the top edge.
- Mix cream cheese with dill and spread a thin strip across the center of the rice. Place shrimp tempura on top. Add avocado or cucumber if using.
- Using the bamboo mat, roll sushi tightly, sealing the edge with water.
- (Optional) Lightly coat the entire roll with tempura batter and panko, fry briefly until golden and crispy. Drain well.
- Slice the roll into 6–8 pieces. Drizzle with eel sauce and mayonnaise. Garnish with parsley and serve immediately.
Notes
For gluten-free version, use gluten-free tempura mix and panko breadcrumbs.
Keep tempura batter cold and oil hot for maximum crispiness.
Use a sharp knife and wet the blade between cuts for clean slices.
Serve immediately for the best texture.
Nutrition
- Calories: 310 kcal
- Sugar: 5 g
- Fat: 12 g
- Carbohydrates: 38 g
- Protein: 12 g
“`