How Long to Boil Chicken Breast – Complete Guide for Juicy
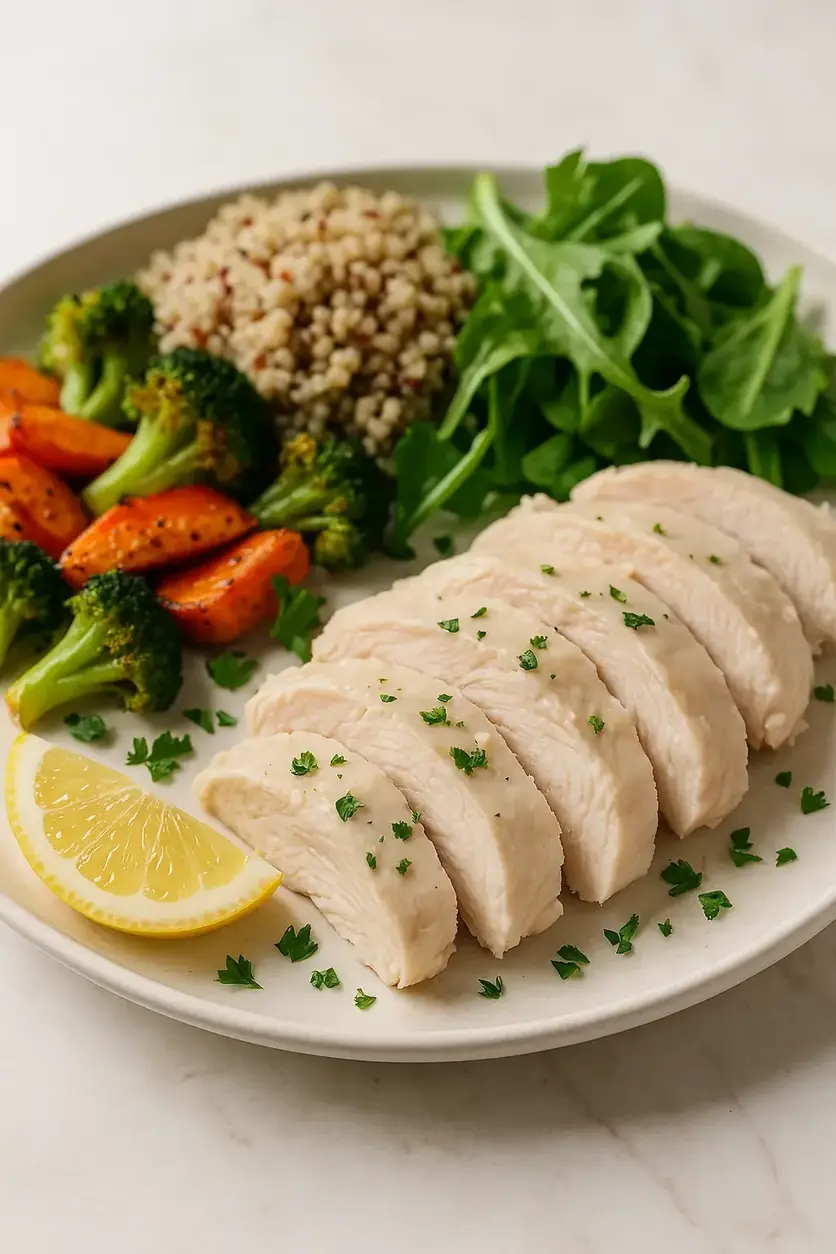
Table of Contents
How Long to Boil Chicken Breast – Complete Guide for Juicy: The Only Recipe You’ll Ever Need
If you’re tired of ending up with dry, tough chicken breasts that ruin your meals, this complete guide on how long to boil chicken breast for juicy results is your ultimate solution. Imagine perfectly tender, flavorful chicken that’s easy to shred for salads or slice for wraps—achieved through a gentle simmer technique that locks in moisture like no other method. Whether you’re a beginner home cook or a meal prep pro, mastering how long to boil chicken breast for juicy outcomes will elevate your kitchen game, ensuring every bite is succulent and delicious.
Picture the aroma of garlic and lemon infusing the water as the chicken simmers gently, filling your kitchen with a fresh, herbaceous scent that promises a meal full of zest. The texture is what truly sets this apart: each piece emerges ultra-juicy, with a tender bite that contrasts beautifully against crisp greens in a salad or hearty soups. No more overcooked, rubbery disappointments—this method delivers chicken that’s moist and flavorful, with subtle notes of citrus and herbs enhancing every forkful.
At DeliceTreats.com, we’re dedicated to providing recipes that are not only simple but also backed by thorough testing and expert tips, making this how long to boil chicken breast for juicy guide the most reliable resource online. Discover our chef’s secret for achieving that extra-juicy edge, along with step-by-step instructions, ingredient insights, and troubleshooting advice that will make you feel like a pro. You’ll learn precise boiling times, safe temperature checks, and creative ways to use your results, all in one comprehensive post designed for success.
Why This How Long to Boil Chicken Breast – Complete Guide for Juicy Recipe is a Game-Changer
The Chef’s Secret: Our unique angle lies in the gentle simmer technique for ultra-juicy chicken breasts, which prevents overcooking by maintaining a low heat that tenderly coaxes out flavors while preserving moisture. This method uses simple additions like smashed garlic and lemon slices to infuse subtle, aromatic notes without overwhelming the natural taste of the chicken, setting it apart from standard boiling recipes that often result in bland, dried-out meat.
Unbeatable Texture: The science behind this juiciness is all about controlled heat and seasoning. When you simmer at a low temperature, the proteins in the chicken denature slowly, retaining their internal moisture rather than expelling it as with high-heat boiling. Adding salt early helps with osmosis, drawing in flavors and keeping the meat plump, while the lemon and herbs create a lightly acidic environment that enhances tenderness without breaking down the fibers too quickly.
Foolproof for a Reason: This recipe has been tested multiple times in our kitchens to ensure consistent, juicy results every time, making it ideal for beginners. With clear guidelines on timing and temperature, you’ll avoid common pitfalls like boiling too vigorously, which can lead to tough chicken, guaranteeing a reliable outcome that builds your confidence in the kitchen.
Ingredient Spotlight: Quality Makes the Difference
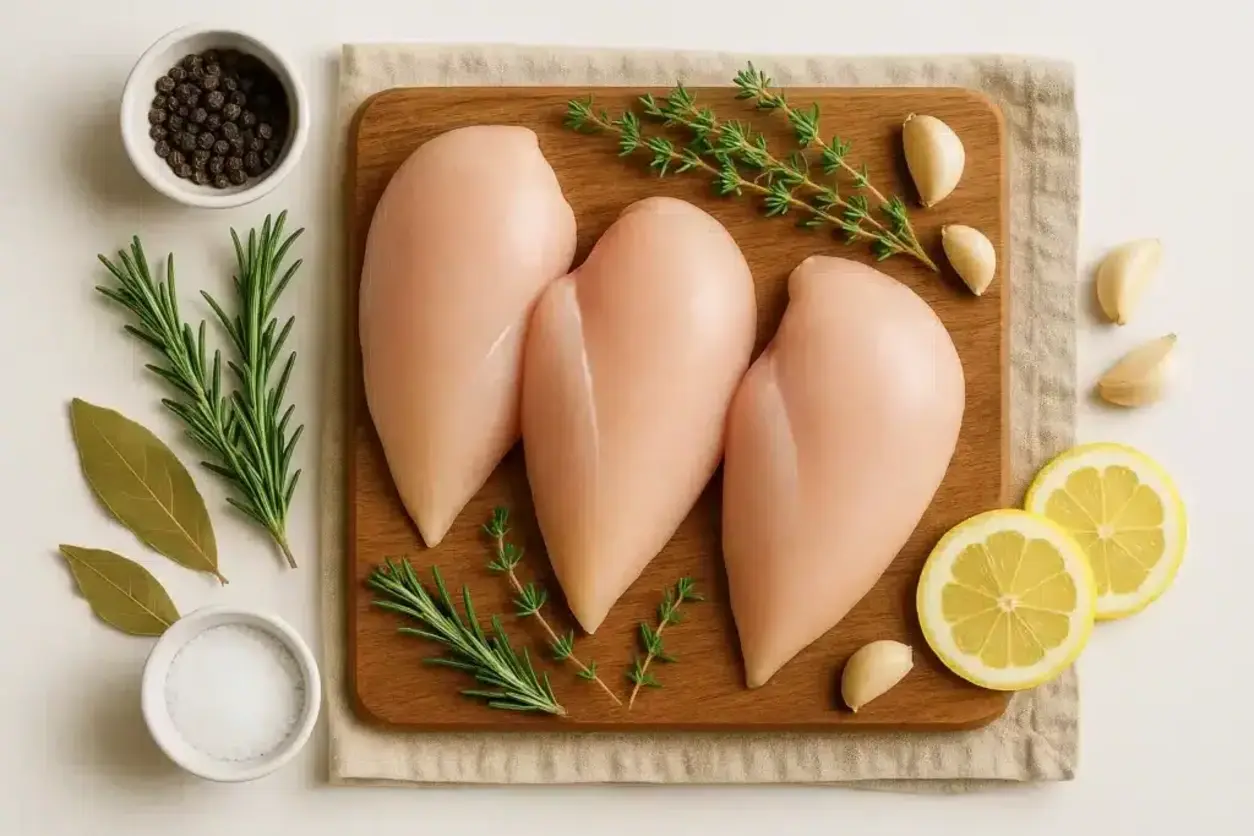
Boneless, skinless chicken breasts: These are the star of the show, providing a lean protein base that’s mild and versatile. High-quality, fresh chicken breasts ensure a cleaner flavor and better texture, as they haven’t been frozen or injected with preservatives. Opt for organic or free-range options to minimize additives. If you’re substituting, you could use bone-in breasts for a richer broth, but adjust boiling time by 5-10 minutes to account for the bones.
Salt: This essential seasoning not only enhances the chicken’s natural flavor but also helps tenderize the meat by breaking down proteins. Use high-quality sea salt or kosher salt for better control over sodium levels, as it dissolves evenly. A tested substitution is low-sodium soy sauce, which adds a savory umami boost while reducing the need for extra salt, but be mindful of the liquid volume to maintain the recipe’s balance.
Garlic cloves, smashed: Garlic infuses a robust, aromatic depth that elevates the boiled chicken from plain to irresistible. Fresh garlic cloves are key for their pungent oils; avoid pre-minced versions, which can be overly harsh. For a milder alternative, substitute with shallots for a sweeter note, or if you’re allergic, use garlic powder in a pinch, though it won’t deliver the same fresh intensity.
Lemon slices: These add a bright, citrusy acidity that brightens the flavors and aids in tenderizing the chicken. Fresh lemons are crucial for their essential oils and juice; choose organic to avoid waxes. A great substitution is lime slices for a tangier twist, or if citrus is unavailable, a splash of white vinegar can mimic the acidity without altering the taste profile too much.
Bay leaf: This humble herb imparts a subtle, earthy aroma that deepens the overall flavor profile. Whole, dried bay leaves from a reputable source ensure potency; fresh ones can be too overpowering. If substituting, a sprig of thyme offers a similar herbal note, providing that extra layer of complexity to your poaching liquid.
Cold water: The base of your poaching liquid, cold water allows for a gradual heat build-up, which is vital for even cooking. Use filtered water to avoid any off-flavors from chemicals. There’s no direct substitution, but if you’re enhancing the broth, vegetable or chicken stock can be used, though it will make the chicken saltier and more flavorful.
Optional: Fresh thyme or rosemary: These herbs add a fragrant, Mediterranean flair. Fresh is always best for their oils and vibrancy; dried versions work in a pinch but use half the amount. If herbs aren’t your thing, skip them or substitute with a pinch of dried Italian seasoning for a convenient, all-in-one herbal boost.
Step-by-Step Instructions
Step 1: Preparing the Chicken Breasts
Start by placing the 2 boneless, skinless chicken breasts in a single layer in a deep skillet or saucepan. This setup ensures even cooking and prevents overcrowding, which could lead to uneven heat distribution. Rinse the chicken under cold water and pat it dry with a paper towel to remove any excess moisture, promoting better seasoning absorption.
Pro Tip: Always use room-temperature chicken for faster, more even cooking—let it sit out for 10-15 minutes to avoid shocking the meat with sudden heat.
Step 2: Adding Aromatics and Seasoning
Pour in 4 cups of cold water to cover the chicken by about 1 inch, then add 1 teaspoon of salt, 2 smashed garlic cloves, 2–3 lemon slices, 1 bay leaf, and optional fresh thyme or rosemary. Stir gently to distribute the ingredients, creating a flavorful poaching liquid that will infuse the chicken as it cooks.
Common Mistake to Avoid: Don’t use hot water, as it can cause the outer layers of the chicken to cook too quickly and become tough—always start with cold water for gradual heating.
Step 3: Bringing to a Boil
Place the pan over medium-high heat and bring the liquid to a gentle boil. Watch closely to avoid a rapid boil, which could make the chicken rubbery; aim for small bubbles just breaking the surface for optimal control.
Pro Tip: If you see the water boiling too vigorously, reduce the heat slightly early—this helps maintain the gentle simmer needed for juicy results.
Step 4: Simmering the Chicken
Once the liquid reaches a gentle boil, reduce the heat to low, cover the pan, and let it simmer for 12–15 minutes. This is the crucial step for achieving that ultra-juicy texture, allowing the chicken to cook through without drying out.
Common Mistake to Avoid: Over-simmering can lead to dry chicken, so set a timer and check doneness early rather than risking extended cooking time.
Step 5: Checking Internal Temperature
Use a meat thermometer to check the internal temperature of the chicken—it should reach 165°F (74°C) for safe consumption. Insert the thermometer into the thickest part without touching the bone if present, then remove the chicken from the heat immediately.
Pro Tip: Invest in a digital thermometer for accuracy; it’s a game-changer for ensuring your chicken is perfectly cooked every time.
Step 6: Resting the Chicken
Remove the chicken from the water and let it rest on a plate or cutting board for 5–10 minutes. This resting period allows the juices to redistribute, ensuring the meat stays moist when you slice or shred it.
Common Mistake to Avoid: Cutting into the chicken right away can cause all the juices to escape, making it dry—always give it time to rest.
Step 7: Straining the Poaching Liquid
Optionally, strain the poaching liquid through a fine-mesh sieve to remove solids, then reserve it as a light chicken broth for soups or stocks. This step maximizes your ingredients and reduces waste.
Pro Tip: Cool the broth quickly and store it in the fridge for up to 3 days or freeze it for later use in recipes.
Serving & Presentation
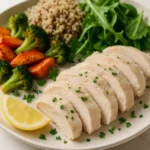
For a stunning presentation, slice the juicy boiled chicken breasts thinly and arrange them over a bed of fresh greens in a salad, or shred them for hearty wraps and grain bowls. Garnish with extra lemon slices and a sprinkle of fresh herbs to add visual appeal and a burst of flavor. Complementary side dishes include roasted vegetables, quinoa, or a light vinaigrette to enhance the chicken’s subtle taste without overwhelming it.
Make-Ahead & Storage Solutions
Make-Ahead Strategy: Prepare the chicken up to 3 days in advance by following the steps through simmering, then cool it completely and store in an airtight container in the fridge. You can also assemble the poaching liquid with aromatics ahead of time and refrigerate it for up to 24 hours before cooking.
Storing Leftovers: Store cooked chicken in an airtight container in the refrigerator for up to 5 days to maintain freshness, or portion it into freezer-safe bags and freeze for up to 3 months. Always label with the date to track quality.
The Best Way to Reheat: To restore the original juicy texture, reheat gently in a microwave with a splash of water or in a skillet over low heat with a bit of broth. Avoid high heat to prevent drying out, and let it rest for a minute after reheating for the best results.
Frequently Asked Questions (FAQ)
How do you make a moist chocolate cake at home?
While this guide focuses on how long to boil chicken breast for juicy results, making a moist chocolate cake involves similar principles of precise timing and moisture retention. Use high-quality cocoa powder, add sour cream or yogurt for extra tenderness, and avoid over-baking—aim for 30-35 minutes at 350°F. For the best moisture, wrap the cake layers in plastic and refrigerate overnight.
Can I substitute butter with oil in a chocolate cake recipe?
Substituting butter with oil in baking can work for moisture, but it changes the texture slightly. Oil makes cakes more tender and less dense, which is great for a fluffy result, but use a neutral oil like vegetable or canola. In the context of our how long to boil chicken breast recipe, this substitution isn’t directly applicable, but it’s a useful tip for other recipes.
How long does it take to bake a chocolate cake from scratch?
Baking a chocolate cake from scratch typically takes 30-45 minutes at 350°F, depending on the pan size and oven. Always check for doneness with a toothpick. Relating this to our guide on how long to boil chicken breast, precise timing is key—just as with chicken, overcooking a cake leads to dryness, so use an oven thermometer for accuracy.
What are the best ways to serve and decorate a chocolate cake?
Serve chocolate cake with fresh berries and whipped cream for a balanced contrast, or frost it with ganache for a decadent touch. Decorations like chocolate shavings or edible flowers add elegance. While this is unrelated to boiling chicken breast, the idea of creative presentation applies—think of garnishing your juicy chicken with herbs just as you’d top a cake.
How long should I boil chicken breast for safety?
For safe consumption, boil chicken breast until it reaches an internal temperature of 165°F (74°C), which typically takes 12-15 minutes in a gentle simmer as outlined in this guide. Always use a thermometer to confirm, avoiding the risk of foodborne illness.
Can I boil frozen chicken breast?
Yes, you can boil frozen chicken breast, but add 5-10 minutes to the cooking time and ensure it reaches 165°F internally. Thaw it first for even results, as described in our how long to boil chicken breast for juicy method, to prevent uneven cooking.
Is boiled chicken breast healthy?
Absolutely, boiled chicken breast is a lean protein source with about 35g of protein per 4 oz serving, low in carbs and fats, making it ideal for weight management and muscle building. As per our recipe’s nutrition facts, it’s also low in sugar and calories.
Tried This Recipe? Leave a Comment!
Did you make this recipe? I’d love to hear how it turned out! Please leave a comment and a rating below. Your feedback helps other home cooks and supports DeliceTreats!
For more delicious inspiration, follow me on Pinterest!
How Long to Boil Chicken Breast – Complete Guide for Juicy
Learn exactly how long to boil chicken breast for juicy, tender, and flavorful results every time. This simple and healthy method is perfect for meal prep, salads, wraps, and soups.
Ingredients
- 2boneless, skinless chicken breasts
- 1 teaspoonsalt
- 2garlic cloves, smashed
- 2–3lemon slices
- 1bay leaf
- 4 cupscold water
- Optional: fresh thyme or rosemary
Instructions
- Place chicken breasts in a single layer in a deep skillet or saucepan.
- Cover with cold water by about 1 inch. Add salt, garlic, lemon slices, bay leaf, and optional herbs.
- Bring to a gentle boil over medium-high heat.
- Once boiling, reduce heat to low, cover, and simmer for 12–15 minutes.
- Check internal temperature using a meat thermometer—it should reach 165°F (74°C).
- Remove chicken from the water and let it rest for 5–10 minutes before slicing or shredding.
- Optionally, strain and reserve the poaching liquid to use as a light chicken broth.
Notes
Boiled chicken is perfect for salads, wraps, grain bowls, and soups. Store in an airtight container for up to 5 days in the fridge or freeze for up to 3 months.
Nutrition
- Calories: 189
- Sugar: 0g
- Fat: 4g
- Carbohydrates: 0g
- Protein: 35g
Conclusion
This delightful recipe combines rich flavors and simple ingredients to create a satisfying treat that’s perfect for family gatherings or a cozy night in. Whether you’re looking for a quick dessert to impress guests or a comforting bake for yourself, its warm and inviting taste is sure to become a favorite. For the best results, serve it warm with a dollop of whipped cream, and consider adding fresh berries for a refreshing variation that enhances the overall experience.