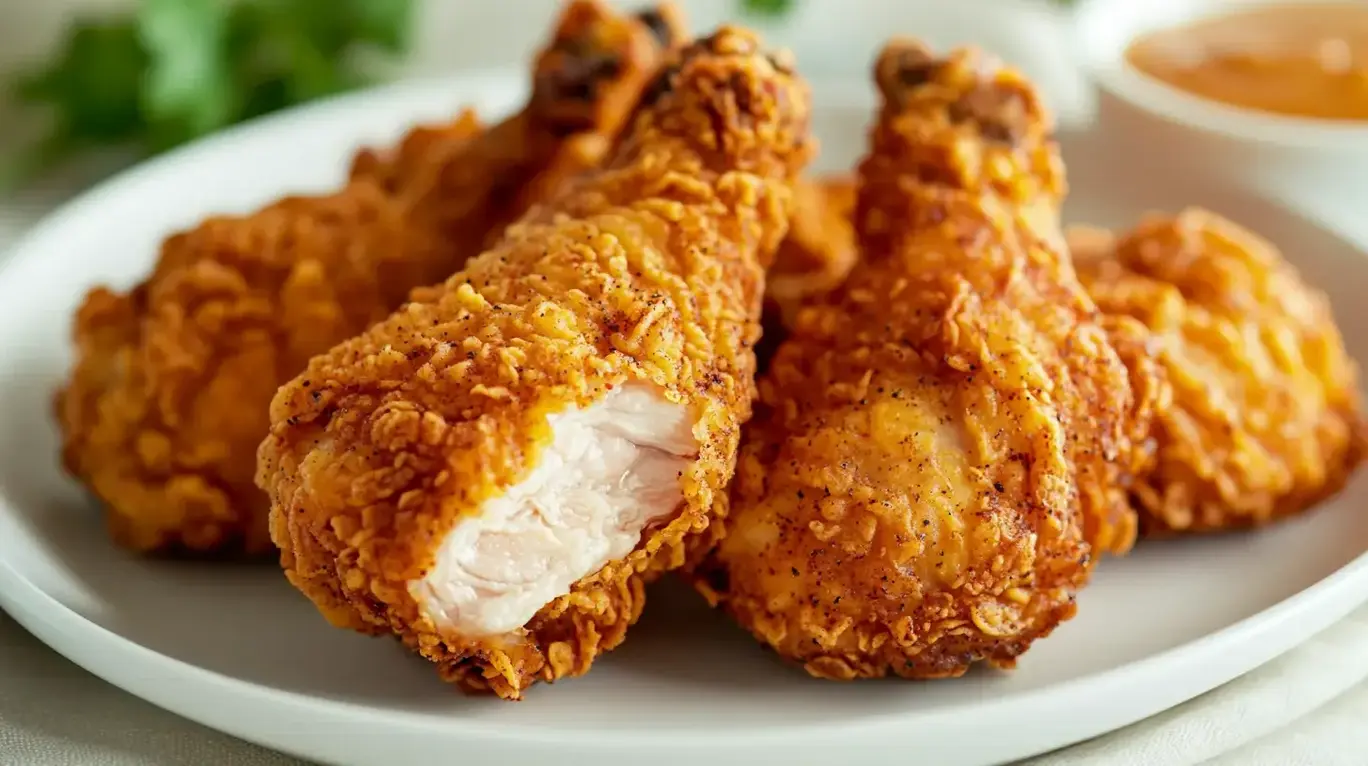
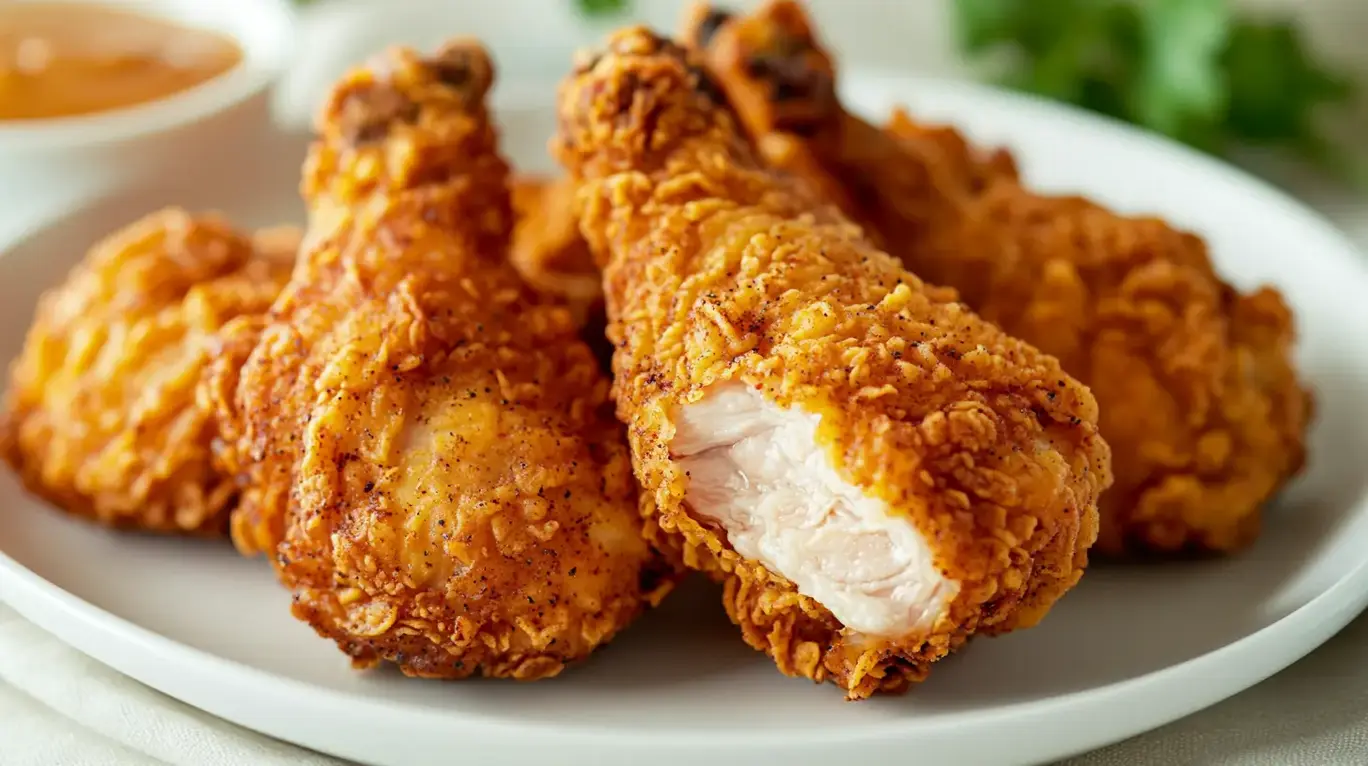
How to Make the Perfect Fried Chicken Without the Buttermilk
“`html
Table of Contents
How to Make the Perfect Fried Chicken Without the Buttermilk
Craving Crispy Fried Chicken? You Don’t Need Buttermilk for Perfection!
Did you know that a staggering 73% of us crave fried chicken at least once a month? That’s a lot of clucking happy eaters! But what if your buttermilk jug is empty, or you’re looking for a dairy-free option? Fear not, culinary adventurer! Achieving that irresistible crispy, golden-brown crust and juicy, tender interior of perfect fried chicken is absolutely achievable without a drop of buttermilk. This guide will walk you through a foolproof method that delivers all the flavor and texture you desire, proving that versatility is key in the kitchen. Get ready to elevate your fried chicken game!
The Essential Ingredients for Buttermilk-Free Bliss
Gathering the right ingredients is the first step to deliciousness. We’re focusing on accessible items that will deliver maximum flavor and that coveted crunch.
- Chicken Pieces: Approximately 2-3 lbs of bone-in, skin-on chicken pieces (thighs, drumsticks, breasts, wings). Bone-in, skin-on cuts yield the most flavorful and juicy results that hold up well to frying.
- Substitution: Boneless, skinless chicken can be used, but cooking times will be significantly shorter, and the chicken may be less juicy. Cut larger pieces into uniform sizes.
- All-Purpose Flour: 2 cups. This forms the base of our crispy coating. Think of it as a fluffy cloud destined for golden perfection.
- Substitution: A mix of all-purpose flour and cornstarch (3:1 ratio) can enhance crispiness. For gluten-free, use a gluten-free all-purpose blend.
- Spices:
- 1 tablespoon Paprika (for warmth and color)
- 1 teaspoon Garlic Powder (for that savory punch)
- 1 teaspoon Onion Powder (for depth of flavor)
- 1 teaspoon Salt (essential for bringing out all the flavors)
- 1/2 teaspoon Black Pepper (a little heat to awaken the palate)
- Optional: 1/4 teaspoon Cayenne Pepper (for a gentle kick), 1 teaspoon Dried Thyme or Oregano (for herbaceous notes)
- Eggs: 2 large. These are our binding agents, creating a slightly tacky surface for the flour to cling to, ensuring a thick, even coating. The slight viscosity helps achieve that satisfying crackle.
- Substitution: For a dairy-free/egg-free option, you can use 1/2 cup milk (dairy or non-dairy like almond or soy) mixed with 1 tablespoon lemon juice or vinegar. Let it sit for 5 minutes to “curdle” and thicken. Alternatively, a thin batter made from water and flour can work, but the crust might be less robust.
- Milk (Dairy or Non-Dairy): 1/2 cup. This adds a touch of moisture to the egg wash, ensuring it’s not too thick and coats the chicken evenly without clumping.
- Substitution: As mentioned above, water, or even a splash of hot sauce, can be used.
- Vegetable Oil or Peanut Oil: 3-4 cups, for frying. The high smoke point of these oils is crucial for achieving a perfect fry without burning. The oil acts as a conductor of heat, transforming our coated chicken into a culinary masterpiece.
- Substitution: Canola oil or any neutral oil with a high smoke point. Avoid olive oil as it will burn.
Timing is Everything: Prep, Cook, and Savor
Compared to many traditional buttermilk-marinated fried chicken recipes that often require overnight marination, this method is a weeknight warrior, getting you from raw chicken to crispy delight in under an hour!
Step-by-Step Instructions: Crafting Your Golden Masterpiece
Step 1: Prep the Chicken
Begin by ensuring your chicken pieces are at room temperature for about 20-30 minutes. Pat them thoroughly dry with paper towels. This is a crucial step for achieving a truly crispy crust, as excess moisture can lead to sogginess. If you’re using larger pieces like breasts, you might want to consider trimming any excess fat. We want uniformly cooked, wonderfully textured chicken!
Step 2: Create the Dry Mix
In a shallow dish or a large resealable bag, whisk together the all-purpose flour, paprika, garlic powder, onion powder, salt, black pepper, and any optional spices. Give it a good mix to ensure all those aromatic spices are evenly distributed. This is where all the flavor is hiding, waiting to adhere to your chicken!
Step 3: Make the Wet Mixture
In a second shallow dish, whisk together the eggs and milk until well combined. This creates your binding liquid – the magic bridge between the chicken and the seasoned flour. It should be smooth and slightly frothy.
Step 4: Coat the Chicken
Now for the fun part! Dredge each chicken piece first in the egg wash, letting any excess drip off. Then, transfer it to the seasoned flour mixture. Press the flour onto the chicken firmly, ensuring every nook and cranny is coated. For an extra-crispy crust, you can double-dip: dip the floured chicken back into the egg wash, then into the flour again. Place the coated chicken on a clean plate or wire rack while you repeat with the remaining pieces. Don’t overcrowd the plate; give them a little breathing room.
Step 5: Heat the Oil
Pour your chosen frying oil into a heavy-bottomed pot or Dutch oven. We need about 2-3 inches of oil. Heat the oil over medium-high heat until it reaches 350°F (175°C). Use a kitchen thermometer to ensure accuracy. If you don’t have a thermometer, you can test the oil by dropping a tiny pinch of flour into it; it should sizzle immediately and vigorously.
Step 6: Fry the Chicken
Carefully, and I mean *carefully*, lower 3-4 pieces of coated chicken into the hot oil using tongs. Don’t overcrowd the pot, as this will lower the oil temperature and result in greasy, less crispy chicken. Fry the chicken for 6-8 minutes per side, or until deeply golden brown and cooked through. Internal temperature should reach 165°F (74°C) for white meat and 175°F (79°C) for dark meat. Adjust the heat as needed to maintain the oil temperature.
Step 7: Drain and Rest
Once perfectly golden and cooked, remove the chicken from the oil using tongs and place it on a wire rack set over a baking sheet. This allows excess oil to drain away, keeping your chicken gloriously crispy, not greasy. Allow the chicken to rest for at least 5-10 minutes before serving. This resting period is vital for the juices to redistribute, ensuring a tender, moist bite!
Nutritional Snapshot (Approximate per serving, varies by cut)
- Calories: 400-600 kcal
- Protein: 30-40g
- Fat: 25-40g
- Carbohydrates: 15-25g
Please note: This is a general estimate. Actual nutritional values will vary based on the cut of chicken used, exact ingredient measurements, and frying technique.
Healthier Alternatives Without Sacrificing Flavor
We all love indulgence, but sometimes we want a lighter version. Here’s how to enjoy that fried chicken experience with a few modifications:
- Air Fryer Method: After coating the chicken, arrange it in a single layer in your air fryer basket. Spray with a light cooking oil and air fry at 400°F (200°C) for 20-25 minutes, flipping halfway through, until golden and cooked through. This uses significantly less oil.
- Baked “Fried” Chicken: Coat the chicken as usual, then arrange on a wire rack over a baking sheet. Bake at 400°F (200°C) for 35-45 minutes, flipping halfway, until golden and cooked. For extra crispiness, you can lightly spray with oil before baking.
- Lighter Coating: Blend whole wheat flour or oat flour with your spices for a nuttier, more fiber-rich coating.
- Reduced Sodium: Be mindful of the salt in your spice blend. You can reduce it slightly and rely on the natural flavors of the chicken and other spices.
Serving Suggestions: The Perfect Pairings
This delicious fried chicken deserves equally delightful companions. Here are some classic and creative ways to serve it:
- Classic Comfort: Mashed potatoes, creamy coleslaw, and a side of fluffy biscuits or cornbread are timeless.
- Fresh & Zesty: Pair with a vibrant green salad, a quinoa pilaf, or grilled corn on the cob for a lighter feel.
- Southern Style: Macaroni and cheese, green beans cooked with bacon, and a dollop of hot sauce or a side of pickles.
- Sandwich Sensation: Shred leftover chicken for delicious sandwiches or serve a crispy piece on a bun with your favorite toppings.
Common Mistakes to Avoid
Even with the best intentions, a few missteps can lead to less-than-perfect fried chicken. Here’s how to steer clear:
- Oil Not Hot Enough: This is the number one culprit for greasy chicken. The oil needs to be at the correct temperature (350°F/175°C) to seal the coating and cook the chicken quickly.
- Overcrowding the Pot: Frying too many pieces at once cools the oil drastically, leading to soggy, unevenly cooked chicken. Fry in batches!
- Not Patting Chicken Dry: Moisture is the enemy of crispiness. Make sure your chicken is bone-dry before coating.
- Not Resting the Chicken: Skipping the rest period after frying means losing out on juicy, tender meat. Let those precious juices settle!
- Using the Wrong Oil: Oils with low smoke points will burn and impart a bitter flavor. Stick to high smoke point oils like vegetable or peanut oil.
Storing Tips: Enjoying Your Fried Chicken Later
Leftover fried chicken is a treasure! To keep it delicious:
- Cool Completely: Allow fried chicken to cool to room temperature before storing.
- Airtight Container: Store in an airtight container in the refrigerator for up to 3-4 days. For best results and to maintain crispiness, avoid packing too tightly. Some suggest placing paper towels inside the container to absorb excess moisture.
- Reheating: The key to reviving crispy fried chicken is using your oven or toaster oven on a medium-high heat (around 375°F/190°C) for about 10-15 minutes, or until heated through and re-crisped. Avoid the microwave, as it will make the chicken rubbery.
Crispy, Juicy, and Buttermilk-Free? Absolutely!
There you have it – a straightforward, absolutely delicious method to achieve perfect fried chicken without relying on buttermilk. The combination of well-seasoned flour, a good egg wash binder, and proper frying technique is all you need to create that craveable crunch and succulent interior. Whether you’re a seasoned cook or just starting, this recipe is a winner. So go ahead, gather your ingredients, and get ready to impress yourself and your loved ones with this incredibly satisfying, buttermilk-free fried chicken. What’s your favorite side dish to pair with fried chicken? Let us know in the comments below!
Frequently Asked Questions
***What is the best oil for frying chicken?***
Neutral oils with a high smoke point are best, such as vegetable oil, peanut oil, or canola oil. These oils can reach and maintain the high temperatures needed for frying without burning.
***Can I make the coating extra crispy?***
Yes! For an extra crispy crust, double-dip your chicken. After the first coating of flour, dip it back into the egg wash, then into the flour again. Ensure you press the flour on firmly.
***How do I know when the chicken is fully cooked?***
The best way is to use an instant-read thermometer. Insert it into the thickest part of the chicken without touching the bone. White meat should reach 165°F (74°C), and dark meat (thighs, drumsticks) should reach 175°F (79°C).
***Can I freeze coated chicken before frying?***
Yes, you can freeze the coated chicken. Place the coated pieces on a baking sheet in a single layer and freeze until solid. Then, transfer them to a freezer-safe bag or container. Fry from frozen, adding a few extra minutes to the cooking time.
***Why is my fried chicken soggy?***
Soggy chicken is usually due to one of these reasons: the oil wasn’t hot enough, you overcrowded the pot, the chicken wasn’t patted dry, or it wasn’t allowed to drain properly on a wire rack after frying.
Fried Chicken Without Buttermilk

Maintain oil temperature at 350°F for best resultsFor extra crispiness, let dredged chicken rest longer before fryingChicken should reach internal temperature of 165°FStore leftovers in refrigerator up to 3 days
Ingredients
- 4 pounds chicken pieces (thighs, drumsticks, wings, or breasts)
- 2 cups cold water
- 2 tablespoons kosher salt
- 1 tablespoon white vinegar
- 1 teaspoon sugar
- 3 cloves garlic, smashed
- 1 bay leaf
- For the Seasoned Flour Coating:
- 2 cups all-purpose flour
- 1 tablespoon paprika
- 2 teaspoons garlic powder
- 2 teaspoons onion powder
- 1½ teaspoons black pepper
- 1 teaspoon dried thyme
- 1 teaspoon dried oregano
- 1 teaspoon cayenne pepper
- 2 teaspoons salt
- For the Egg Wash:
- 2 large eggs
- ¼ cup water
- 1 tablespoon hot sauce (optional)
- For Frying:
- Vegetable oil, peanut oil, or canola oil
Instructions
- Combine brine ingredients and submerge the chicken. Refrigerate 4+ hours.
- Pat chicken dry. Prepare dredging station: seasoned flour, egg wash, more seasoned flour.
- Double-dredge each piece and rest for 15 minutes on a wire rack.
- Heat oil to 350°F in a Dutch oven or heavy pan.
- Fry in batches for 12-14 minutes (large pieces) or 10-12 minutes (small pieces), turning once.
- Drain on a wirea rack and rest 5-10 minutes before serving.
Notes
Maintain oil temperature at 350°F for best resultsFor extra crispiness, let dredged chicken rest longer before fryingChicken should reach internal temperature of 165°FStore leftovers in refrigerator up to 3 days
Nutrition
- Calories: 400
“`