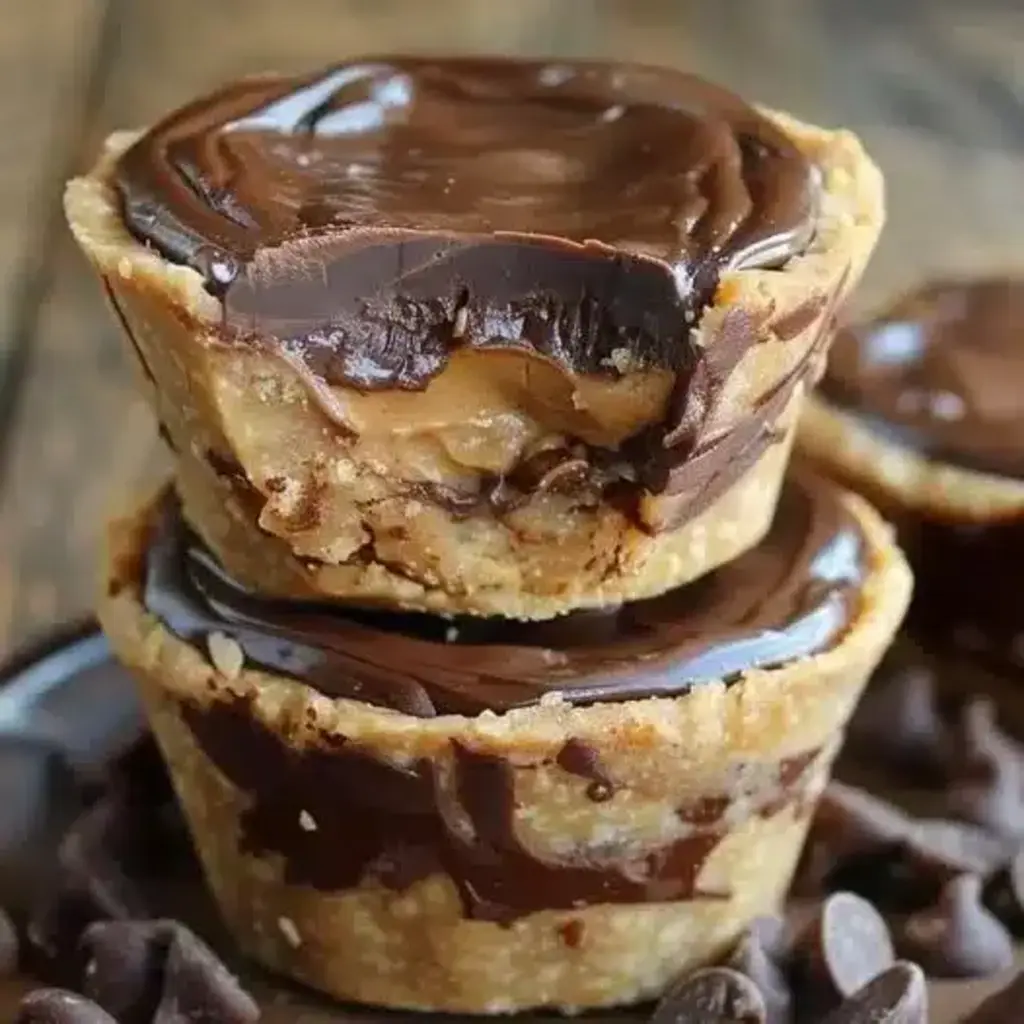
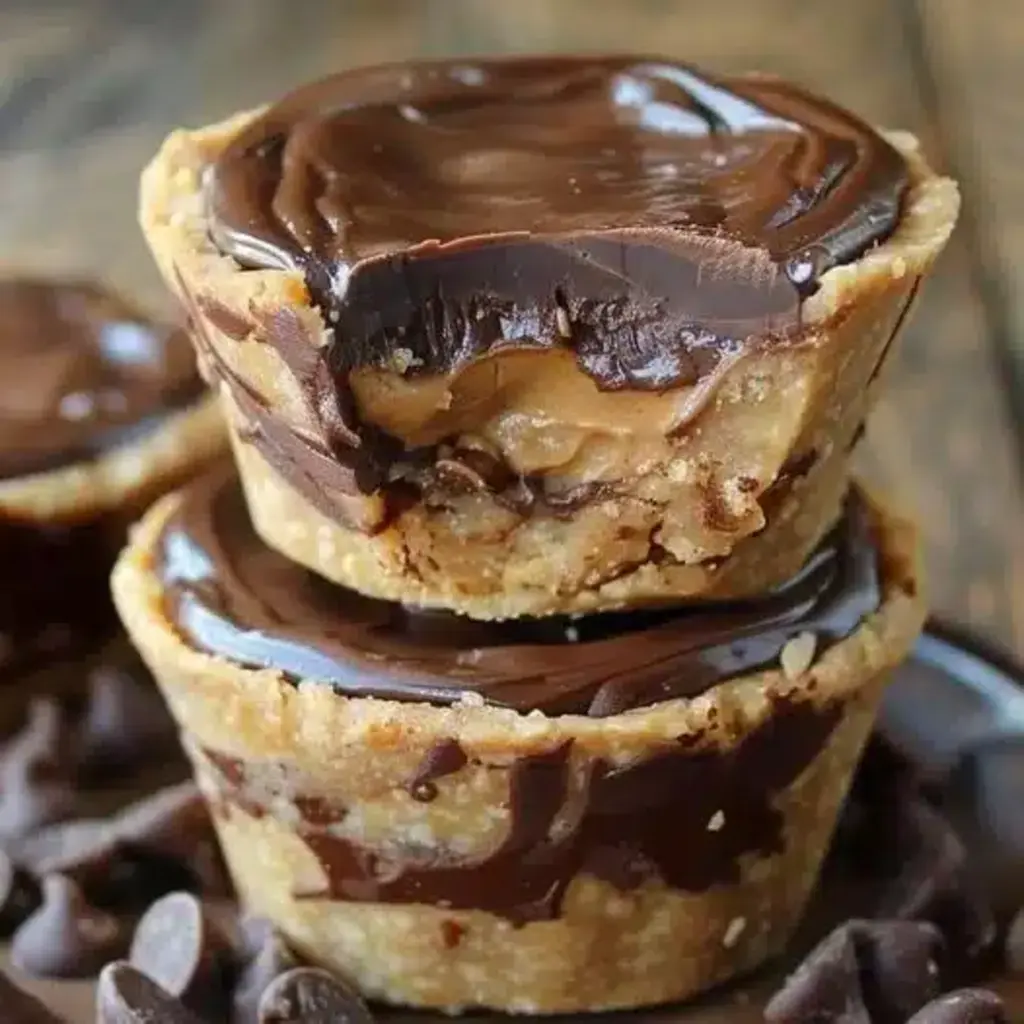
Mini Chocolate Peanut Butter Pies – Easy Dessert Recipe
“`html
Table of Contents
- Introduction: The Heavenly Duo
- Crafting Your Mini Pies: The Ingredients
- Timing Your Dessert Adventure
- Embarking on the Baking Journey
- Nutritional Information: A Sweet Glance
- Healthier Alternatives: Indulge Wisely
- Serving Suggestions: Elevate Your Dessert
- Common Mistakes to Avoid
- Storing Tips: Keep the Magic Alive
- Frequently Asked Questions
Mini Chocolate Peanut Butter Pies – Easy Dessert Recipe
Introduction: The Heavenly Duo
Are you searching for an easy yet incredibly decadent dessert that combines two of America’s favorite flavors, chocolate and peanut butter? If so, you’re in the right place!
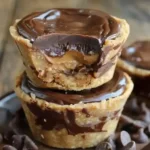
These mini chocolate peanut butter pies are a heavenly treat that seamlessly marries the creamy, nutty goodness of peanut butter with the luxurious, rich taste of chocolate. Originating from the cherished American dessert traditions, this recipe is a testament to how simple, beloved flavors can come together to create something truly extraordinary. Imagine a perfectly crumbly crust, a silky smooth peanut butter filling, and a glossy chocolate ganache topping – it’s a symphony of textures and tastes that dance on your palate. Whether you’re planning a special occasion, hosting a dinner party, or simply looking to satisfy a persistent sweet craving, these adorable mini pies are guaranteed to impress your guests and become a new family favorite. They offer all the indulgence of a full-sized pie, but in a perfectly portioned, incredibly charming package. Get ready to embark on a delicious journey that’s as fun to make as it is to devour!
Crafting Your Mini Pies: The Ingredients
The magic of these mini pies lies in the quality and combination of their components. We’ve broken down the ingredients by component for clarity, offering insights and potential substitutions to suit your pantry and preferences.
For the Perfect Crust
- 2 cups graham cracker crumbs: The classic choice for a slightly sweet and sturdy base. Aim for finely ground crumbs for the best texture. (About 14-16 full sheets of graham crackers).
- 1/2 cup unsalted butter, melted: Binds the crumbs together, providing richness and a golden hue. Ensure it’s fully melted.
- 1/4 cup granulated sugar: Adds a touch of sweetness and helps create a crisper crust.
- 1/4 teaspoon salt: Enhances the other flavors and balances the sweetness.
Substitutions: For a different flavor profile, you can use chocolate wafer crumbs, shortbread cookie crumbs, or even crushed pretzels for a sweet and salty kick. For a dairy-free option, use a plant-based butter alternative.
For the Creamy Peanut Butter Filling
- 8 oz cream cheese, softened: The crucial base for a smooth, rich, and tangy filling. Ensure it’s at room temperature for easy blending.
- 1 cup creamy peanut butter: Use your favorite brand! Natural peanut butter can sometimes be oily, so stir it very well. Creamy varieties yield the smoothest texture.
- 1/2 cup powdered sugar (confectioners’ sugar): Sweetens the filling and contributes to its velvety texture. Sift it if lumpy.
- 1 teaspoon vanilla extract: Adds a warm, aromatic depth to the peanut butter flavor.
- 1/4 cup heavy cream: For an extra creamy and lighter consistency.
Substitutions: Any smooth peanut butter will work, but crunchy can be used if you don’t mind textural variation. For a dairy-free filling, use a dairy-free cream cheese alternative and full-fat coconut cream (chilled and only the solid part) instead of heavy cream.
For the Luxurious Chocolate Ganache
- 4 oz semi-sweet chocolate, finely chopped: Quality matters here! Chocolate chips can be used but may not melt as smoothly.
- 1/2 cup heavy cream: Creates a glossy, decadent topping.
- 1 tablespoon unsalted butter (optional): Adds extra shine and a richer mouthfeel.
Substitutions: Use dark chocolate for a more intense flavor or milk chocolate for a sweeter ganache. For a dairy-free ganache, use dairy-free chocolate and full-fat coconut milk (the creamy part from the top of a chilled can).
Timing Your Dessert Adventure
Compared to typical chocolate peanut butter pies which often require longer baking and cooling times for a single large pie, these mini versions are designed for efficiency. The no-bake filling and quick ganache preparation make this recipe significantly faster, with the primary time commitment being chilling. The average pie recipe might take 30-40 minutes of prep and then 45-60 minutes of baking, plus cooling. Our mini pies skip the baking entirely for the filling!
Embarking on the Baking Journey
Let’s get started on creating these delightful mini treats!
Step 1: Preheat Your Oven and Prepare Tins
Even though the filling is no-bake, the crust benefits from a brief bake to set it. Preheat your oven to 350°F (175°C). Lightly grease a 12-cup muffin tin or line it with paper liners. If you plan to serve the pies directly from the tin, greasing is best. If you’ll be removing them, liners are convenient.
Step 2: Create the Irresistible Crust
In a medium bowl, combine the graham cracker crumbs, melted butter, granulated sugar, and salt. Stir until all the crumbs are evenly moistened, resembling wet sand. This mixture will hold together when pressed.
Divide this mixture evenly among the 12 muffin cups. Press the crumbs firmly into the bottom and slightly up the sides of each cup to form the pie crusts. You can use the bottom of a small glass or a measuring spoon to get a compact and even layer.
Bake the crusts for 8-10 minutes, or until they are lightly golden and fragrant. This step is crucial for a crisp crust that won’t become soggy. Remove them from the oven and let them cool completely in the muffin tin while you prepare the filling.
Step 3: Whip Up the Luscious Peanut Butter Filling
In a large bowl, beat the softened cream cheese with an electric mixer until it’s smooth and free of lumps. This is your foundation for a truly creamy filling.
Add the creamy peanut butter and continue beating until well combined. Then, gradually beat in the powdered sugar until the mixture is light and fluffy. Stir in the vanilla extract and heavy cream, mixing until everything is just incorporated and the filling has a smooth, luscious texture.
Step 4: Assemble the Mini Pies
Once the crusts have cooled completely, carefully spoon or pipe the peanut butter filling evenly into each baked crust. Fill them generously, creating a beautiful dome shape if desired.
Step 5: Make the Silky Chocolate Ganache
Place the finely chopped semi-sweet chocolate in a heatproof bowl. In a small saucepan, heat the heavy cream over medium heat until it just begins to simmer around the edges. Do not let it boil vigorously.
Pour the hot cream over the chopped chocolate. Let it sit undisturbed for 5 minutes to allow the chocolate to melt. Then, gently whisk the mixture, starting from the center and working your way out, until it’s smooth, glossy, and completely combined. If using, whisk in the tablespoon of butter until melted and incorporated for extra shine.
Step 6: Ganache, Chill, and Serve
Allow the ganache to cool slightly for about 10-15 minutes, until it’s thickened but still pourable. Spoon or drizzle the ganache over the peanut butter filling in each mini pie, ensuring each one is beautifully coated.
Transfer the muffin tin to the refrigerator and chill for at least 2 hours, or until the filling is firm and the ganache has set. This chilling time is essential for the pies to hold their shape.
Once chilled, carefully remove the mini pies from the muffin tin. If using liners, peel them off. If you greased the tin, you may need to gently loosen the edges with a small knife.
Nutritional Information: A Sweet Glance
- Calories: Approximately 350-450 per mini pie (varies based on exact ingredients and portion size).
- Fat: Around 25-35g (includes saturated fats).
- Carbohydrates: Approximately 30-40g (includes sugars).
- Protein: Around 5-8g.
- Sodium: Varies based on graham crackers and peanut butter used.
Please note: This is an estimated nutritional value and can vary significantly based on the specific brands and quantities of ingredients used. For precise tracking, it’s recommended to use a nutritional calculator with your exact recipe details.
Healthier Alternatives: Indulge Wisely
Looking to make these mini pies a bit lighter without sacrificing flavor? Try these swaps:
- Crust: Use a base of finely ground whole-wheat graham crackers or oat flour mixed with a touch of coconut oil for the crust. Reduce the sugar or swap for a sugar substitute.
- Peanut Butter Filling: Opt for a natural peanut butter with no added sugar. Use a light cream cheese or a Greek yogurt and cream cheese blend to reduce fat and increase protein. Substitute some of the powdered sugar with a sugar-free sweetener like erythritol or stevia, adjusting to taste.
- Chocolate Ganache: Use sugar-free dark chocolate chips for the ganache and a light coconut milk or almond milk instead of heavy cream.
Serving Suggestions: Elevate Your Dessert
These mini pies are delightful on their own, but here are a few ideas to take them to the next level:
- Garnish: Top with a dollop of whipped cream, a sprinkle of chocolate shavings, a mini peanut butter cup, or a drizzle of extra peanut butter.
- With Fruit: Serve alongside fresh raspberries or strawberries for a burst of freshness that cuts through the richness.
- Coffee Pairings: They pair beautifully with a hot cup of coffee or a cold glass of milk.
- Party Favors: Package them in small treat boxes for a charming homemade gift or party favor.
Common Mistakes to Avoid
- Not softening cream cheese: Lumpy filling is the enemy! Ensure your cream cheese is truly at room temperature.
- Overmixing the filling: Once combined, stop mixing. Overmixing can deflate the fluffiness and potentially make the filling less stable.
- Ganache too hot: Pouring piping hot ganache can melt the filling. Let it cool slightly before topping.
- Not chilling long enough: Patience is key! Undercooked chilling will result in pies that fall apart when served.
- Pressing the crust too loosely: A well-compacted crust is essential for structure.
Storing Tips: Keep the Magic Alive
Store leftover mini chocolate peanut butter pies in an airtight container in the refrigerator for up to 3-4 days. The chilling process is crucial for maintaining their shape and freshness.
You can also freeze these pies! Place them on a baking sheet in the freezer until firm, then transfer them to a freezer-safe container or bag. They can be stored in the freezer for up to 1 month. Thaw them in the refrigerator before serving.
Frequently Asked Questions
***Can I use crunchy peanut butter instead of creamy?***
Yes, you absolutely can! Using crunchy peanut butter will add a delightful textural contrast to the smooth filling. Just ensure you stir natural, oil-separated peanut butter very well before measuring.
***Do I need to bake the crust?***
Baking the crust for 8-10 minutes at 350°F (175°C) is highly recommended. It helps to set the crust, making it firmer and less likely to crumble. It also toasts the crumbs, enhancing their flavor.
***How much time does the ganache need to set?***
The ganache needs about 10-15 minutes to cool down and thicken before being drizzled or spooned onto the pies. The pies themselves need at least 2 hours in the refrigerator to fully chill and set.
***Can I make the crust with a different type of cookie?***
Certainly! Chocolate cookie crumbs (like Oreos without the cream filling), vanilla wafers, or shortbread cookies can all be used as a base. Adjust the sugar in the crust slightly depending on the sweetness of the cookie.
***Can I make these in a larger pie dish?***
This recipe is designed for mini pies, typically in muffin tins. While you could scale it up for a standard 9-inch pie, the baking and chilling times would need significant adjustments, and the crust to filling ratio would be different. For a standard pie, consider a baked pie crust recipe.
Conclusion: Enjoy Your Delicious Creation!
There you have it – a simple yet elegant recipe for Mini Chocolate Peanut Butter Pies that’s sure to become a go-to treat. The perfect balance of rich chocolate and creamy peanut butter, encased in a crisp graham cracker crust, makes these mini desserts simply irresistible. Whip up a batch for your next gathering, or simply to indulge your sweet tooth. They are guaranteed to bring smiles and satisfied sighs. Don’t wait – gather your ingredients and start baking this delectable dessert today. You won’t regret it!
Mini Chocolate Peanut Butter Pies – Easy Dessert Recipe
These mini chocolate peanut butter pies are a heavenly treat that combines the creamy goodness of peanut butter with the luxurious taste of chocolate. Originating from the classic American dessert traditions, this recipe brings together the best of both worlds. Whether you’re making these for a special occasion or just to satisfy a sweet craving, these mini pies are sure to impress.
Ingredients
- Optional substitutions:
Instructions
- Prepare the Crust:In a medium bowl, combine graham cracker crumbs and melted butter. Press mixture into the bottoms and sides of a muffin tin lined with cupcake liners. Refrigerate for 30 minutes to set.
- Make the Filling:In a large mixing bowl, beat the cream cheese and peanut butter until smooth. Add powdered sugar and vanilla extract, and mix until well combined.
- Whip the Cream:In a separate bowl, whip the heavy cream until stiff peaks form. Gently fold the whipped cream into the peanut butter mixture.
- Fill the Crusts:Spoon the peanut butter filling into the chilled crusts, smoothing the tops with a spatula.
- Prepare the Ganache:In a small saucepan, heat the 1/2 cup heavy cream until just simmering. Remove from heat and add the chocolate chips, stirring until melted and smooth.
- Top with Ganache:Pour the chocolate ganache over the peanut butter filling, spreading evenly.
- Chill and Serve:Refrigerate the pies for at least 2 hours, or until set. Garnish with additional chocolate chips before serving.
Notes
Ensure the cream cheese is softened for a smoother filling.
Chill the crusts thoroughly before adding the filling to prevent crumbling.
“`