Mini Kentucky Sawdust Pie Delight Recipe
“`html
Table of Contents
Mini Kentucky Sawdust Pie Delight Recipe
Are You Ready for a Truly Unique Pie Experience?
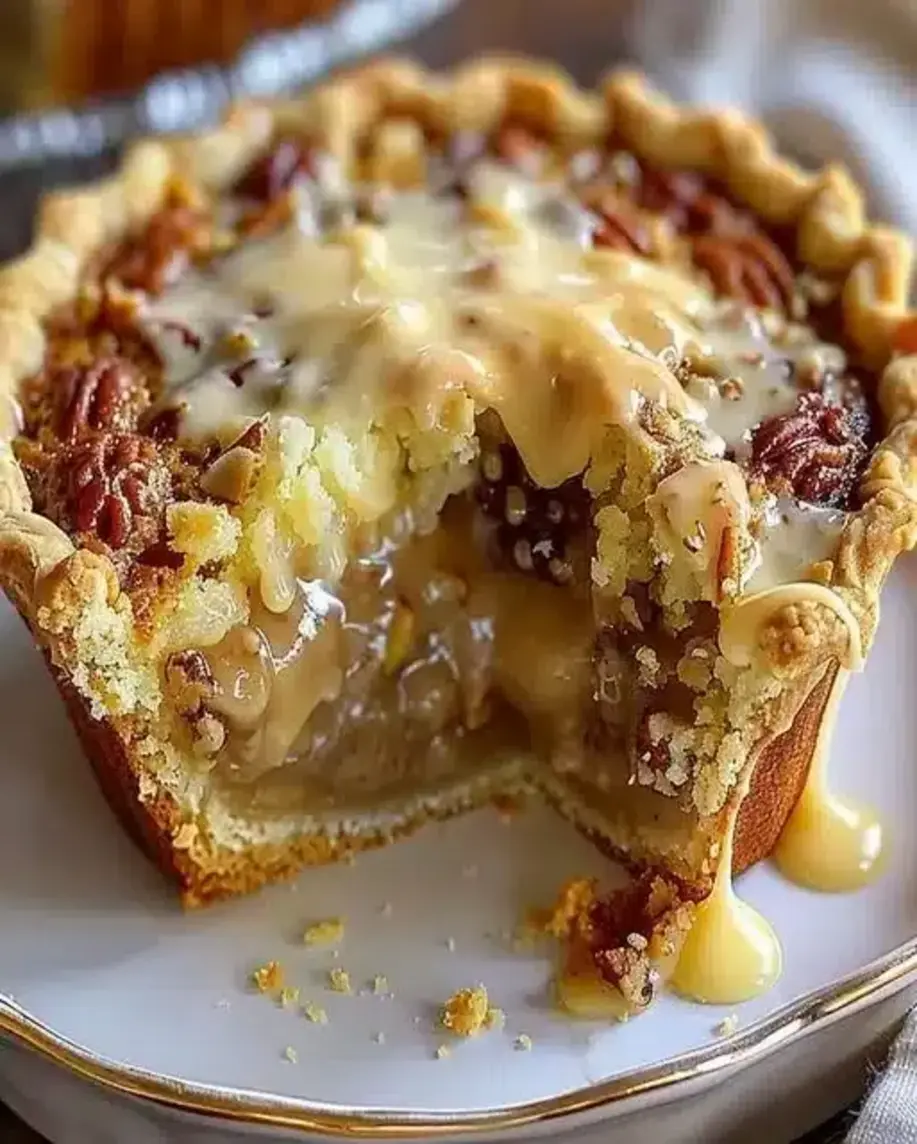
Greetings, pie lovers! If you’re in search of a unique and indulgent dessert, you’ve come to the right place. Today, we’re diving into the delightful world of Mini Kentucky Sawdust Pie Delight. This sweet treat is sure to become a family favorite. But what exactly *is* a Kentucky Sawdust Pie, and why does it have such an intriguing name? This classic Southern dessert gets its name from its distinctive, crumbly texture, often achieved with finely ground nuts or coconut, mimicking the appearance of sawdust. It’s a rich, sweet, and surprisingly easy pie that offers a wonderful contrast of textures and flavors, making it a standout among more traditional pies. We’re going to explore how to make these delightful mini versions, perfect for individual servings and guaranteed to impress!
Unlock the Magic: Ingredients for Your Mini Pie Delight
The beauty of this mini Kentucky Sawdust Pie lies in its straightforward yet incredibly satisfying ingredient list. Each component plays a crucial role in achieving that signature texture and rich flavor. We’ll break down what you need and offer some smart swaps if you’re missing something or have specific dietary needs.
- Unsalted Butter: 1 cup (2 sticks), softened. This is the creamy foundation, bringing richness and tenderness. Substitution: Salted butter (reduce added salt in the recipe), or a good quality vegan butter.
- Granulated Sugar: 1 ¾ cups. For that essential sweetness and structure. Substitution: Coconut sugar for a slightly different caramel note, or a sugar substitute like erythritol for a lower-carb option.
- Eggs: 3 large, at room temperature. They bind everything together and contribute to the richness and slight chewiness. Substitution: Flax eggs (3 tbsp flaxseed meal + 9 tbsp water, let sit for 5 mins) for a vegan option, though texture may vary slightly.
- Vanilla Extract: 1 teaspoon. The classic aromatic enhancer that rounds out the sweet flavors. Substitution: Almond extract for a different nutty profile, or bourbon for an authentic Southern kick.
- All-Purpose Flour: 1 cup. The structural backbone of our pie. Substitution: A gluten-free all-purpose blend for gluten-free eaters. Ensure it has xanthan gum.
- Salt: ½ teaspoon. Balances the sweetness and enhances other flavors. Substitution: Omit if using salted butter.
- Chopped Nuts: 1 cup walnuts or pecans, finely chopped. This is key for that “sawdust” texture and nutty flavor. Substitution: Shredded coconut (sweetened or unsweetened), or even finely crushed pretzels for a sweet and salty surprise. You could also use a mix!
- Optional: Dark Chocolate Chips or Chunks: ½ cup. For an extra layer of indulgence. Substitution: White chocolate chips, butterscotch chips, or omit entirely.
- Pre-made Mini Pie Crusts or Muffin Liners: Approximately 12. To hold our delicious filling. Note: You can also make your own tartlet shells if you prefer.
Mastering the Clock: Pie Prep & Bake Times
Compared to a traditional full-sized pie that can take 1.5-2 hours from start to finish (including cooling), these mini versions are incredibly fast! The prep is minimal, and the baking time is significantly reduced, making this an ideal dessert for when you need a quick, impressive treat. On average, most pie recipes require 30+ minutes of prep and over an hour of baking, so these mini delights are a real time-saver.

Crafting Your Mini Kentucky Sawdust Pie Delight: A Step-by-Step Guide
Let’s get baking! Follow these easy steps to create your mouthwatering mini pies.
Step 1: Preheat and Prep Your Workspace
Begin by preheating your oven to 350°F (175°C). If you’re using muffin tins, lightly grease them or line them with paper liners. If you have pre-made mini pie crusts, arrange them on a baking sheet.
Step 2: Creaming the Butter and Sugar for a Dreamy Base
In a large mixing bowl, use an electric mixer (or a whisk and some elbow grease!) to cream together the softened unsalted butter and granulated sugar. Beat them until the mixture is light, fluffy, and pale in color. This process incorporates air, which helps give your pie filling a delightful texture.
Step 3: Adding the Eggs and Vanilla for Richness
Add the eggs one at a time, beating well after each addition until fully incorporated. Don’t rush this step, as it helps emulsify the mixture. Stir in the vanilla extract. Your batter should be smooth and glossy at this point.
Step 4: Gently Incorporating the Dry Ingredients
In a separate, smaller bowl, whisk together the all-purpose flour and salt. Gradually add this dry mixture to the wet ingredients, mixing on low speed or by hand just until combined. Be careful not to overmix, as this can lead to a tough texture.
Step 5: The “Sawdust” Texture – Adding Nuts and Optional Goodies
Now for the star! Fold in your finely chopped nuts (or your chosen substitution like coconut). If you’re adding chocolate chips or chunks, fold those in now as well. The mixture will become thicker and beautifully textured.
Step 6: Filling Your Crusts and Baking to Golden Perfection
Spoon the filling evenly into your prepared mini pie crusts or muffin liners, filling them about two-thirds full. Place the baking sheet (or tin) into the preheated oven. Bake for 20-25 minutes, or until the edges are golden brown and the centers are set but still slightly soft. A toothpick inserted near the center should come out with moist crumbs, not wet batter.
Step 7: Cooling and Devouring
Let the mini pies cool in their tins or muffin liners on a wire rack for about 10-15 minutes before carefully removing them to cool completely. This initial cooling period helps them firm up.
A Glimpse at the Goodness: Nutritional Information
While this is a treat, knowing what’s in it is always helpful. The exact nutritional values can vary based on ingredient brands and specific substitutions. Here’s an approximate breakdown per mini pie:
- Calories: ~250-350 kcal (depending on crust, nuts, and additions)
- Fat: ~15-25g (primarily from butter and nuts)
- Carbohydrates: ~30-45g (from sugar and flour)
- Protein: ~3-5g
- Sugar: ~20-30g
Please note: This is an estimate and can vary significantly. For precise nutritional information, use an online recipe calculator with your specific ingredients.
Sweet Swaps: Healthier Alternatives
Looking to lighten this delight without sacrificing flavor? Here are a few ideas:
- Reduce Sugar: You can slightly reduce the sugar by ¼ to ½ cup, especially if using sweetened coconut or adding very sweet chocolate chips.
- Nut-Free “Sawdust”: Finely shredded unsweetened coconut offers a wonderful texture and flavor. You could also use toasted oats, pulsed finely in a food processor, for a different kind of crunch.
- Whole Wheat Flour/GF Blend: Substituting half of the all-purpose flour with whole wheat flour can add a bit more fiber. Alternatively, use a good gluten-free blend designed for baking.
- Richer Nuts, Less Sugar: If using pecans or walnuts, their natural oils and robust flavor can sometimes allow for a slight reduction in sugar without a noticeable loss of richness.
Serving Suggestions: Elevate Your Pie Experience
These mini pies are delightful on their own, but here are a few ways to make them even more special:
- Dusting: A light dusting of powdered sugar or a drizzle of chocolate ganache adds an elegant touch.
- Creamy Companion: Serve warm with a dollop of freshly whipped cream, crème fraîche, or a scoop of vanilla bean ice cream.
- Fruity Pairing: A small side of fresh berries, like raspberries or sliced strawberries, provides a refreshing contrast to the sweet pie.
- Coffee Break: Perfect with a hot cup of coffee or a glass of cold milk.
Common Mistakes to Avoid
Even the simplest recipes can have a few pitfalls. Here’s how to avoid them:
- Overmixing Flour: This develops gluten too much, resulting in a tough pie. Mix only until the ingredients are just combined.
- Not Softening Butter Properly: Cold butter won’t cream well, leading to a less airy and smooth filling. Use fully softened butter.
- Baking for Too Long: This can dry out the pie and make it hard. Keep an eye on them and remove them when they are golden brown and set.
- Impatience with Cooling: Letting them cool slightly before serving allows them to set up properly. Warm is good, but piping hot can lead to a messy bite.
Storing Your Pie Perfection
Should there be any leftovers (a rare occurrence!), store your mini Kentucky Sawdust Pies in an airtight container at room temperature for up to 2 days. For longer storage, refrigerate them for up to 5 days. They can be enjoyed cold, or gently warmed in a low oven or microwave.
Frequently Asked Questions
Why is it called “Sawdust Pie”?
It’s named for its texture, which is often achieved by using finely chopped nuts (like pecans or walnuts) or shredded coconut, giving it a crumbly appearance reminiscent of sawdust.
Can I make this pie without nuts?
Absolutely! Shredded coconut is a fantastic nut-free alternative that provides a similar texture and delicious flavor. Finely crushed pretzels or even toasted breadcrumbs could offer a unique crunchy element if you’re feeling adventurous.
What kind of pie crust should I use?
This recipe is designed for pre-made mini pie crusts or as a filling for muffin liners. You can also use homemade tartlet shells or even a graham cracker crust.
Is this pie overly sweet?
It is a sweet dessert, typical of Southern baking. However, the nuts add a rich, slightly bitter counterpoint, and you can always adjust the sugar slightly or pair it with something less sweet for the perfect balance.
Can I make a large Kentucky Sawdust Pie?
Yes, you can certainly adapt this recipe for a standard 9-inch pie. You’ll likely need to double the recipe’s filling ingredients and bake it in a single crust for about 45-60 minutes, or until set.
Your New Favorite Mini Indulgence Awaits!
There you have it – the delightful Mini Kentucky Sawdust Pie! With its intriguing name and irresistible texture, this pie is a testament to simple ingredients creating something truly special. Whether you’re a seasoned baker or just starting out, this recipe is approachable, forgiving, and incredibly rewarding. The mini format makes them perfect for parties, potlucks, or simply a special treat for yourself. So, gather your ingredients, embrace the fun textures, and bake up a batch of these delightful mini pies. Your taste buds will thank you!
Mini Kentucky Sawdust Pie Delight Recipe

Greetings, pie lovers! If you’re in search of a unique and indulgent dessert, you’ve come to the right place. Today, we’re diving into the delightful world ofMini Kentucky Sawdust Pie Delight. This sweet treat is sure to become a family favorite
Ingredients
- 1 cupgraham cracker crumbs
- 1 cupsweetened shredded coconut
- 1 cupchopped pecans
- 1 cupgranulated sugar
- 1/2 cupfirmly packed brown sugar
- 1/2 cupunsalted butter, melted
- 4large eggs, lightly beaten
- 1/2 cupbuttermilk
- 1 tspvanilla extract
- 1/4 tspsalt
Instructions
- Preheat your ovento 350°F (175°C). Prepare mini pie pans by greasing them lightly.
- In a large bowl,combine graham cracker crumbs, shredded coconut, chopped pecans, granulated sugar, and brown sugar.
- Add themelted butter, beaten eggs, buttermilk, vanilla extract, and saltto the dry mixture. Stir until well combined.
- Divide the mixture evenlyamong the mini pie pans.
- Bake for 25-30 minutes, or until the tops are golden brown and the filling is set.
- Allow the pies tocool completelybefore removing them from the pans. Serve as is or with a drizzle of caramel sauce for extra indulgence.
Notes
For best results with yourMini Kentucky Sawdust Pie Delight, here are a few helpful tips:
“`