No-Bake Blueberry Cheesecake Recipe | Easy & Tasty
“`html
Table of Contents
No-Bake Blueberry Cheesecake Recipe | Easy & Tasty
Craving a Dessert So Easy, It Almost Makes Itself?
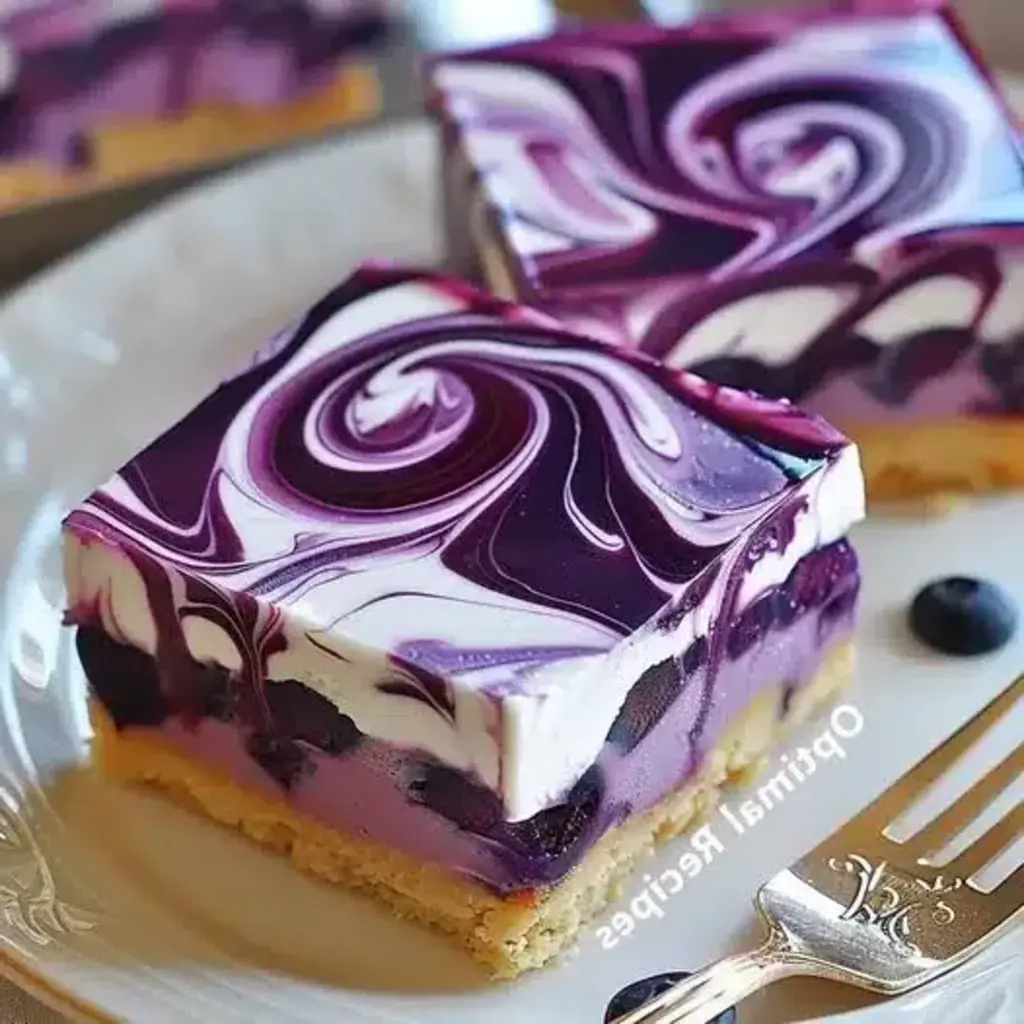
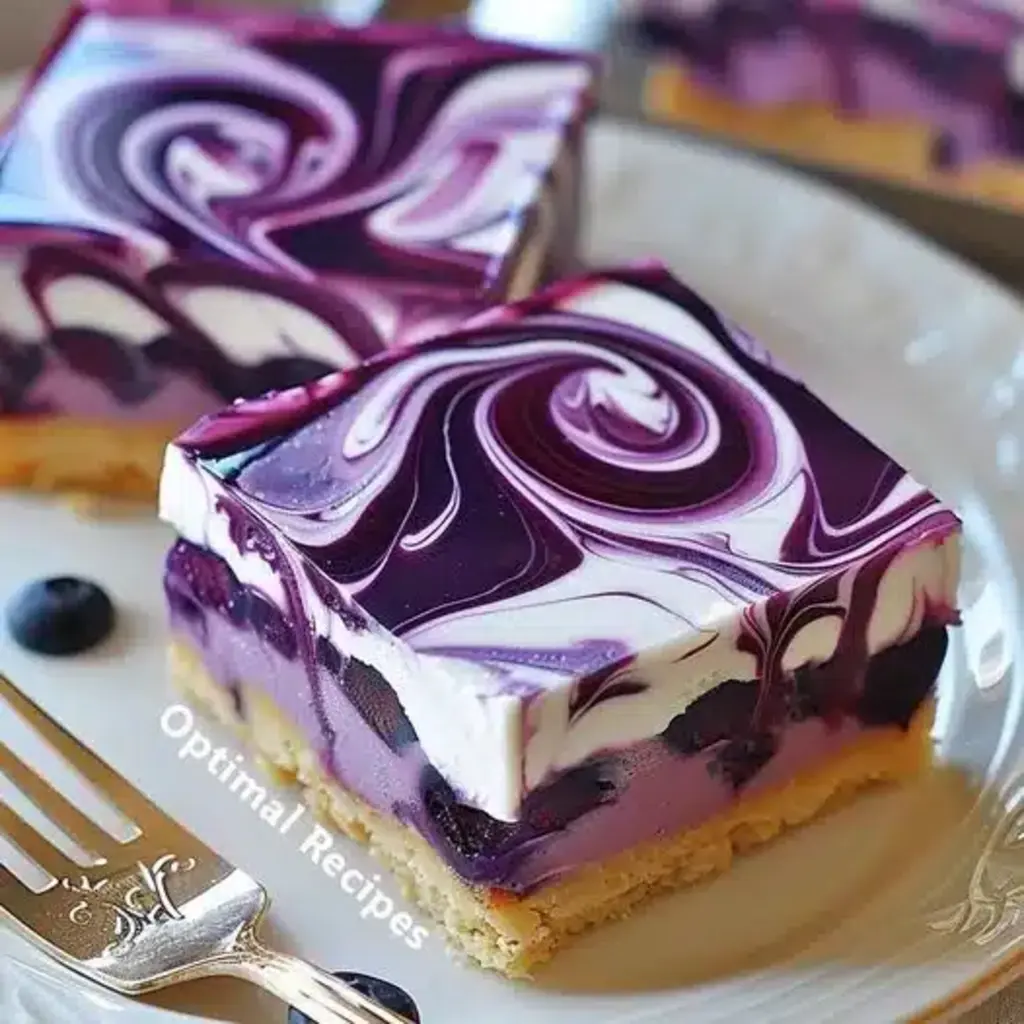
What if we told you that you could create a show-stopping dessert that looks and tastes like you spent hours in the kitchen, all with no oven required? In today’s fast-paced world, finding time for elaborate baking can be a challenge. That’s why we’re thrilled to share this No-Bake Blueberry Cheesecake Recipe, a dessert as delightful to the palate as it is easy on the eyes. With its layered richness of creamy cheesecake and vibrant blueberry mousse atop a crumbly biscuit base, this dessert not only satisfies your sweet tooth but also adds a dash of elegance to any dining table. Whether you’re a seasoned chef or a novice in the kitchen, this cheesecake promises a hassle-free preparation process, ensuring that its exquisite taste is within everyone’s reach. Get ready to impress your friends and family with minimal effort and maximum flavor!
Gather Your Ingredients: The Building Blocks of Bliss
The magic of this no-bake cheesecake lies in its simple yet effective ingredients. Using good quality components will elevate the final taste and texture. Here’s what you’ll need:
For the Biscuit Base: A Crumbly Foundation
- 200g Digestive Biscuits (or Graham Crackers): These provide a foundation that crumbles beautifully. *Substitution: You can use shortbread or even crushed amaretti cookies for a different flavor profile.* Ensure they are finely crushed for an even layer. The texture should be like coarse sand.
- 100g Unsalted Butter, melted: This binds the crumbs together, creating a firm yet yielding base. *Substitution: If you prefer a less rich base, you can use a lighter margarine, but butter offers the best flavor and texture.*
- 2 tbsp Granulated Sugar: A touch of sweetness to complement the biscuits.
For the Cream Cheese Filling: Velvety Smoothness
- 500g Cream Cheese, softened: The star of the show, providing that signature tangy creaminess. Ensure it’s at room temperature to avoid lumps. *Substitution: While full-fat is recommended for the best texture, you can use reduced-fat cream cheese; however, the texture might be slightly less firm.*
- 150g Icing Sugar (Powdered Sugar): For sweetness and smooth texture. Sift it to prevent any gritty feel. *Substitution: You can adjust the amount of icing sugar to your taste, but be mindful that too little may result in a tart flavor.*
- 1 tsp Vanilla Extract: Enhances the overall flavor profile and adds a warm aroma. *Substitution: Vanilla bean paste offers a more intense flavor and visible flecks of vanilla.*
- 250ml Heavy Cream (Whipping Cream): Whipped to stiff peaks, this adds lightness and airiness to the filling. Ensure it’s cold for optimal whipping. *Substitution: Double cream can be used if heavy cream is unavailable.*
For the Blueberry Mousse: A Burst of Fruity Delight
- 300g Fresh or Frozen Blueberries: Their vibrant color and sweet-tart flavor create a delightful contrast. If using frozen, thaw them completely and drain excess liquid. *Substitution: You can use blueberry jam or preserves for an even more intense blueberry flavor, but reduce added sugar accordingly.*
- 2 tbsp Granulated Sugar (or to taste): To balance the tartness of the blueberries. Adjust based on the sweetness of your berries.
- 1 tbsp Lemon Juice: Brightens the blueberry flavor and adds a subtle zing.
- 1 tsp Blueberry Jam/Preserves (optional): For an extra boost of blueberry intensity and a glossier finish.
Timing is Everything
30 minutes
4-6 hours
4 hours 30 minutes – 6 hours 30 minutes
On average, no-bake cheesecakes require about 30 minutes of active preparation and a significant chilling period of at least 4 hours. This recipe aligns perfectly, offering a straightforward assembly that fits seamlessly into your busy schedule.
Crafting Your No-Bake Blueberry Cheesecake: Step-by-Step
Step 1: Prepare the Biscuit Base
Let’s start with the foundation. In a medium bowl, crush your digestive biscuits until they form fine crumbs. You can use a food processor for a super-fine texture or a rolling pin and a ziplock bag for a more rustic feel. Pour the melted unsalted butter and granulated sugar over the crumbs. Mix until the crumbs are evenly moistened, resembling wet sand. Press this mixture firmly and evenly into the bottom of a 9-inch springform pan. Use the base of a glass or a measuring cup to create a compact, flat layer. Pop this pan into the refrigerator while you prepare the rest of the components.
Step 2: Whip the Cream Cheese Filling
Now, for the luscious cheesecake filling. In a large bowl, beat the softened cream cheese with an electric mixer until it’s completely smooth and creamy, with no lumps. Add the sifted icing sugar and vanilla extract. Beat again until well combined and smooth. In a separate, chilled bowl, whip the cold heavy cream until stiff peaks form. Gently fold about two-thirds of the whipped cream into the cream cheese mixture until just combined. Be careful not to overmix, as this can deflate the whipped cream. Gently fold in the remaining whipped cream until no streaks remain. This creates a light and airy texture.
Step 3: Craft the Blueberry Mousse
Time to bring in the vibrant blueberry element. In a small saucepan, combine the blueberries, granulated sugar, and lemon juice. Cook over medium heat, stirring occasionally, until the blueberries have burst and the mixture has thickened slightly, about 5-8 minutes. If you’re using optional jam, stir it in during the last minute of cooking. Let this blueberry mixture cool completely. For an extra smooth mousse, you can lightly mash some of the berries with a fork as it cools, or blend it briefly with an immersion blender, but leave some whole for texture.
Step 4: Assemble Your Masterpiece
Get ready to layer your creation! Take the chilled biscuit base out of the refrigerator. Spoon the creamy cheesecake filling evenly over the biscuit base, smoothing the top with an offset spatula or the back of a spoon. Now, gently spoon the cooled blueberry mixture over the cheesecake filling. You can create swirls by drizzling the blueberry mixture and then using a toothpick or skewer to gently marble it into the cream cheese layer. Alternatively, you can spread it evenly for a distinct blueberry layer.
Step 5: Chill to Perfection
The hardest part is waiting! Cover the springform pan loosely with plastic wrap, ensuring it doesn’t touch the surface of the cheesecake. Refrigerate for at least 4-6 hours, or preferably overnight, until the cheesecake is firm and set. The chilling time is crucial for the flavors to meld and the texture to develop properly.
Nutritional Information Per Slice (Approximate)
This is an approximate guide. Actual values may vary based on specific ingredients used.
- Calories: 350-450 kcal
- Protein: 5-7g
- Fat: 20-30g (Saturated Fat: 12-18g)
- Carbohydrates: 30-40g (Sugars: 25-35g)
- Fiber: 1-2g
Healthier Alternatives for a Lighter Indulgence
Looking to lighten up this decadent dessert? Here are some swaps that maintain flavor while reducing calories and fat:
- Base: Use whole wheat graham crackers or crushed oats mixed with a little coconut oil instead of butter for a fiber boost. For a very low-carb option, consider an almond flour and coconut oil base.
- Cream Cheese: Substitute half of the cream cheese with Greek yogurt (full-fat for best texture) for added protein and a tangy flavor.
- Sweetener: Reduce the amount of sugar or use natural sweeteners like a sugar-free sweetener or a touch of maple syrup (adjusting liquid quantities if necessary).
- Blueberries: Use unsweetened blueberry puree or opt for alternative low-sugar berry toppings.
Serving Suggestions for Maximum Delight
Serve your No-Bake Blueberry Cheesecake chilled. For an extra special touch, garnish with fresh blueberries, a dollop of whipped cream, or a sprig of mint. It’s a perfect ending to a dinner party, a delightful treat for a summer afternoon, or a sweet surprise for any occasion. You can also serve it with a side of fresh fruit salad to balance the sweetness.
Common Mistakes to Avoid
Even simple recipes can have pitfalls. Here’s how to ensure yours is perfect:
- Using cold cream cheese: This is a recipe for lumpy cheesecake. Always ensure your cream cheese is at room temperature.
- Overmixing the whipped cream: Overbeaten cream can become grainy. Whip until soft peaks form, then fold carefully.
- Not chilling long enough: Patience is key! Insufficient chilling will result in a cheesecake that’s too soft and difficult to slice.
- Watery blueberry sauce: Ensure your blueberry mixture has cooled completely and is of a jam-like consistency before adding it to the cheesecake.
Storing Your Cheesecake
Leftover cheesecake should be stored in an airtight container in the refrigerator. It will keep well for up to 3-4 days. Due to its no-bake nature, freezing is not recommended as it can affect the texture.
Enjoy Your Effortless Masterpiece!
This No-Bake Blueberry Cheesecake is a testament to how simple ingredients and straightforward methods can yield extraordinary results. It’s a dessert that brings joy without the stress, perfect for both novice bakers and seasoned pros looking for a quick yet impressive treat. Now that you’ve mastered this recipe, why not try other no-bake wonders or explore creative berry combinations? Share this recipe with friends and family, and let us know in the comments how your cheesecake turned out!
Frequently Asked Questions
Can I make the blueberry topping ahead of time?
Yes, absolutely! The blueberry mixture can be made up to 2 days in advance and stored in an airtight container in the refrigerator. Ensure it’s at room temperature or slightly warmed before layering if it has become too firm.
What kind of pan should I use?
A 9-inch springform pan is ideal. The removable sides make it easy to take the cheesecake out without damaging its shape. If you don’t have one, you can use a regular round cake pan and line it with parchment paper for easier removal.
Can I use frozen blueberries?
Yes, frozen blueberries work perfectly. Thaw them completely and drain any excess liquid before cooking them down for the topping to avoid a watery sauce.
How do I get clean slices?
For clean slices, dip a sharp knife into hot water and wipe it dry between each cut. This helps the knife glide through the cheesecake smoothly.
No-Bake Blueberry Cheesecake Recipe | Easy & Tasty
Discover the joy of making thisno-bake blueberry cheesecake, a dessert as delightful to the palate as it is easy on the eyes. With its layered richness of creamy cheesecake and vibrant blueberry mousse atop a crumbly biscuit base, this dessert not only satisfies your sweet tooth but also adds a dash of elegance to any dining table. Whether you’re a seasoned chef or a novice in the kitchen, this cheesecake promises a hassle-free preparation process, ensuring that its exquisite taste is within everyone’s reach.
Ingredients
- For the Crust:
- For the Blueberry Mousse:
- F or the Cream Cheese Layer:
- Fo r the Swirl:
Instructions
- Line an 8-inch square baking pan with parchment paper, leaving an overhang for easy removal.
- Mix biscuit crumbs, melted coconut oil, and sugar in a bowl. Press into the bottom of the pan and chill in the refrigerator to set.
- For the blueberry mousse, blend blueberries, sugar, and lemon juice until smooth. Heat the agar-agar mixture until dissolved and mix with the blueberry puree.
- Beat cream cheese, powdered sugar, and vanilla extract until smooth. Spread over the chilled crust.
- Spoon dollops of blueberry mousse over the cream cheese layer and use a toothpick to create swirls. Decorate with fresh blueberries.
- Chill in the refrigerator for at least 6 hours or until the cheesecake is set.
- Use the parchment overhang to lift out the cheesecake and cut into squares.
Notes
Thisno-bake blueberry cheesecakeis perfect for various occasions, from casual get-togethers to festive celebrations. Here are a few tips and serving suggestions:
“`