Pineapple Orange Swirl Cheesecake Recipe – Refreshing Dessert

“`html
Table of Contents
- Welcome to Pineapple Orange Swirl Cheesecake
- The Stars of the Show: Ingredients
- Timing is Everything: Prep, Cook, and Chill
- Let’s Get Baking: Step-by-Step
- Nutritional Snapshot
- Healthier Twists on Tradition
- Serving Suggestions
- Common Cheesecake Pitfalls and How to Avoid Them
- Storing Your Masterpiece
- A Tropical Fiesta in Every Bite
- Frequently Asked Questions
Pineapple Orange Swirl Cheesecake Recipe – Refreshing Dessert
Welcome to Pineapple Orange Swirl Cheesecake
Did you know that cheesecake is the second most popular dessert in the United States, after chocolate cake? This amazing dessert has a long-standing reputation for being the star of any dessert table, and our Pineapple Orange Swirl Cheesecake is no exception. Drawing inspiration from Southern hospitality and tropical flavors, this cheesecake combines the tangy sweetness of pineapples with the citrusy zest of oranges, creating a refreshing and delightful treat that’s perfect for any occasion. This recipe brings together a harmonious blend of creamy textures and vibrant flavors, making it a must-try for cheesecake lovers looking for a bright, new twist on a classic. Get ready to transport your taste buds to a sunny paradise with every delicious bite!
The Stars of the Show: Ingredients
For the Crust:
- Graham Cracker Crumbs: 1 ½ cups (about 10-12 full sheets). These form the foundation, providing a sweet and slightly salty crunch. For a different flavor profile, consider digestive biscuits or vanilla wafers.
- Granulated Sugar: ¼ cup. Just enough to enhance the sweetness of the crumbs.
- Unsalted Butter, melted: 6 tablespoons. This binds the crumbs together, creating a sturdy and flavorful crust. Salted butter can be used, but reduce added salt in the filling if you do.
For the Filling:
- Cream Cheese, softened: 4 (8-ounce) packages. The heart of our cheesecake! Ensure it’s truly softened to room temperature for a silky smooth texture, free of lumps. Avoid low-fat versions for the best creamy result.
- Granulated Sugar: 1 ½ cups. Provides sweetness and structure.
- Large Eggs: 4. They bind the ingredients and add richness. Room temperature eggs emulsify better.
- Sour Cream: 1 cup. Adds a pleasant tang and moisture, contributing to a tender crumb. Full-fat Greek yogurt is a good substitute.
- Vanilla Extract: 1 teaspoon. Enhances all the other flavors.
- Orange Zest: 2 tablespoons (from about 2 medium oranges). This is where the bright citrus notes come alive, offering a zesty perfume. Freshly grated from organic oranges is best.
- Crushed Pineapple, well-drained: 1 (8-ounce) can. The tropical sweetness that pairs beautifully with orange. Ensure it’s very well-drained to prevent a watery batter. Fresh pineapple can be used, but adjust sweetness.
For the Swirl:
- Pineapple Juice: ¼ cup (reserved from the crushed pineapple, or use fresh/canned). This forms the base for our vibrant swirl.
- Cornstarch: 1 tablespoon. This helps thicken the pineapple juice into a delightful glaze.
- Orange Food Coloring (optional): A few drops. For an intensified visual appeal that matches the tropical theme.
Timing is Everything: Prep, Cook, and Chill
Most standard cheesecakes take around 15-20 minutes of prep, 60-90 minutes to bake, and a minimum of 4-6 hours to chill. Our Pineapple Orange Swirl Cheesecake requires a bit more prep for the swirl element and a more generous chilling time to allow the flavors to meld beautifully. The total time commitment, especially the chilling, is well worth the wait for this exquisite dessert.
Let’s Get Baking: Step-by-Step
Step 1: Preheat and Press
First things first, let’s get your oven ready! Preheat it to 350°F (175°C). Grab a 9-inch springform pan. This is crucial for easy removal later. Lightly grease the sides of the pan.
Step 2: Mix the Crust
In a medium bowl, stir together the graham cracker crumbs and ¼ cup of granulated sugar. Pour in the melted butter and mix until all the crumbs are moistened. It should resemble wet sand.
Step 3: Bake the Crust
Press the crumb mixture evenly into the bottom and about 1 inch up the sides of your prepared springform pan. Use the bottom of a glass or a measuring cup to get a nice, firm, even layer. Place the pan on a baking sheet and bake for 8-10 minutes. This helps set the crust. Remove from oven and let it cool while you prepare the filling.
Step 4: Prepare the Swirl
Now for the delightful swirl! In a small saucepan, whisk together ¼ cup of pineapple juice and 1 tablespoon of cornstarch until smooth. Cook over medium heat, stirring constantly, until the mixture thickens into a glossy sauce, about 2-3 minutes. Remove from heat and let it cool slightly. If you’re using food coloring, stir in a few drops now for that vibrant orange hue. Set aside.
Step 5: Beat the Cream Cheese
In a large bowl (preferably a stand mixer with a paddle attachment), beat the softened cream cheese on medium speed until it’s completely smooth and creamy, with no lumps. This is the secret to a velvety texture! Scrape down the sides of the bowl as needed.
Step 6: Add Sweetness and Eggs
Gradually add the 1 ½ cups of granulated sugar to the cream cheese and beat until well combined and fluffy. Add the eggs, one at a time, beating on low speed just until each egg is incorporated. Be careful not to overmix here, as this can lead to cracks. Scrape down the bowl after adding the last egg.
Step 7: Incorporate Flavors
Gently mix in the sour cream, vanilla extract, and orange zest on low speed until just combined. Finally, fold in the well-drained crushed pineapple. You want to distribute it evenly without overworking the batter. The batter should be thick and luscious.
Step 8: Assemble the Cheesecake
Pour about half of the cheesecake batter over the cooled crust. Dollop spoonfuls of the pineapple swirl mixture over this layer. Pour the remaining cheesecake batter on top, then dollop the rest of the pineapple swirl over the second batter layer. Using a toothpick or a skewer, gently swirl the pineapple mixture into the cheesecake batter to create beautiful patterns. Don’t over-swirl, or the colors will blend too much.
Step 9: Bake to Perfection
There are a couple of ways to bake for the best results:
Water Bath (Recommended): Wrap the outside of your springform pan tightly with heavy-duty aluminum foil to prevent any water from seeping in. Place the wrapped pan in a larger roasting pan. Pour hot water into the roasting pan until it comes about halfway up the sides of the springform pan. This creates a moist, even-heating environment, preventing cracks.
Baking: Carefully place the cheesecake (in its water bath, if using) into the preheated oven. Bake for 70-80 minutes, or until the edges are set and the center is still slightly jiggly when gently shaken. If not using a water bath, bake directly on the baking sheet.
Cooling in Oven: Once baked, turn off the oven, prop the door open slightly with a wooden spoon, and let the cheesecake cool in the oven for 1 hour. This gradual cooling also helps prevent cracks.
Step 10: Cool and Chill
After cooling in the oven, remove the cheesecake from the oven and water bath (if used). Let it cool completely on a wire rack at room temperature. Once cooled, cover it loosely with plastic wrap and refrigerate for at least 6 hours, or preferably overnight. This chilling time is crucial for the cheesecake to set properly and for the flavors to deepen and meld. Rushing this step will result in a soft, unset cheesecake.
Nutritional Snapshot
- Calories: Approximately 450-550 per serving (this can vary based on exact ingredients and portion size).
- Fat: ~28-35g
- Carbohydrates: ~40-50g
- Protein: ~8-10g
- Sugar: ~30-40g
- (Note: This is an estimate and can vary based on ingredient brands and portion sizes.)
Healthier Twists on Tradition
Want a lighter version that still boasts incredible flavor? Try these swaps:
- Crust: Use crushed whole wheat graham crackers or even a blend of crushed nuts (like almonds or walnuts) with a touch of honey or maple syrup and melted coconut oil instead of butter.
- Filling: Replace half of the cream cheese with low-fat Greek yogurt for a tangier, protein-boosted filling. You can also reduce the sugar slightly, relying more on the natural sweetness of the pineapple and orange.
- Sweetener: Experiment with natural sweeteners like maple syrup or agave nectar, adjusting quantities as needed for taste.
Serving Suggestions
This cheesecake is a showstopper on its own, but a few simple additions can elevate it further:
- Garnish with fresh pineapple chunks and orange slices.
- A dollop of whipped cream or coconut cream adds a luxurious touch.
- A sprinkle of toasted coconut flakes can enhance the tropical theme.
- Serve with a side of fresh berries for a burst of color and contrasting flavor.
Common Cheesecake Pitfalls and How to Avoid Them
- Cracking: Overmixing the batter, baking at too high a temperature, or rapid cooling can cause cracks. Use room temperature ingredients, mix gently, bake at a moderate temperature (preferably with a water bath), and cool gradually.
- Lumpy Texture: Not softening the cream cheese enough is the main culprit. Ensure it’s at room temperature for at least an hour before starting.
- Watery Cheesecake: Not draining the pineapple well or excess moisture in the batter. Ensure ingredients are at room temperature and thoroughly heat/thicken the swirl mixture.
- Underbaked Center: The cheesecake should still have a slight wobble in the center when it’s done. It will continue to set as it cools.
Storing Your Masterpiece
Once your Pineapple Orange Swirl Cheesecake is completely chilled and set, you can store it in the refrigerator. Keep it covered loosely with plastic wrap or in an airtight container. It will stay delicious for up to 3-4 days.
A Tropical Fiesta in Every Bite
This Pineapple Orange Swirl Cheesecake is more than just a dessert; it’s an experience! The vibrant citrus notes dance with the sweet, tangy pineapple, all enveloped in a luxuriously creamy cheesecake base. It’s testament to how simple, quality ingredients can come together to create something truly extraordinary. Whether you’re hosting a summer barbecue, celebrating a special occasion, or simply craving a taste of paradise, this cheesecake is sure to impress. Don’t wait to try this delightful tropical twist on a classic. We promise your taste buds will thank you!
Frequently Asked Questions
***Can I make this cheesecake ahead of time?***
Absolutely! Cheesecakes are best made a day in advance to allow for proper chilling and flavor development. It will keep in the refrigerator for up to 3-4 days.
***Why is my cheesecake cracking?***
Cracking is often due to overmixing, baking at too high a temperature, or cooling too quickly. Using room temperature ingredients, mixing gently, baking with a water bath, and cooling gradually in the oven can help prevent this. Small cracks are purely cosmetic and won’t affect the taste!
***Can I use fresh pineapple instead of canned?***
Yes, you can! If using fresh pineapple, ensure it is very ripe for sweetness. You’ll need to adjust the sugar in the filling if your fresh pineapple is less sweet than canned. Also, make sure to drain it thoroughly. You can also use fresh juice for the swirl, just ensure it’s thickened properly.
***How do I know when the cheesecake is done?***
The edges of the cheesecake should be set, but the center should still have a slight jiggle when you gently shake the pan. It will continue to firm up as it cools and chills.
***Can I freeze this cheesecake?***
Yes, but it’s best to freeze it before adding any toppings. Wrap the completely chilled cheesecake tightly in plastic wrap, then in aluminum foil. Freeze for up to 1 month. Thaw overnight in the refrigerator before serving.
Enjoy this tropical cheesecake?
Share your creations with us or leave a comment below!
Pineapple Orange Swirl Cheesecake Recipe – Refreshing Dessert

Cheesecakes have a long-standing reputation for being the star of any dessert table, and our Pineapple Orange Swirl Cheesecake is no exception. Drawing inspiration from Southern hospitality and tropical flavors, this cheesecake combines the tangy sweetness of pineapples with the citrusy zest of oranges, creating a refreshing and delightful treat. This recipe brings together a harmonious blend of creamy textures and vibrant flavors, making it a must-try for cheesecake lovers.
Ingredients
- 1 1/2 cupsgraham cracker crumbs
- 1/4 cupsugar
- 1/2 cupmelted butter
- 24 ozcream cheese, softened
- 1 cupsugar
- 1 tspvanilla extract
- 3large eggs
- 1 cupcrushed pineapple, drained
- 1/2 cuporange juice
- 1 tbsporange zest
- Orange and yellow food coloring (optional)
- Pineapple slices, for garnish
- Orange slices, for garnish
- Whipped cream, for garnish
- Mint leaves, for garnish
Instructions
- Preheat the oven:Preheat your oven to 325°F (165°C) and grease a 9-inch springform pan.
- Prepare the crust:In a medium bowl, combine graham cracker crumbs, 1/4 cup sugar, and melted butter. Press the mixture into the bottom of the prepared pan to form the crust.
- Mix the filling:In a large bowl, beat the cream cheese and 1 cup sugar until smooth. Add vanilla extract and beat until combined.
- Add eggs:Add the eggs one at a time, beating well after each addition. Then mix in the crushed pineapple, orange juice, and orange zest until well combined.
- Color the batter:Divide the batter into two bowls. Add orange food coloring to one bowl and yellow food coloring to the other, if desired. Swirl both batters together in the prepared crust.
- Bake:Bake for 50-60 minutes, or until the center is set. Cool on a wire rack for 10 minutes before running a knife around the edge of the pan to loosen. Cool completely before removing the rim of the pan.
- Refrigerate:Refrigerate the cheesecake for at least 4 hours or overnight before serving.
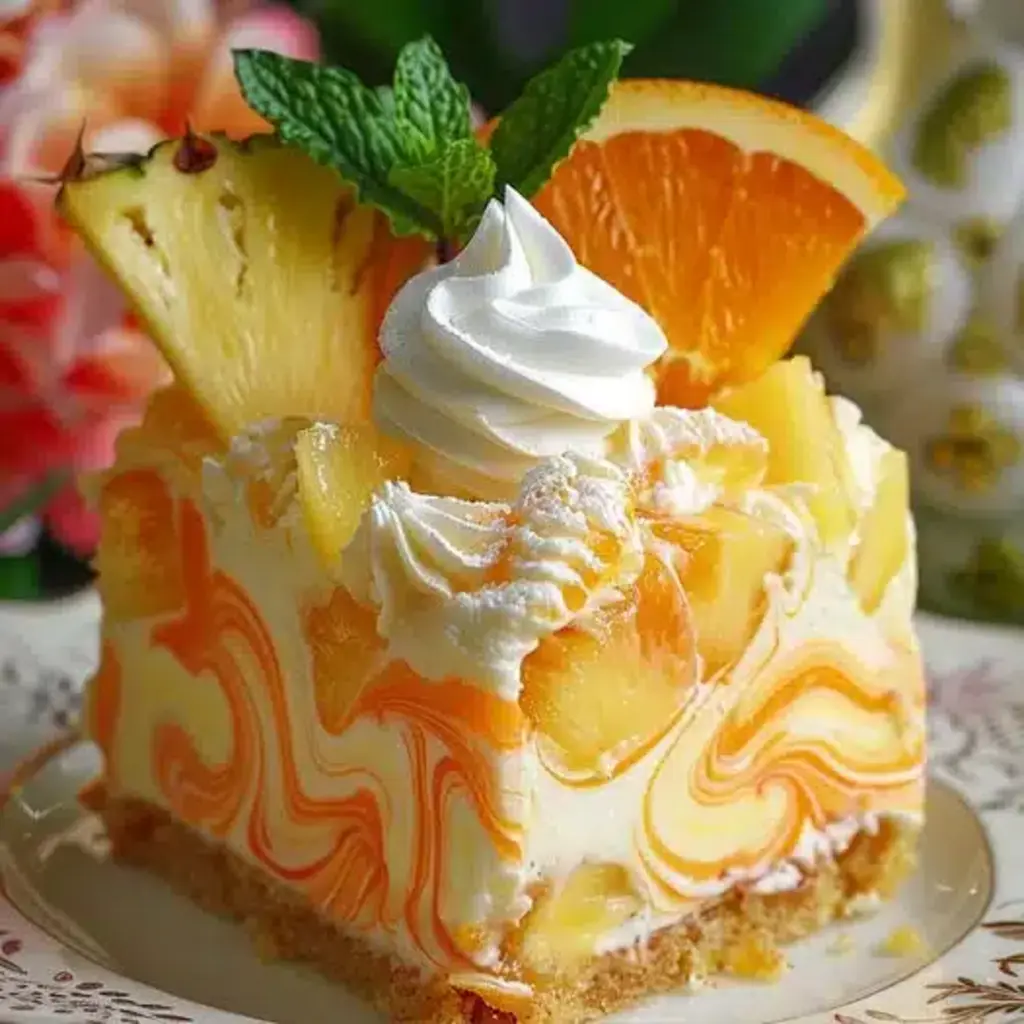
- Garnish and serve:Garnish with pineapple slices, orange slices, whipped cream, and mint leaves before serving.
Notes
Room temperature ingredients:Ensure that the cream cheese and eggs are at room temperature before mixing to achieve a smooth and creamy batter.
Avoid over-mixing:Over-mixing the batter can incorporate too much air, leading to cracks in the cheesecake.
Use a water bath:Baking the cheesecake in a water bath can help prevent cracks and ensure even baking.
“`