Rice Krispie Treat Cheesecake Recipe
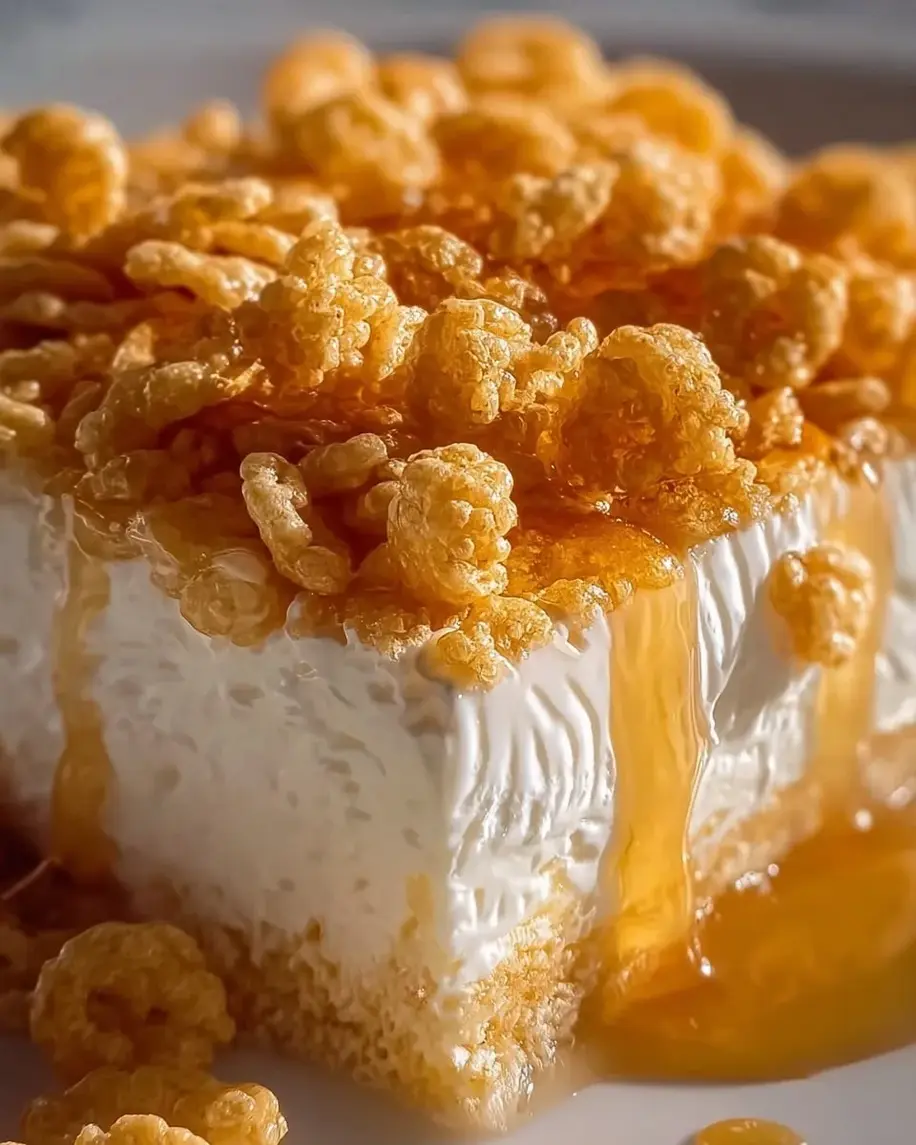
Table of Contents
Rice Krispie Treat Cheesecake Recipe
Introduction
Did you know that over 70% of home bakers seek no-bake dessert recipes during the summer months to avoid heating up the kitchen? This no-bake Rice Krispie Treat Cheesecake is the perfect answer to that demand, masterfully combining two iconic American treats into one unforgettable dessert. Imagine the nostalgic, airy crunch of a classic Rice Krispie treat transformed into a sturdy, marshmallow-kissed crust, topped with a cloud-like, creamy cheesecake filling that requires zero oven time. This dessert isn’t just a recipe; it’s a textural adventure that plays with contrasts—creamy meets crunchy, sweet meets subtly tangy. It’s the ultimate crowd-pleaser for family reunions, birthday parties, or when you simply need a fun project with the kids that yields spectacular, delicious results. Let’s dive into how you can create this playful twist on traditional cheesecake that sets up beautifully in your fridge.
Ingredients List
Gather these simple ingredients for a dessert that promises maximum flavor and fun. For best results, ensure your cream cheese and heavy cream are very cold.
For the Rice Krispie Crust:
- 6 cups Rice Krispies cereal: The star of the show, providing that signature light, crispy snap and nostalgic flavor. For a gluten-free version, ensure you use a certified gluten-free crispy rice cereal.
- 5 tablespoons unsalted butter: Adds rich, toasty flavor and helps bind the crust. For a dairy-free swap, use a high-quality plant-based butter.
- 1 (10 oz) bag mini marshmallows: Mini marshmallows melt more evenly and quickly, creating the perfect gooey “glue” for our crust. You’ll love the stretchy, sweet pull they give each bite.
- 1/4 teaspoon fine sea salt: A critical pinch to balance the sweetness and enhance all the other flavors.
For the No-Bake Cheesecake Filling:
- 16 oz (two 8 oz blocks) full-fat cream cheese, softened: Must be at room temperature for a lump-free, silky filling. The full-fat version provides structure and that classic, rich cheesecake tang. Lower-fat versions may result in a runny filling.
- 1 cup powdered sugar: Dissolves seamlessly into the filling without grittiness, adding sweetness and helping to stabilize the cream.
- 1 tablespoon pure vanilla extract: Use the real stuff for a warm, aromatic depth that artificial extracts can’t match.
- 2 cups heavy whipping cream, very cold: This is whipped to stiff peaks to give the filling its incredible light, mousse-like texture. The high fat content is non-negotiable for proper whipping.
- Optional Garnish: Extra mini marshmallows, a drizzle of melted chocolate or caramel sauce, or a sprinkle of crushed Rice Krispies for added crunch and visual appeal.
Timing
Compared to a traditional baked cheesecake, which can take over an hour of active baking plus cooling time, this no-bake version shaves off significant effort and heat. The 25 minutes of hands-on prep is a fun, interactive process, while the 4+ hour chill time is completely hands-off, allowing the flavors to meld and the structure to firm up perfectly. It’s the ideal make-ahead dessert.
A stunning no-bake Rice Krispie Treat Cheesecake, featuring a golden cereal crust and a fluffy white cheesecake topping, ready to slice and serve.
Step-by-Step Instructions
Follow these detailed steps for a foolproof dessert that will have everyone asking for the recipe.
Step 1: Prepare the Pan and Cereal
Lightly grease a 9×13 inch baking pan with butter or non-stick spray. Line it with parchment paper, leaving an overhang on the two long sides—this will be your “lifeline” for lifting the entire cheesecake out for clean slicing later. Measure out your 6 cups of Rice Krispies cereal into a very large mixing bowl. I find that gently crushing a handful of the cereal in my palm before adding it helps create a more cohesive crust that holds together better when sliced.
Step 2: Make the Marshmallow Crust
In a large pot or Dutch oven, melt the 5 tablespoons of butter over low heat. Once melted, add the entire bag of mini marshmallows and the 1/4 teaspoon of salt. Stir constantly with a sturdy silicone spatula until the marshmallows are completely melted, smooth, and glossy. This should take about 5-7 minutes. Do not rush this step or use high heat, as burnt marshmallow is not salvageable. Immediately pour the molten marshmallow mixture over the waiting Rice Krispies. Working quickly but carefully (the marshmallow is hot!), fold and stir until every single piece of cereal is thoroughly and evenly coated. Transfer the sticky mixture into your prepared pan. Using the bottom of a greased measuring cup or your hands (lightly greased), press the mixture firmly and evenly into the bottom of the pan. You want a compact, uniform layer. Let this crust cool at room temperature while you make the filling.
Step 3: Create the No-Bake Cheesecake Filling
In the bowl of a stand mixer fitted with the paddle attachment (or using a large bowl and a hand mixer), beat the softened cream cheese on medium speed for 2-3 minutes until it is completely smooth, creamy, and free of any lumps. Scrape down the bowl. Add the powdered sugar and vanilla extract. Beat on low initially to incorporate the sugar, then increase to medium and beat for another 1-2 minutes until fully combined and fluffy. Scrape the bowl again. In a separate, clean, chilled bowl, pour in the very cold heavy whipping cream. Using the whisk attachment (or a hand mixer), whip the cream on medium-high speed until stiff peaks form. This means when you lift the whisk, the peak of cream stands straight up and doesn’t droop. Be careful not to over-whip into butter. Gently fold about one-third of the whipped cream into the cream cheese mixture to lighten it. Then, carefully fold in the remaining whipped cream until no white streaks remain. The filling should be thick, smooth, and billowy.
Step 4: Assemble and Chill
Pour the luxurious cheesecake filling over the cooled Rice Krispie crust. Use an offset spatula or the back of a spoon to spread it into a perfectly smooth, even layer, reaching all the way to the edges of the pan. For a professional touch, you can create decorative swirls on the surface. Cover the pan tightly with plastic wrap or aluminum foil. This is the most important step: refrigerate for at least 4 hours, but ideally 6 hours or overnight. This extended chilling time is non-negotiable as it allows the filling to set firmly, making clean slicing possible and letting the flavors fully develop.
Step 5: Slice and Serve
When ready to serve, use the parchment paper overhang to carefully lift the entire dessert out of the pan and onto a cutting board. Peel down the paper sides. For the cleanest slices, use a large, sharp knife. Dip the knife in hot water and wipe it dry between each cut. This melts through the creamy filling cleanly. Cut into squares or bars. Add your optional garnishes just before serving to maintain their texture and appearance.
Nutritional Information
The following is an approximate nutritional breakdown per serving (based on 15 servings). Values may vary based on specific brands and ingredient measurements.
- Calories: ~420 kcal
- Total Fat: 28g
- Saturated Fat: 17g
- Cholesterol: 85mg
- Sodium: 220mg
- Total Carbohydrates: 40g
- Dietary Fiber: 0g
- Sugars: 28g
- Protein: 4g
Healthier Alternatives
You can make mindful swaps to tailor this dessert to different dietary needs without sacrificing the fun, playful spirit of the recipe.
- For the Crust: Use a brown rice crispy cereal and swap the butter for coconut oil. Look for a marshmallow brand made with less processed sugars or use a homemade marshmallow fluff recipe with honey.
- For the Filling: Opt for a reduced-fat or Neufchâtel cream cheese (note: the filling may be slightly softer). For the heavy cream, full-fat coconut cream (chilled) can be whipped as a dairy-free alternative. Reduce the powdered sugar by 1/4 cup and add a touch of monk fruit sweetener to taste.
- Overall: Increase the serving count to make smaller portions, and top with fresh berries instead of extra marshmallows or chocolate for a boost of vitamins and fiber.
Serving Suggestions
This dessert is a star on its own, but a few accompaniments can elevate it to a show-stopping centerpiece.
- Drizzle & Dip: Serve with small bowls of warm chocolate ganache, salted caramel sauce, or a vibrant raspberry coulis for dipping.
- À la Mode: A scoop of vanilla bean ice cream or a tangy strawberry sorbet alongside a square creates a fantastic temperature and texture contrast.
- Party Platter: Cut into small, bite-sized squares and arrange on a tiered stand for a kid-friendly birthday party or potluck dessert table.
- Beverage Pairing: The sweet, creamy profile pairs wonderfully with a cup of strong black coffee, a glass of cold milk, or a sparkling Moscato d’Asti for adults.
Common Mistakes
Avoid these pitfalls to ensure your Rice Krispie Treat Cheesecake turns out perfect every time.
- Using Cold Cream Cheese: This is the #1 cause of a lumpy filling. Take the time to let it soften on the counter for 1-2 hours.
- Rushing the Marshmallow Melt: High heat burns marshmallows, creating a bitter taste and a crust that’s too hard. Low and slow is the key.
- Under-Whipping or Over-Whipping the Cream: Soft peaks won’t provide enough structure, causing a runny filling. Over-whipped cream