Simple Sourdough Starter Guide

Table of Contents
Simple Sourdough Starter Guide
Introduction
Did you know that according to a 2023 survey by the Artisan Bread Bakers Association, over 70% of home bakers who started making sourdough during the pandemic still use a simple sourdough starter today? If you’re wondering how to create your own active, bubbly sourdough starter using just whole grain flour and water in one week, this guide is perfect for you. Mastering a sourdough starter isn’t just about baking bread—it’s about tapping into age-old fermentation techniques that produce that signature tangy flavor and incredible texture. In this comprehensive tutorial, we’ll walk you through every step, from mixing your initial ingredients to feeding and monitoring your starter. By following this simple sourdough starter guide, you’ll unlock the secret to homemade sourdough that rivals any bakery’s offerings, all while saving money and enjoying the satisfaction of crafting something truly from scratch.
Sourdough starters have been around for thousands of years, dating back to ancient Egypt. Today, with the resurgence of home baking, understanding how to maintain a healthy starter is key. Unlike commercial yeast, a sourdough starter relies on wild yeasts and beneficial bacteria naturally present in flour and air. This not only gives your bread that coveted sour edge but also makes it easier to digest for many people. If you’re new to baking or a seasoned pro looking to refine your techniques, this simple process will have you baking artisanal loaves in no time. Remember, patience is key—your starter develops character over days, mirroring the slow fermentation that defines great sourdough. Let’s dive in and get those bubbles going!
As we embark on this baking journey, keep in mind that a successful sourdough starter hinges on consistency and observation. We’ll cover everything from selecting the right flour to troubleshooting common issues. By the end of this week, you’ll have a starter teeming with life, ready to transform into bread, pizza dough, or even pancakes. If you’re eco-conscious, think of this as a sustainable alternative to store-bought yeast. Plus, studies from the Journal of Agricultural and Food Chemistry highlight the nutritional benefits of fermented grains, including improved digestibility and higher vitamin levels.
Ingredients List
Creating your simple sourdough starter requires minimal ingredients, emphasizing natural fermentation. Here’s what you’ll need to kick things off:
- Whole Grain Flour: 1/2 cup (100g) – Opt for whole wheat or rye flour for their higher wild yeast content; substitute with unbleached all-purpose if whole grain isn’t available, though it may take longer to activate. The earthy, nutty aroma adds depth to your starter from the start.
- Water: 1/2 cup (120ml) – Use filtered or spring water at room temperature (around 70-80°F); avoid tap water with chlorine if possible, as it can inhibit yeast growth. It should be fresh and odorless, ensuring a clean slate for fermentation.
Over the seven days, you’ll use additional flour and water for feedings. Total for the initial starter and two feedings: 1.5 cups flour and 1 cup water, keeping things simple and affordable. The flour imparts a slightly sweet, grainy scent, while water acts as the nurturing medium for those lively microbes.
Timing
This simple sourdough starter recipe is designed for efficiency, requiring just about 10 minutes of active prep time each day over seven days. Here’s the breakdown:
Compared to average commercial yeast bread recipes that might take 2-3 hours total (including rising and baking), this starter-building process spreads out the effort for natural development. No rushing here—in fact, slower is better for building robust bacteria cultures. If you’re comparing to other starter methods, some take up to 14 days, making this a streamlined seven-day guide that still delivers active, ready-to-bake results.
Step-by-Step Instructions
Day 1: Mixing
Begin by choosing a clean glass or ceramic container—avoid metal, as it can react with acids. Measure out 1/2 cup whole grain flour and 1/2 cup water. Stir them together with a wooden spoon or spatula until you have a thick paste with no dry flour lumps. The mixture will smell fresh and slightly sweet, like uncooked dough. Cover loosely with a cloth or plastic wrap to allow airflow, and place in a warm spot (65-75°F). Let it sit undisturbed for 24 hours. This initial mixing encourages wild yeasts from the flour and air to start colonizing your mixture.
Days 2 Through 7: Feeding
Each day from Day 2 onward, perform a feeding ritual. Discard about half of your starter (this refreshes the culture and prevents overgrowth of less desirable microbes), then add 1/2 cup flour and 1/2 cup water to the remaining starter. Stir vigorously until smooth—aim for a batter-like consistency. Over these days, you’ll notice bubbles forming, a sign of active fermentation. The scent might evolve from sweet to mildly sour, like yogurt. Continue this daily feeding, always returning to your warm spot after stirring.
Stirring Daily
Although feedings happen once a day, give your starter a gentle stir once or twice more each day if possible. This keeps oxygen flowing and promotes even fermentation. Resist over-stirring to avoid introducing contaminants—your utensil should be clean, and your hands washed.
Signs of Activeness
By Day 5-7, look for a starter that doubles in size overnight and has a tangy, slightly alcoholic smell. Test by dropping a spoonful into water—if it floats, it’s bubbly and ready. If not, feed once more and wait another 24 hours. This active stage means your symbiotic culture of bacteria and yeast is thriving, perfect for baking.
To expand, maintaining a starter post-activation involves weekly feedings or daily if baking often. Freeze portions for later use, thawing and feeding back to life. Always use room-temperature ingredients for feedings to keep the bacteria happy. If your starter smells off (like vinegar or acetone), it might need refreshing—discard more and feed generously.
Nutritional Information
While a sourdough starter itself isn’t consumed directly, understanding its nutritional prowess informs your baking decisions. This fermentation process breaks down complex carbs, releasing nutrients—per 1 cup serving of active starter:
- Calories: Approximately 250 kcal
- Carbohydrates: 50g (including 2g fiber for gut health)
- Protein: 8g (from wheat)
- Fats: 1g
- Probiotics: Natural boost from fermentation, aiding digestion
Compared to quick-rise yeast, sourdough starter contributes more enzymatic activity, potentially increasing bioavailability of minerals like iron and zinc. Research from the USDA shows fermented products like this enhance nutrient absorption, making your breads healthier overall.
Healthier Alternatives
If you want to tweak your simple sourdough starter for better nutrition without sacrificing flavor, consider these swaps that preserve the tangy essence:
- Flour Swap: Use sprouted whole grain flour instead of regular whole wheat; it retains more nutrients and natural sweetness. Rye flour alternative amps up fiber without a bitter aftertaste.
- Water Enhancement: Infuse your water with electrolytes or add a pinch of sea salt during feedings for mineral-rich starters that feed the microbes better.
- Add-Ins: Incorporate ground flaxseeds for omega-3s, maintaining the starter’s consistency and adding a subtle nutty flavor.
These adjustments keep the fermentation magic intact while boosting vitamins and minerals. For gluten-free bakers, try sorghum flour, though activation might take longer due to fewer wild yeasts.
Serving Suggestions
Once your starter bubbles with life, it’s star-ready for culinary adventures beyond bread. Here are personalized serving ideas:
- Sourdough Bread: Mix 1 cup starter with flour, water, and salt for a basic loaf. Bake at 450°F for 30-40 minutes after proofing. The tangy flavor pairs perfectly with butter or olive oil.
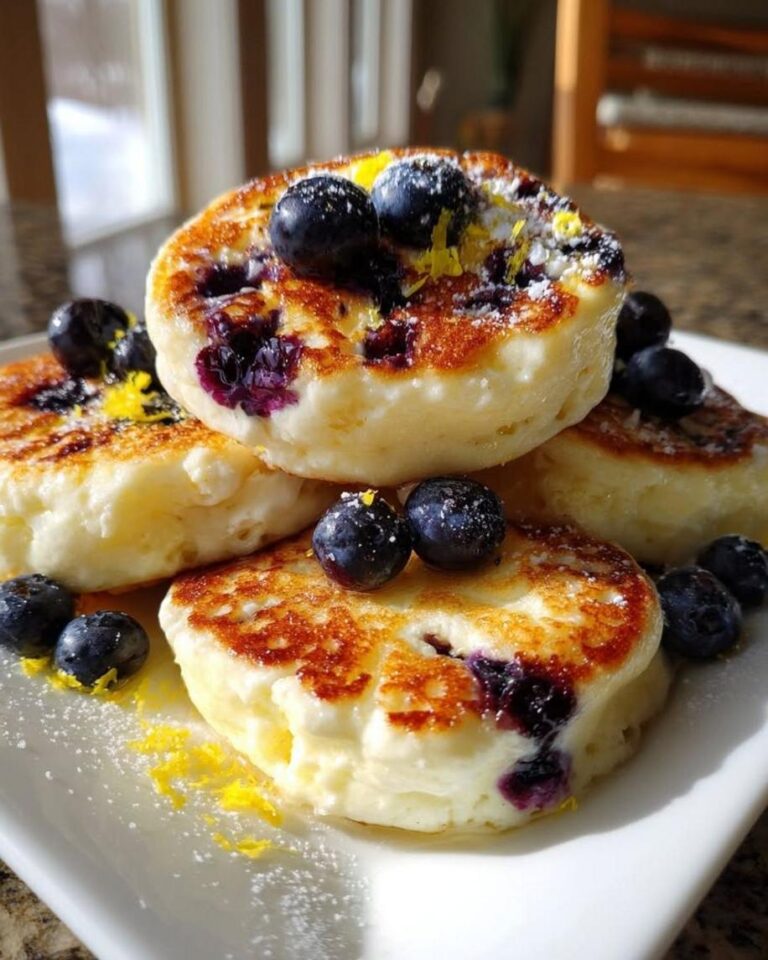
- Pancakes or Waffles: Replace commercial yeast in recipes with 1/2 cup fed starter for fluffy, fermented treats. Top with maple syrup for breakfast bliss.
- Pizza Dough: Use as a base for homemade pizza, yielding a chewy crust with natural rise. Add toppings and bake at 500°F for crispy perfection.
Experiment with portions—like 1/4 cup for cookies—to infuse tang into desserts. Your active starter transforms ordinary recipes into extraordinary meals.
Common Mistakes
Even seasoned bakers stumble with sourdough starters. Avoid these pitfalls:
- Using Wrong Temperature: Too cold slows fermentation; too hot kills microbes. Stick to 70-75°F for optimal activity.
- Skipping Discarding: Not discarding halts growth, leading to a sluggish starter. It’s counterintuitive but essential.
- Overfeeding Early: Don’t rush feedings—patience builds strength. Overdoing it can overwhelm vulnerable cultures.
- Ignoring Smell Changes: A sharp acetone smell means starvation; feed immediately to revive.
By sidestepping these, your seven-day process will yield a vibrant culture. Remember, every starter has a personality—observe and adjust.
Storing Tips
Post-creation, maintain your starter properly for longevity:
- Fridge Storage: For occasional use, refrigerate in a jar. Feed weekly with equal parts flour and water.
- Freezing: Spoon into ice cube trays, freeze, and store in zip bags. Thaw and feed to reactivate.
Keep utensils clean to prevent contamination. Dried starters can be revived by soaking in water and feeding. Always label jars to avoid mix-ups.

Conclusion
Congratulations on embarking on your simple sourdough starter journey! By following this seven-day guide, you’ve harnessed the power of natural fermentation to create an active culture ready for delicious recipes. Remember, the key to great sourdough is consistency, observation, and a bit of patience. Now that your starter is bubbly, experiment with breads and beyond, saving on store-bought ingredients while enjoying healthier, tastier results. Share your creations in the comments below, and if you’re loving this guide, subscribe for more baking tips. Happy fermenting!
FAQs
***Can I use all-purpose flour instead of whole grain?***
You can, but whole grain activates faster due to more wild yeasts. All-purpose works and may just extend the timeline by 1-2 days.
***What if my starter smells bad?***
A mild sourness is normal, but rotten odors indicate issues—discard and start over, ensuring clean tools.
***How often should I feed after the first week?***
If room temperature, daily; refrigerated, weekly. Frequent bakers can keep it active on the counter.
***Is a starter only for bread?***
No—use in pizzas, crackers, or even cocktails for unique flavors.
Sourdough Starter Whole Grain
Start your own active, bubbly sourdough starter using simple whole grain flour and water in just one week.
Ingredients
- 100 g whole grain rye flour or whole wheat flour, preferably organic
- 500 g all-purpose flour, unbleached and preferably organic, for feedings
- 1 litre filtered or spring water, at room temperature
Instructions
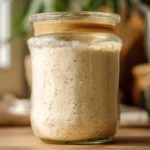
- Record the weight of your clean, empty glass jar in grams and label with the current date for clear tracking.
- Add 100 g whole wheat or rye flour and 100 g water to the jar. Mix thoroughly with a fork until homogenous; the mixture will be thick. Scrape down the sides with a spatula, cover loosely, and secure a rubber band around the jar to mark starter height. Allow to rest at room temperature for 24 hours.
- Inspect the starter. Minimal or no activity is expected; small bubbles may be visible. Leave covered at room temperature for another 24 hours.
- Remove and discard half the mixture, retaining 100 g of starter. Add 100 g all-purpose flour and 100 g room temperature water. Mix thoroughly, scrape down sides, cover loosely, and let rest for 24 hours at room temperature.
- Discard all but 100 g of starter. Feed by adding 100 g all-purpose flour and 100 g room temperature water. Stir well, scrape down sides, loosely cover, and rest 24 hours at room temperature. If growth slows, continue the feeding routine.
- Discard until 100 g of starter remain. Add 100 g all-purpose flour and 100 g water. Stir thoroughly, scrape down sides, loosely cover, and rest 24 hours.
- Each day, discard until 100 g of starter remain. Feed with 100 g all-purpose flour and 100 g water, mix completely, scrape the sides, cover loosely, and let rest until at least doubled in size.
- Test maturity by dropping a spoonful of starter into a bowl of water. If it floats, the starter is ready to use. If not, continue daily discard and feeding until appropriate activity is observed.
- For frequent bakers, maintain the starter at room temperature and feed daily, discarding as before and allowing it to peak for 4–6 hours prior to use. For casual bakers, refrigerate and refresh the starter weekly: discard, feed, rest at room temperature for 1–2 hours, then return to refrigeration.
Notes
Always use filtered or spring water to prevent chlorine from disrupting fermentation.
Starter behaviour may vary based on flour type, ambient temperature, and water source.
It is normal for activity to fluctuate or slow down, especially on day 4 or 5; remain consistent with feedings.
Nutrition
- Calories: 523.6
- Fat: 1 g
- Carbohydrates: 108.4 g
- Protein: 15.9 g