Strawberry Banana Pudding Recipe
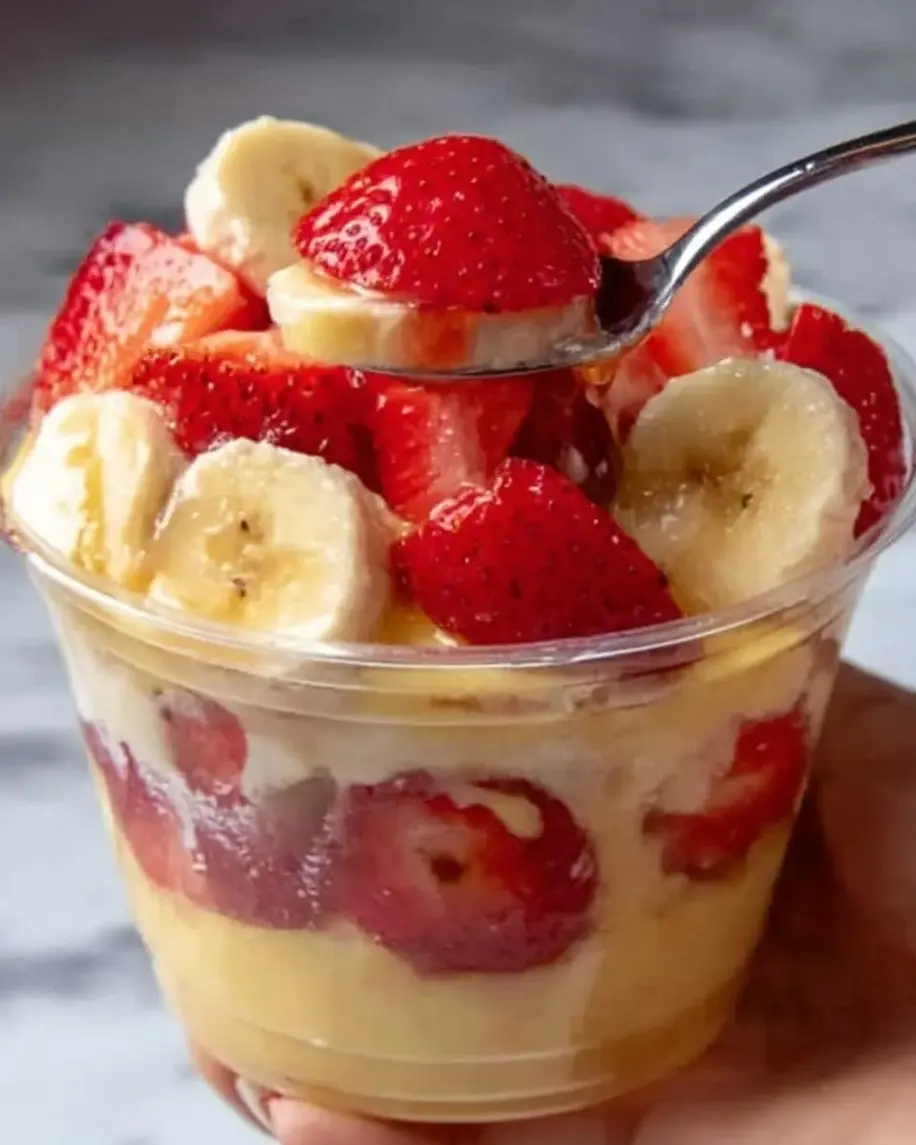
Table of Contents
Strawberry Banana Pudding Recipe
Introduction
Did you know that no-bake desserts see a 47% surge in online searches during the warmer months? This Strawberry Banana Pudding is perfectly positioned to be your go-to treat when the sun is shining and you crave something cool, creamy, and utterly satisfying. A luscious, creamy, no-bake dessert perfect for warm days or any time you want a sweet treat, this recipe transforms simple ingredients into a show-stopping masterpiece. Layers of vanilla wafers, fresh strawberries, and ripe bananas are enveloped in a rich vanilla pudding made from instant pudding mix, sweetened condensed milk, and whipped cream. The magic happens in the fridge, where hours of chilling meld the flavors and soften the wafers into a delightful, cake-like texture. It’s simple to assemble, requires zero oven time, and is guaranteed to delight family and friends at your next gathering.
Ingredients List
Gather these simple ingredients for a dessert that tastes anything but. The beauty lies in the balance of textures and flavors.
- For the Pudding Cream:
- 2 (3.4 oz) boxes instant vanilla pudding mix – The foundation of our creamy layer. It provides that classic, nostalgic pudding flavor and thickens beautifully. Substitution: For a different flavor profile, try cheesecake or white chocolate instant pudding.
- 1 (14 oz) can sweetened condensed milk – This is the secret to the luxurious, rich sweetness and creamy body. It’s thick, sticky, and golden. Substitution: For a less sweet version, use half condensed milk and half whole milk, but note the texture will be slightly thinner.
- 3 cups cold whole milk – The cold temperature is crucial for the instant pudding to set properly. Whole milk yields the creamiest result. Substitution: 2% milk works, but avoid skim milk for best texture.
- 1 (8 oz) container frozen whipped topping, thawed (like Cool Whip) – This lightens the dense pudding into a cloud-like, spreadable cream. Substitution: For a homemade touch, whip 1.5 cups of heavy cream with 2 tablespoons of powdered sugar until stiff peaks form.
- For the Layers:
- 1 (11 oz) box vanilla wafers (like Nilla Wafers) – These crisp, buttery cookies soften into a perfect, tender layer that soaks up the cream and fruit juices. Substitution: Shortbread cookies or ladyfingers are excellent alternatives.
- 4-5 medium ripe bananas – Look for bananas that are yellow with a few brown speckles—sweet, fragrant, and perfectly soft. Slice them just before assembling to prevent browning.
- 1 lb fresh strawberries, hulled and sliced – Choose bright red, fragrant berries for the best flavor and visual pop. Their slight tartness cuts through the sweetness beautifully.
- Optional Garnish: Additional sliced strawberries, whole strawberries, mint leaves, or crushed vanilla wafers.
Timing
20 minutes
0 minutes (No-Bake!)
4 hours (minimum)
4 hours 20 minutes
Compared to many baked desserts that require 30+ minutes of active baking and cooling time, this Strawberry Banana Pudding is a time-saver. The 20-minute active prep time is significantly less than the average cake or pie recipe. The majority of the “work” is passive chilling, allowing you to prepare it in the morning for an evening dessert or even the night before. This makes it an ideal choice for busy hosts and last-minute plans.
A vibrant, creamy Strawberry Banana Pudding in a glass trifle dish, showcasing layers of vanilla wafers, fresh fruit, and luscious cream.
Step-by-Step Instructions
Step 1: Prepare the Pudding Cream
In a large mixing bowl, whisk together the two boxes of instant vanilla pudding mix and the sweetened condensed milk. The mixture will be very thick and paste-like at this stage. Gradually pour in the 3 cups of cold milk while whisking continuously. Whisk vigorously for about 2 minutes until the mixture is very smooth and has begun to thicken noticeably. Let it sit for 5 minutes to allow the pudding to fully set and thicken. Now, gently fold in the thawed whipped topping with a spatula. Use a folding motion (cutting down the middle and turning over) until no white streaks remain. You should have a voluminous, light, and creamy pudding mixture. Set this aside while you prepare the fruit.
Step 2: Prepare the Fruit and Wafers
Wash, hull, and slice your strawberries into uniform slices, about 1/4-inch thick. Peel and slice your bananas into 1/4-inch to 1/2-inch thick rounds. Pro-Tip: To prevent banana browning, you can toss the slices in a teaspoon of lemon or pineapple juice, but it’s not strictly necessary as they will be covered in cream and consumed quickly. Have your box of vanilla wafers ready to go. Choose your serving dish—a large glass trifle bowl (about 4-quart capacity) is ideal for showcasing the beautiful layers, but a 9×13-inch baking dish works perfectly for a more traditional presentation.
Step 3: Assemble the Layers
Now for the fun, creative part! Start by spreading a thin layer of the pudding cream on the very bottom of your dish. This helps anchor the first layer of wafers. Arrange a single layer of vanilla wafers, slightly overlapping, to cover the bottom. You may need to break some to fit into corners. Next, add a layer of banana slices, followed by a layer of strawberry slices. Spoon and spread about one-third of the remaining pudding cream evenly over the fruit, making sure to reach the edges to seal in the fruit. Repeat the layering process two more times: wafers, bananas, strawberries, cream. For the final top layer, use the remaining pudding cream to create a beautiful, swirled surface. You can garnish with additional strawberry slices, whole strawberries, or crushed wafers.
Step 4: Chill and Set
This is the most critical step for perfect texture and flavor. Cover the assembled pudding tightly with plastic wrap, pressing it directly onto the surface of the cream to prevent a skin from forming. Refrigerate for at least 4 hours, but ideally 8 hours or overnight. This extended chilling time is non-negotiable—it allows the wafers to soften completely, absorbing the cream and fruit juices to become tender and cake-like, and lets all the flavors marry into a harmonious, decadent dessert.
Nutritional Information
The following is an approximate nutritional breakdown per serving (assuming 12 generous servings). Values may vary based on specific brands and ingredient substitutions.
~420 kcal
~14g
~8g
~68g
~50g
~6g
~320mg
~2g
Healthier Alternatives
You can easily adapt this classic to be a bit lighter without sacrificing the indulgent feel.
- Pudding & Milk: Use sugar-free instant pudding mix and swap the whole milk for unsweetened almond milk or skim milk. The sweetened condensed milk is the main sugar source, so consider using a “light” version or making a smaller batch with just one box of pudding and adjusting other ingredients proportionally.
- Whipped Topping: Substitute the frozen whipped topping with freshly whipped coconut cream (from a can of full-fat coconut milk) or light whipped cream.
- Wafers: Use whole-grain or gluten-free vanilla wafers if needed. For a lower-carb option, thinly sliced angel food cake or layers of fresh pineapple can be interesting substitutes, though the texture will differ.
- Fruit: The recipe is already fruit-forward! You can increase the ratio of strawberries to bananas for a slightly lower sugar content, as strawberries have less natural sugar than bananas.
Serving Suggestions
- Serve chilled in individual parfait glasses for an elegant presentation at dinner parties.
- Pair with a cup of strong coffee or a glass of dessert wine like Moscato d’Asti to complement the sweetness.
- For a summer BBQ, serve it alongside lighter fare like grilled chicken or fish to balance the meal.
- Top with a drizzle of chocolate sauce, caramel, or a sprinkle of toasted nuts for an extra special touch.
Common Mistakes
- Not Chilling Long Enough: Serving before the 4-hour mark results in crunchy, unintegrated wafers. Patience is key.
- Using Warm Milk: Instant pudding requires cold liquid to activate the thickening agents. Warm milk will lead to a runny, unset cream.
- Over-mixing the Cream: Whisking the pudding is fine, but when folding in the whipped topping, be gentle. Over-mixing deflates the air and makes the cream dense.
- Slicing Bananas Too Early: Preparing bananas hours in advance leads to significant browning. Slice them right before assembly.
- Skimping on Layers: Creating thick, chunky layers instead of multiple thin, even layers makes the dessert harder to serve and less harmonious in each bite.
Storing Tips
- Refrigeration: Keep covered tightly with plastic wrap or in an airtight container in the refrigerator. It is best consumed within 3-4 days. After this, the bananas will continue to soften and may become mushy, and the wafers can become overly soft.
- Freezing: Freezing is not recommended. The dairy and whipped components will separate and become watery upon thawing, and the fruit texture will be ruined.
- Make-Ahead: This is an excellent make-ahead dessert. Assemble it fully the night before you plan to serve it for the best possible flavor and texture.
Conclusion
This Strawberry Banana Pudding is more than just a dessert; it’s a guaranteed crowd-pleaser that combines simplicity with spectacular results. With its no-bake convenience, beautiful layers, and perfect balance of creamy, fruity, and soft textures, it’s a recipe you’ll return to for potlucks, family dinners, and warm-weather celebrations. The magic truly happens in the fridge, transforming basic ingredients