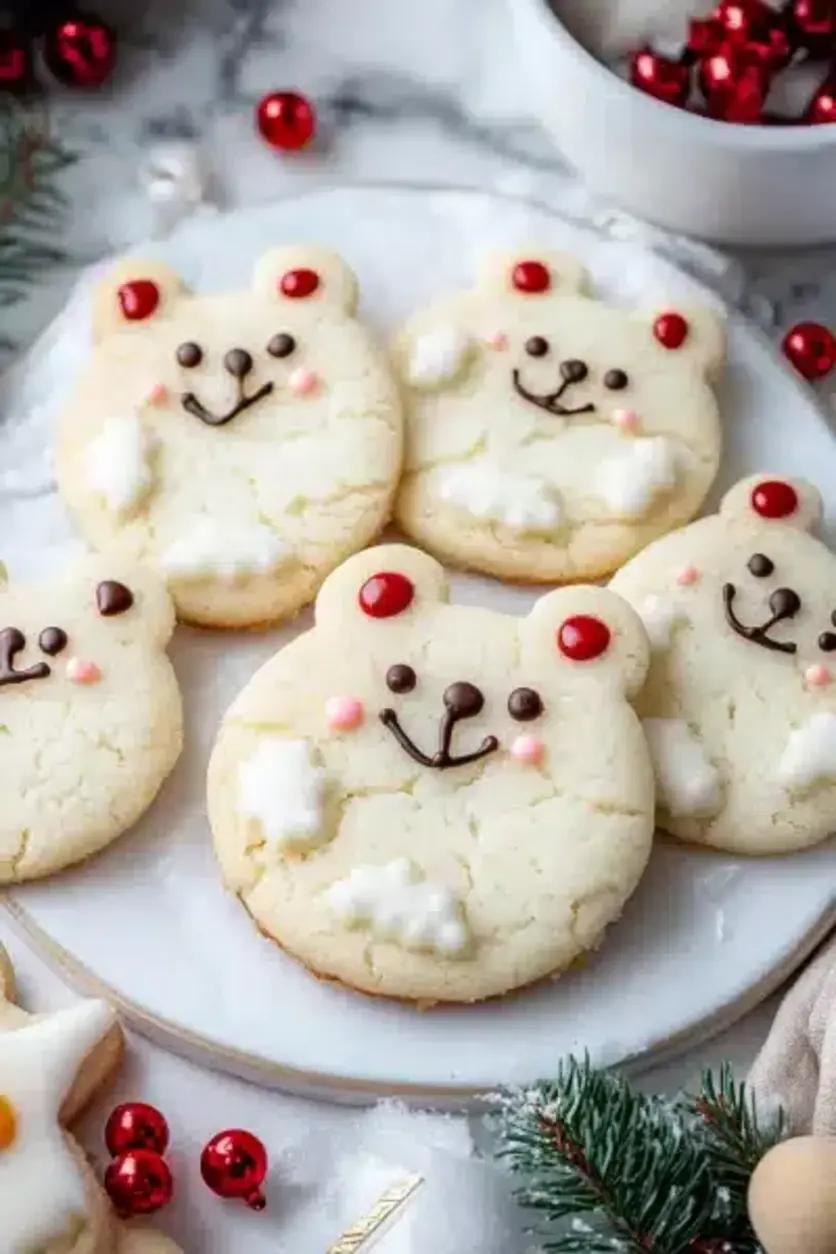
🐻 Whimsical Polar Bear Cookies: A Holiday Delight 🎄
“`html
Table of Contents
🐻 Whimsical Polar Bear Cookies: A Holiday Delight 🎄
Polar Bear Cookies: Your New Favorite Holiday Treat?
Are you searching for a baking project that brings enchantment and deliciousness to your holiday season? With Christmas just around the corner, the allure of festive treats is undeniable. Many home bakers are on the hunt for recipes that are not only visually appealing but also a joy to create and share. If you’re among the millions looking to add a touch of whimsical charm to your dessert table this year, you’re in for a treat! These Polar Bear Cookies are incredibly easy to make, spectacularly delightful, and destined to become a cherished part of your Christmas baking traditions. Get ready to spread joy to your family and friends with this fun and festive recipe!
Whimsical Polar Bear Cookies Ingredients
To bring these adorable polar bears to life, you’ll need a few pantry staples and some simple decorative elements. The beauty of this recipe lies in its straightforward approach, ensuring success even for novice bakers.
For the Cookie Dough:
- 2 ¼ cups (281g) All-Purpose Flour: The sturdy foundation for our cookies. You can substitute 1:1 with a gluten-free all-purpose blend if needed.
- 1 teaspoon Baking Soda: Essential for a gentle lift and tender crumb.
- ½ teaspoon Salt: Balances the sweetness and enhances all flavors.
- 1 cup (226g) Unsalted Butter, softened: Crucial for a rich, buttery flavor and tender texture. Ensure it’s truly softened, not melted.
- ¾ cup (150g) Granulated Sugar: Provides sweetness and helps with browning.
- 1 large Egg: Binds the ingredients and adds richness.
- 1 teaspoon Vanilla Extract: For that warm, comforting aroma and classic cookie taste.
For Decoration:
- White Royal Icing or Melted White Chocolate: For the bear’s “fur” and face.
- Black Food Coloring: To draw the eyes and nose. Gel food coloring is best for concentration.
- Small Orange Candy or Icing: For the nose (optional).
Whimsical Polar Bear Cookies Timing
Timing is key for perfect cookies, especially when shaping is involved. These polar bear cookies require some chilling time to ensure they hold their shape beautifully during baking. The prep and active baking times are quite short, making them an ideal festive activity.
- Prep Time: Approximately 30 minutes (mixing and initial shaping).
- Chill Time: Minimum of 1 hour (for the dough to firm up). This can be done in stages.
- Bake Time: 10-12 minutes per batch.
- Total Time: Around 40 minutes of active time, plus at least 2-3 hours for chilling and decorating.
Compare this to average decorated sugar cookies, which often involve more intricate dough preparation or longer baking and cooling periods. This recipe is designed for efficiency without sacrificing cuteness!
Step-by-Step Instructions
Let’s get baking and create these adorable polar bears!
Step 1: Prepare Your Workspace and Dough
First things first, let’s start with the cookie dough. In a medium bowl, whisk together the flour, baking soda, and salt. Set this aside. In a large bowl, cream together the softened butter and granulated sugar until light and fluffy. This step is crucial for texture; imagine beating warm sunshine into fluffy clouds! Next, beat in the egg and vanilla extract until well combined. The aroma of vanilla is like a hug for your kitchen!
Step 2: Chill the Dough
Gradually add the dry ingredients to the wet ingredients, mixing on low speed or by hand until just combined. Be careful not to overmix, as this can lead to tough cookies. The dough will be soft. Divide the dough in half, flatten each half into a disk, wrap tightly in plastic wrap, and refrigerate for at least 30 minutes. This chilling process makes the dough firmer and easier to work with, preventing excessive spreading during baking.
Step 3: Shape the Polar Bears
Now for the fun part! Roll out one disk of chilled dough on a lightly floured surface to about ¼ inch thickness. Using a round cookie cutter (about 2-3 inches in diameter), cut out circles. For the heads, take a smaller round cutter or the rim of a small glass and cut out a smaller circle from the top half of each large circle. For the ears, take small pieces of dough and shape them into tiny flattened ovals, then stick them onto the top of the bear’s head. You can also use a little bit of water as “glue” if needed. For the nose, you can either use a tiny piece of dough, a small pink or orange candy, or plan to pipe it later. Gently press a small ball of dough (or the candy) onto the snout area.
Step 4: Chill Again (Crucial!)
Place the shaped polar bear cookies on parchment-lined baking sheets, leaving about an inch between them. It’s important to chill these shaped cookies again for at least 30 minutes (or up to a few hours) in the refrigerator. This second chill solidifies the shapes and ensures they maintain their adorable polar bear form when they hit the heat of the oven. Don’t skip this step – it’s a common mistake that leads to sad, spread-out bears!
Step 5: Bake to Golden Perfection
Preheat your oven to 350°F (175°C). Bake the chilled cookies for 10-12 minutes, or until the edges are lightly golden. The centers should still look soft. Overbaking will result in crispier, darker cookies, which isn’t the look we want for our fluffy polar bears. Keep a close eye on them, as oven temperatures can vary.
Step 6: Cool and Decorate
Let the cookies cool on the baking sheets for 5 minutes before transferring them to a wire rack to cool completely. Once completely cool, it’s time to bring our polar bears to life! Prepare your white royal icing or melt your white chocolate. Dip the top half of each cookie into the icing to create a fluffy “fur” effect, or spread it on. For the face, use a toothpick dipped in black food coloring to draw two small eyes and a nose. If you didn’t use a candy nose, you can pipe a small dot of black icing for the nose. Let the decorations set completely before stacking or serving.
Nutritional Information
While exact nutritional values can vary based on ingredient brands and precise measurements, here’s an approximate breakdown per cookie:
- Calories: ~150-200 kcal
- Carbohydrates: ~20-25g
- Fat: ~8-12g
- Protein: ~2-3g
Please note this is an estimate. The addition of icing or chocolate can increase calorie and sugar content.
Healthier Alternatives
Looking to make these polar pals a bit kinder to your waistline?
- Flour: Swap half of the all-purpose flour for whole wheat flour for added fiber.
- Sweetener: Consider reducing the granulated sugar slightly, or using a natural sweetener like maple syrup (though this may affect dough consistency).
- Butter: Use a plant-based butter substitute or reduce the butter slightly and add unsweetened applesauce to maintain moisture.
- Decorations: Use a minimal amount of icing and opt for natural food colorings. You could also use edible markers for eyes and noses.
Serving Suggestions
These polar bear cookies are perfect on their own, but here are a few ideas to elevate your holiday spread:
- Arrange them on a festive platter alongside other holiday cookies.
- Serve with a glass of cold milk or warm hot chocolate for a classic pairing.
- Use them as edible decorations on a gingerbread house or a holiday cake.
- Package them in clear cellophane bags tied with a festive ribbon for delightful homemade gifts.
Common Mistakes to Avoid
To ensure your polar bears turn out perfectly fluffy and adorable, steer clear of these common pitfalls:
- Not chilling the dough enough: This is the #1 reason for spread. Proper chilling is essential for shape retention.
- Overmixing the dough: Overmixing develops gluten, resulting in tough cookies. Mix until just combined.
- Using melted butter: Softened butter is crucial for creaming and texture.
- Baking at the wrong temperature: Ensure your oven is accurately preheated.
- Decorating before cookies are fully cool: Icing will melt and slide off warm cookies.
Storing Your Polar Bear Cookies
Store your beautifully decorated Polar Bear Cookies in an airtight container at room temperature. They should stay fresh and delicious for up to a week. If you’ve used Royal Icing, they can actually last even longer and the icing hardens beautifully.
Frequently Asked Questions
1. Can I make these cookies ahead of time?
Yes! The dough can be made up to 2-3 days in advance and kept chilled. You can also freeze the shaped, unbaked cookies. Bake them directly from frozen, adding a few extra minutes to the baking time.
2. My cookies spread a lot. What went wrong?
The most common cause is insufficient chilling of the dough. It’s essential to chill the dough before rolling and cutting, and then chill the shaped cookies again before baking. Also, ensure your butter is properly softened and not melted.
3. What kind of icing is best for decorating?
Royal icing is ideal for decorating as it dries hard and smooth, making it perfect for drawing details. Melted white chocolate is a simpler option that also sets well.
4. Can I use different cutters for variations?
Absolutely! Get creative with different sized cutters to make variations in your polar bears, or even use them as a base for other animal shapes!
5. How long will the decorated cookies last?
Decorated cookies stored in an airtight container at room temperature will typically last for about a week to 10 days, especially if using royal icing.
Have you tried making these delightful Polar Bear Cookies? Share your creations and experiences in the comments below! We’d love to see your festive bakes!
Conclusion
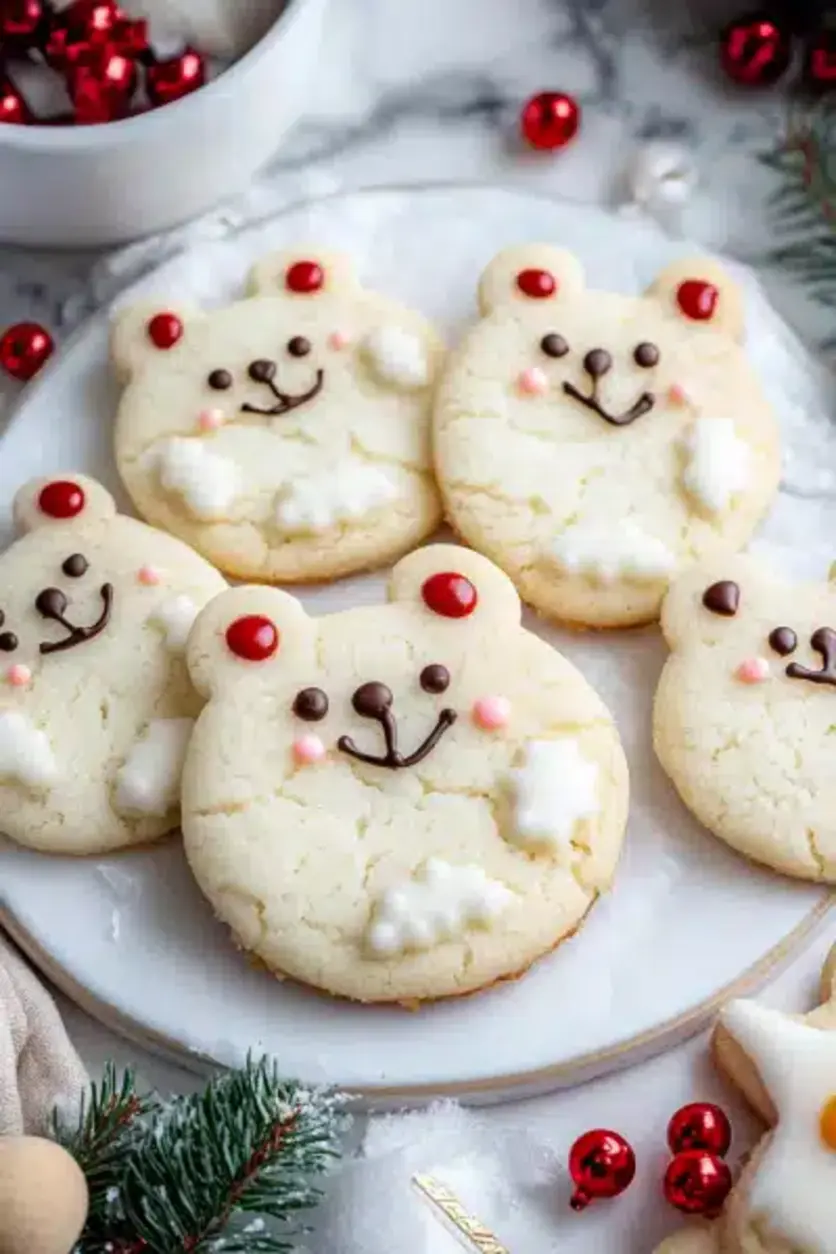
These Whimsical Polar Bear Cookies are more than just a dessert; they’re a bundle of holiday cheer waiting to be baked. Their simple elegance and adorable design make them a hit with kids and adults alike. The process is enjoyable, forgiving, and results in a truly festive treat. Gather your ingredients, get your loved ones involved, and create some sweet memories this holiday season. Happy Baking!
PrintPolar Bear Cookies Recipe: Adorable, Soft, and Delicious!
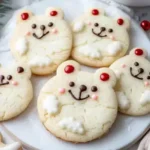
These adorable Polar Bear Cookies are made with a soft cream cheese cookie base, topped with creamy buttercream frosting, and decorated to resemble playful polar bears. Perfect for holiday parties, baking with kids, or adding a sweet, festive touch to your dessert table!
Ingredients
- 3/4 cupunsalted butter, room temperature (170g)
- 1/2 cupfull-fat cream cheese, room temperature (113g)
- 1 1/2 cupsgranulated sugar (300g)
- 1large egg, room temperature (56g)
- 2 tspvanilla extract (8g)
- 3 cupsall-purpose flour (375g)
- 1 Tbspcornstarch (8g)
- 1/2 tspbaking powder (2g)
- 1/2 tspfine salt (3g)
- 1 cupunsalted butter, room temperature (226g)
- 1 Tbspvanilla extract (12g)
- 1/2 tspfine salt (3g)
- 3 1/2 cupspowdered sugar (454gor 1 lb. box)
- 1/4 cupheavy cream (60g)
- 1 cupwhite sanding sugar
- 30large chocolate chips
- Round black sprinkles (for eyes)
- Round red or pink sprinkles (for cheeks)
Instructions
- In a large bowl, beat butter and cream cheese until smooth. Add sugar and cream until light and fluffy. Mix in egg and vanilla.
- In a separate bowl,whisktogether flour, cornstarch, baking powder, and salt. Gradually add dry ingredients to the wet mixture.
- Divide dough into two portions, wrap in plastic, and chill for at least 2 hours.
- Roll dough to 1/3-inch thickness and cut out 2 1/2-inch circles for faces and 3/4-inch circles for ears. Assemble polar bears by attaching ears to faces. Chill for 15 minutes.
- Bake cookies at 350°F (175°C) for 12–14 minutes or until edges are set. Cool completely.
- Beat butter until creamy for frosting. Add vanilla and salt, then mix in powdered sugar and cream until smooth. Pipe frosting onto cookies and dip in sanding sugar.
- Add a frosted oval for the muzzle, chocolate chips for noses, and sprinkles for eyes and cheeks. Enjoy your creations!
Notes
Chilling the dough is essential for preventing spread.
Store frosted cookies in an airtight container at room temperature for 2 days, in the fridge for up to 5 days, or freeze for up to 1 month.
For best results, don’t overbake the cookies.
Nutrition
- Calories: 205
- Sugar: 21g
- Fat: 10g
- Carbohydrates: 28g
- Protein: 2g
“`